


How to Create a Folder on Squarespace
If you’ve been trying to create a folder in Squarespace and can’t find the option anywhere, you’re not alone. Many users search for “folders” only to discover that Squarespace now refers to them as drop-downs in the Pages menu.
In this quick guide, you’ll learn exactly how to create a folder (drop-down navigation) in Squarespace, organize your pages, and keep your website dashboard clean and easy to manage.
What Is a Drop-Down in Squarespace?
A drop-down in Squarespace is essentially a folder that groups multiple pages together under one navigation item.
This is especially useful if you:
Have lots of pages on your website
Want cleaner navigation menus
Need to organize SEO landing pages
Manage location or industry-specific pages
Want a tidier Squarespace backend
For example, instead of showing 20 individual pages in your navigation, you can place them all inside one organized drop-down menu.

Want a framework for designing the perfect homepage?

Need an expert to build your Squarespace website?
Book a free kick-off call with our team to discuss your project requirements in detail.
How to Add a Folder in Squarespace
Follow these simple steps to create a drop-down folder in Squarespace.
Step 1: Open Your Squarespace Pages Menu
From your Squarespace dashboard:
Log in to your website
Click Pages in the left-hand menu
This is where all your site pages and navigation settings live.
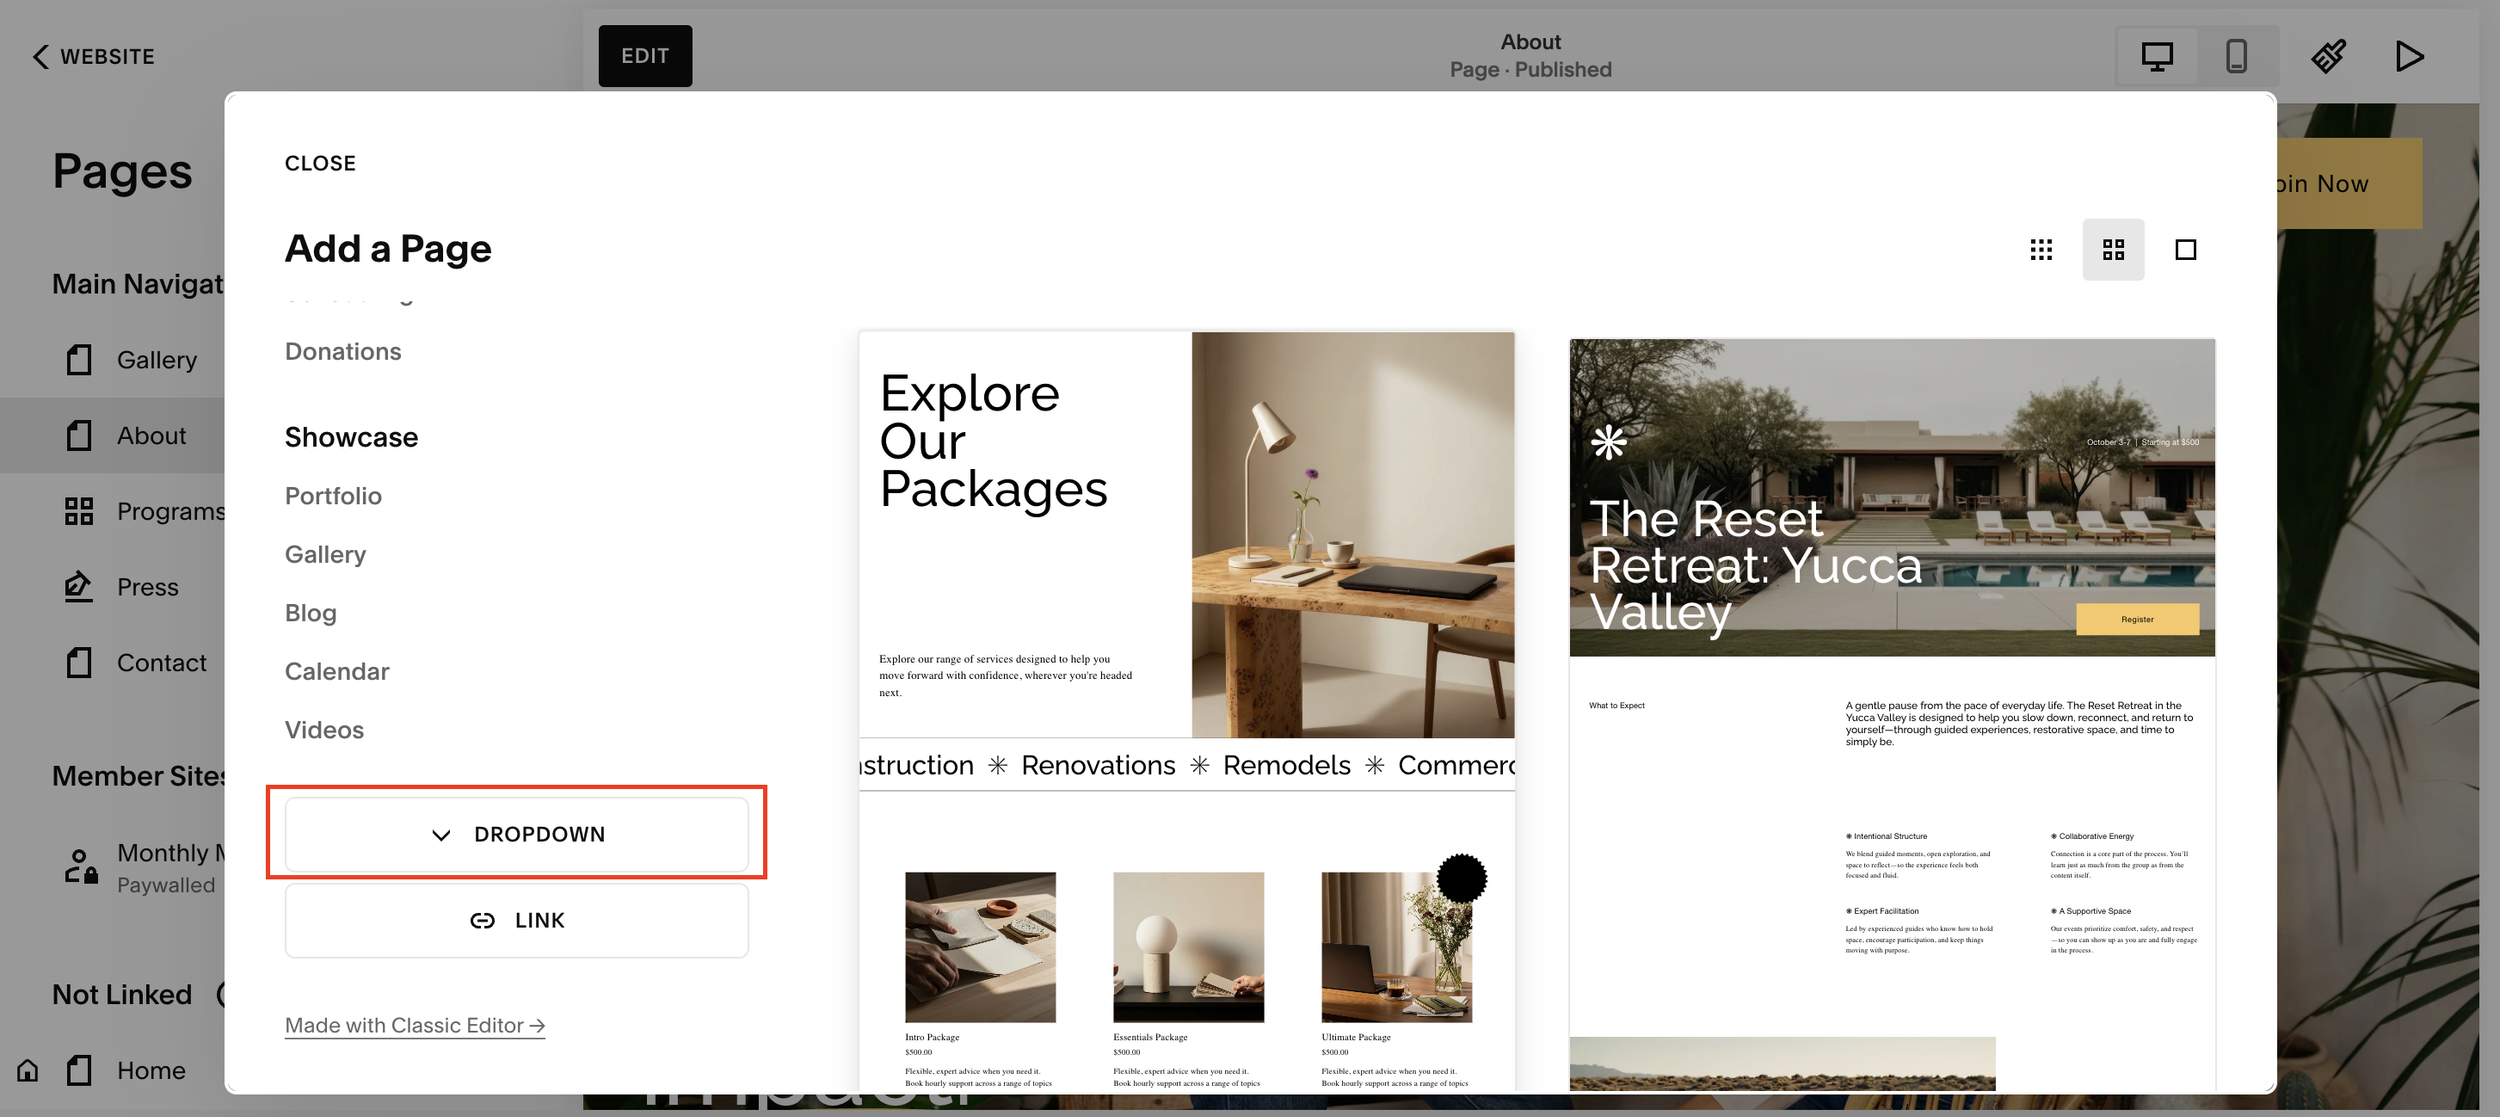
Step 2: Click the “+” Button
Inside the Pages section:
Click the plus (+) icon
Look through the available options
You might expect to see something called “Folder,” but in Squarespace, the option is labeled Drop-Down.
Step 3: Select “Drop-Down”
Click Drop-Down to create your new folder.
Once created, you can:
Rename it anything you want
Use it to organize related pages
Move it anywhere in your site navigation
For example, you could call it:
Services
SEO Locations
Resources
Group of Pages
Blog Categories
Step 4: Drag and Drop Pages Into the Folder
Squarespace makes organizing pages incredibly simple.
To add pages into your drop-down folder:
Click and hold the page you want to move
Drag it into the drop-down menu
Release it inside the folder
You’ll immediately see the pages nested underneath the drop-down.
This creates a clean, organized structure both in your website navigation and inside the Squarespace backend.
Why Use Drop-Down Folders in Squarespace?
Using drop-down folders is a great way to manage larger websites.
Benefits Include:
Cleaner navigation menus
Better organization of pages
Easier management of large websites
Improved workflow for SEO projects
Reduced clutter in the Squarespace dashboard
For example, if your site has 100+ SEO landing pages, grouping them into location or industry folders makes the backend far easier to navigate.
You can also collapse the folders to keep everything neat and manageable.
Can You Move the Drop-Down Folder?
Yes, you can reposition the drop-down folder anywhere in your navigation.
Simply:
Click and hold the folder
Drag it to a new position
Drop it where you want it to appear
Squarespace’s drag-and-drop interface makes restructuring your site navigation very easy.
Final Thoughts
Although many users still think of them as “folders,” Squarespace now labels them as drop-downs in the Pages menu.
Once you know where to look, creating and organizing page groups is incredibly straightforward.
If you manage a growing website, using drop-down folders can help keep your navigation clean, improve usability, and simplify your site management workflow.
If you found this guide helpful, consider checking out more Squarespace tutorials to improve your website organization and SEO structure.