


How to Add an E-commerce Store in Squarespace (Step-by-Step Guide)
Adding an online store to your Squarespace website is a great way to start selling products, services, or digital content. While the process used to be slightly different, recent updates to the Squarespace menu system have changed how you set up a store.
In this guide, you’ll learn exactly how to create a store in Squarespace, add products or services, and organize everything in one place.
Why Use Squarespace for E-commerce?
Squarespace offers a built-in e-commerce system that allows you to sell a variety of items without installing additional plugins.
With Squarespace you can sell:
Physical products
Digital products
Services
Group events
Content memberships
Appointments and scheduling
Donations
Everything is integrated directly into the Squarespace platform, making it simple to manage your store alongside your website.

Want a framework for designing the perfect homepage?

Need an expert to build your Squarespace website?
Book a free kick-off call with our team to discuss your project requirements in detail.
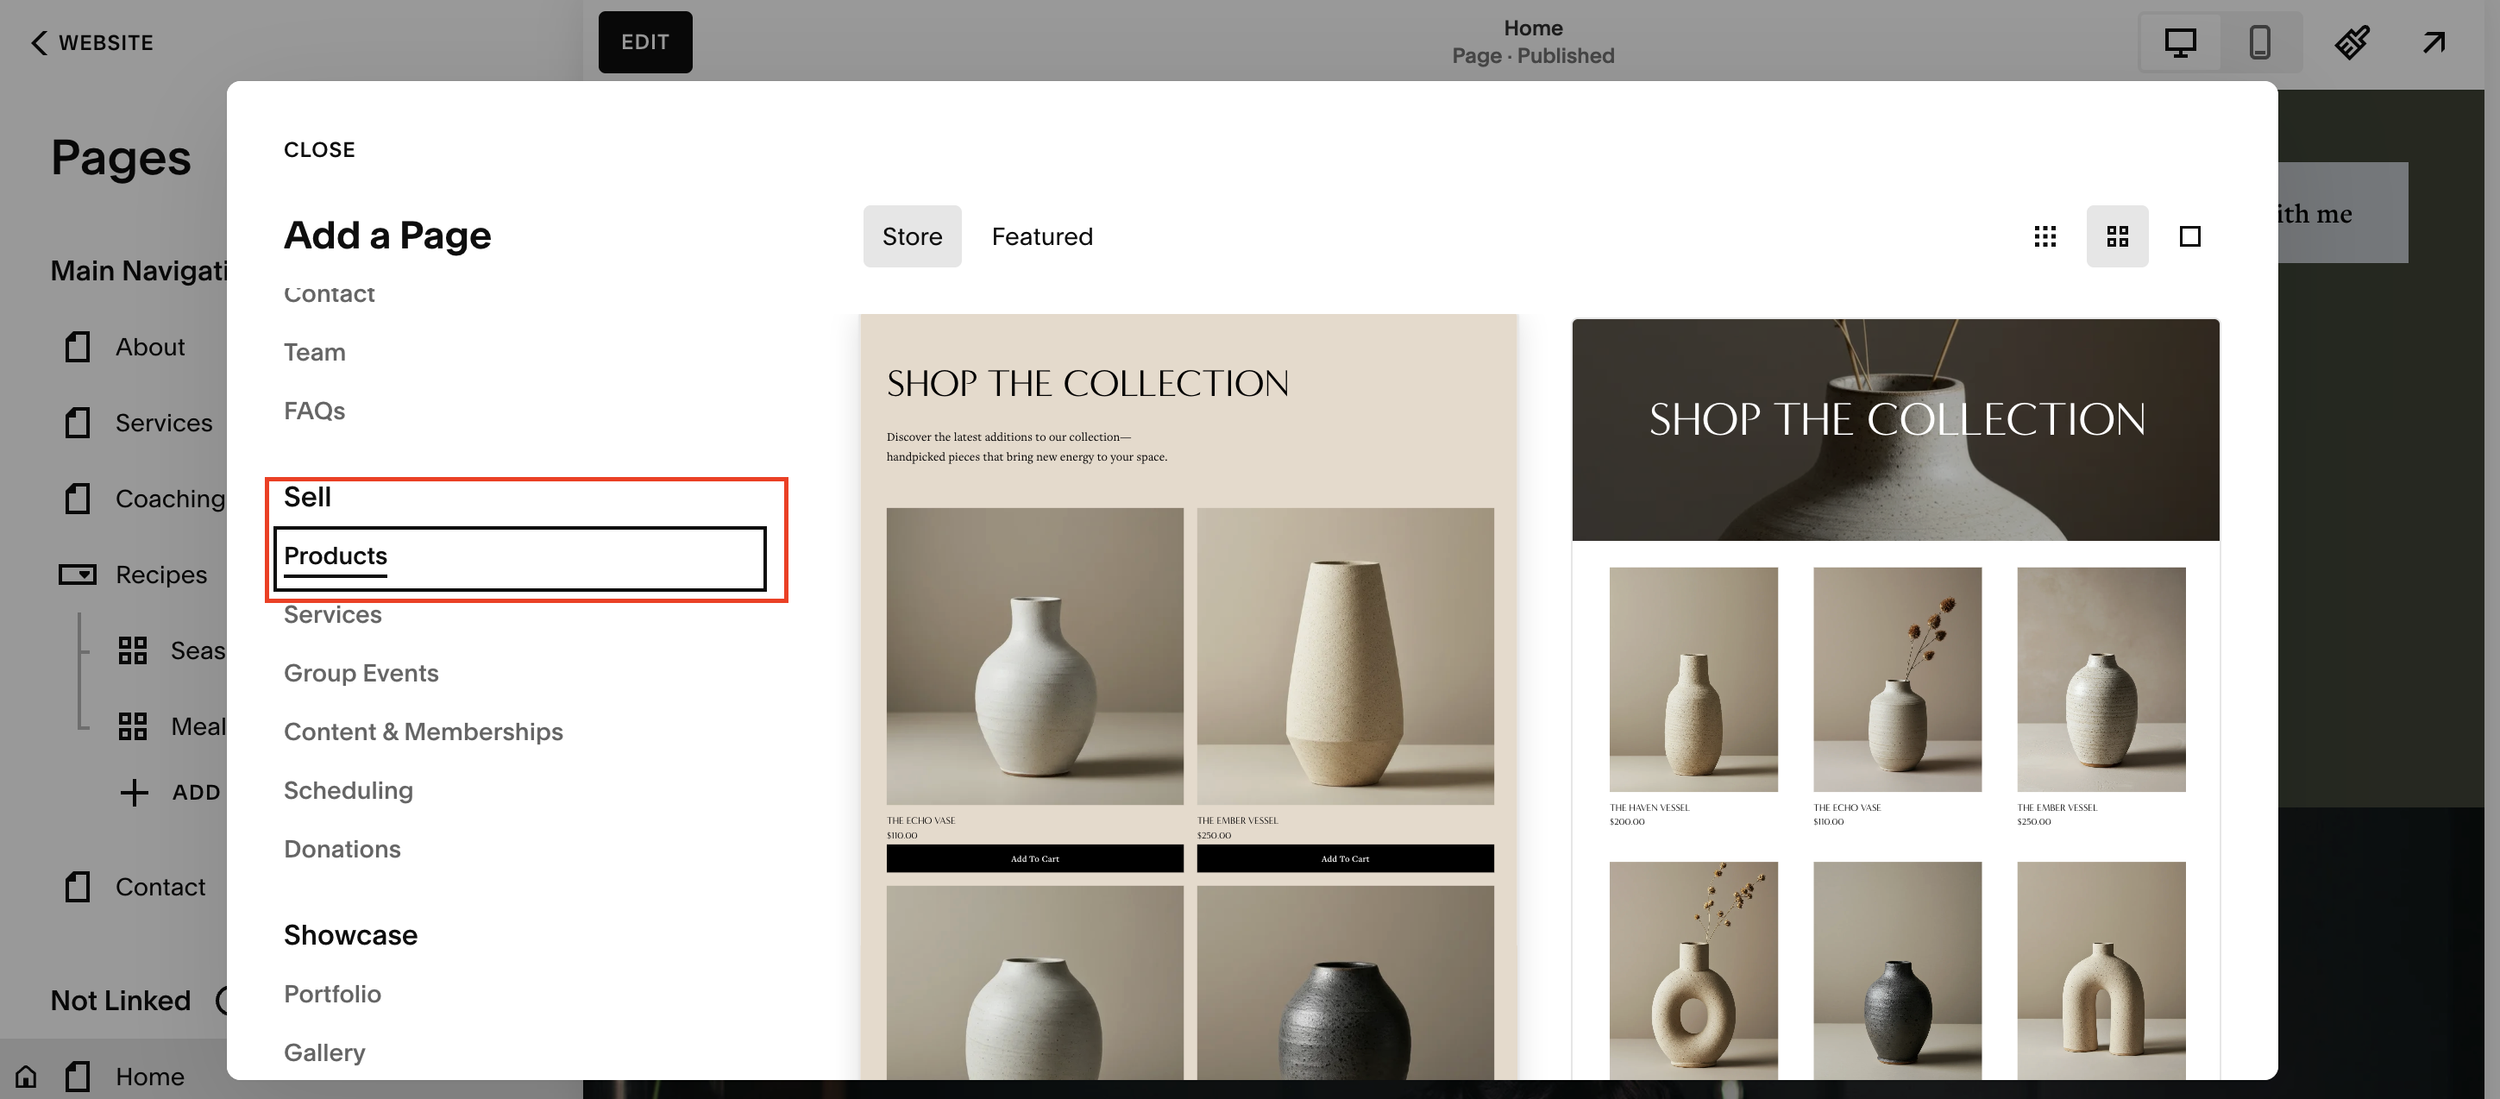
Step 1: Open the Pages Menu
To start setting up your store:
Log into your Squarespace dashboard
Click Pages
Select the + (Add Page) button
You’ll notice that Squarespace has updated the page creation menu. Instead of “Collections,” you now see new categories.
These categories include:
Showcase
Sell
Introduce
For creating an online store, you’ll want to focus on Sell.
Step 2: Choose a Selling Option
Inside the Sell section, Squarespace provides several options depending on what you want to offer.
These include:
Products
Services
Group events
Content memberships
Scheduling
Donations
Some options connect to other Squarespace tools. For example:
Scheduling integrates with Acuity Scheduling
Donations use the Squarespace donation block
If you're building a standard online shop, the easiest option to start with is Products.
Step 3: Create Your Store Page
Once you click Products, Squarespace will show you several store layout templates.
To continue:
Choose a layout
Click Create
Squarespace will automatically generate a store page where your products will live.
Inside this store page you’ll see:
Your product listings
Store settings
Product management tools
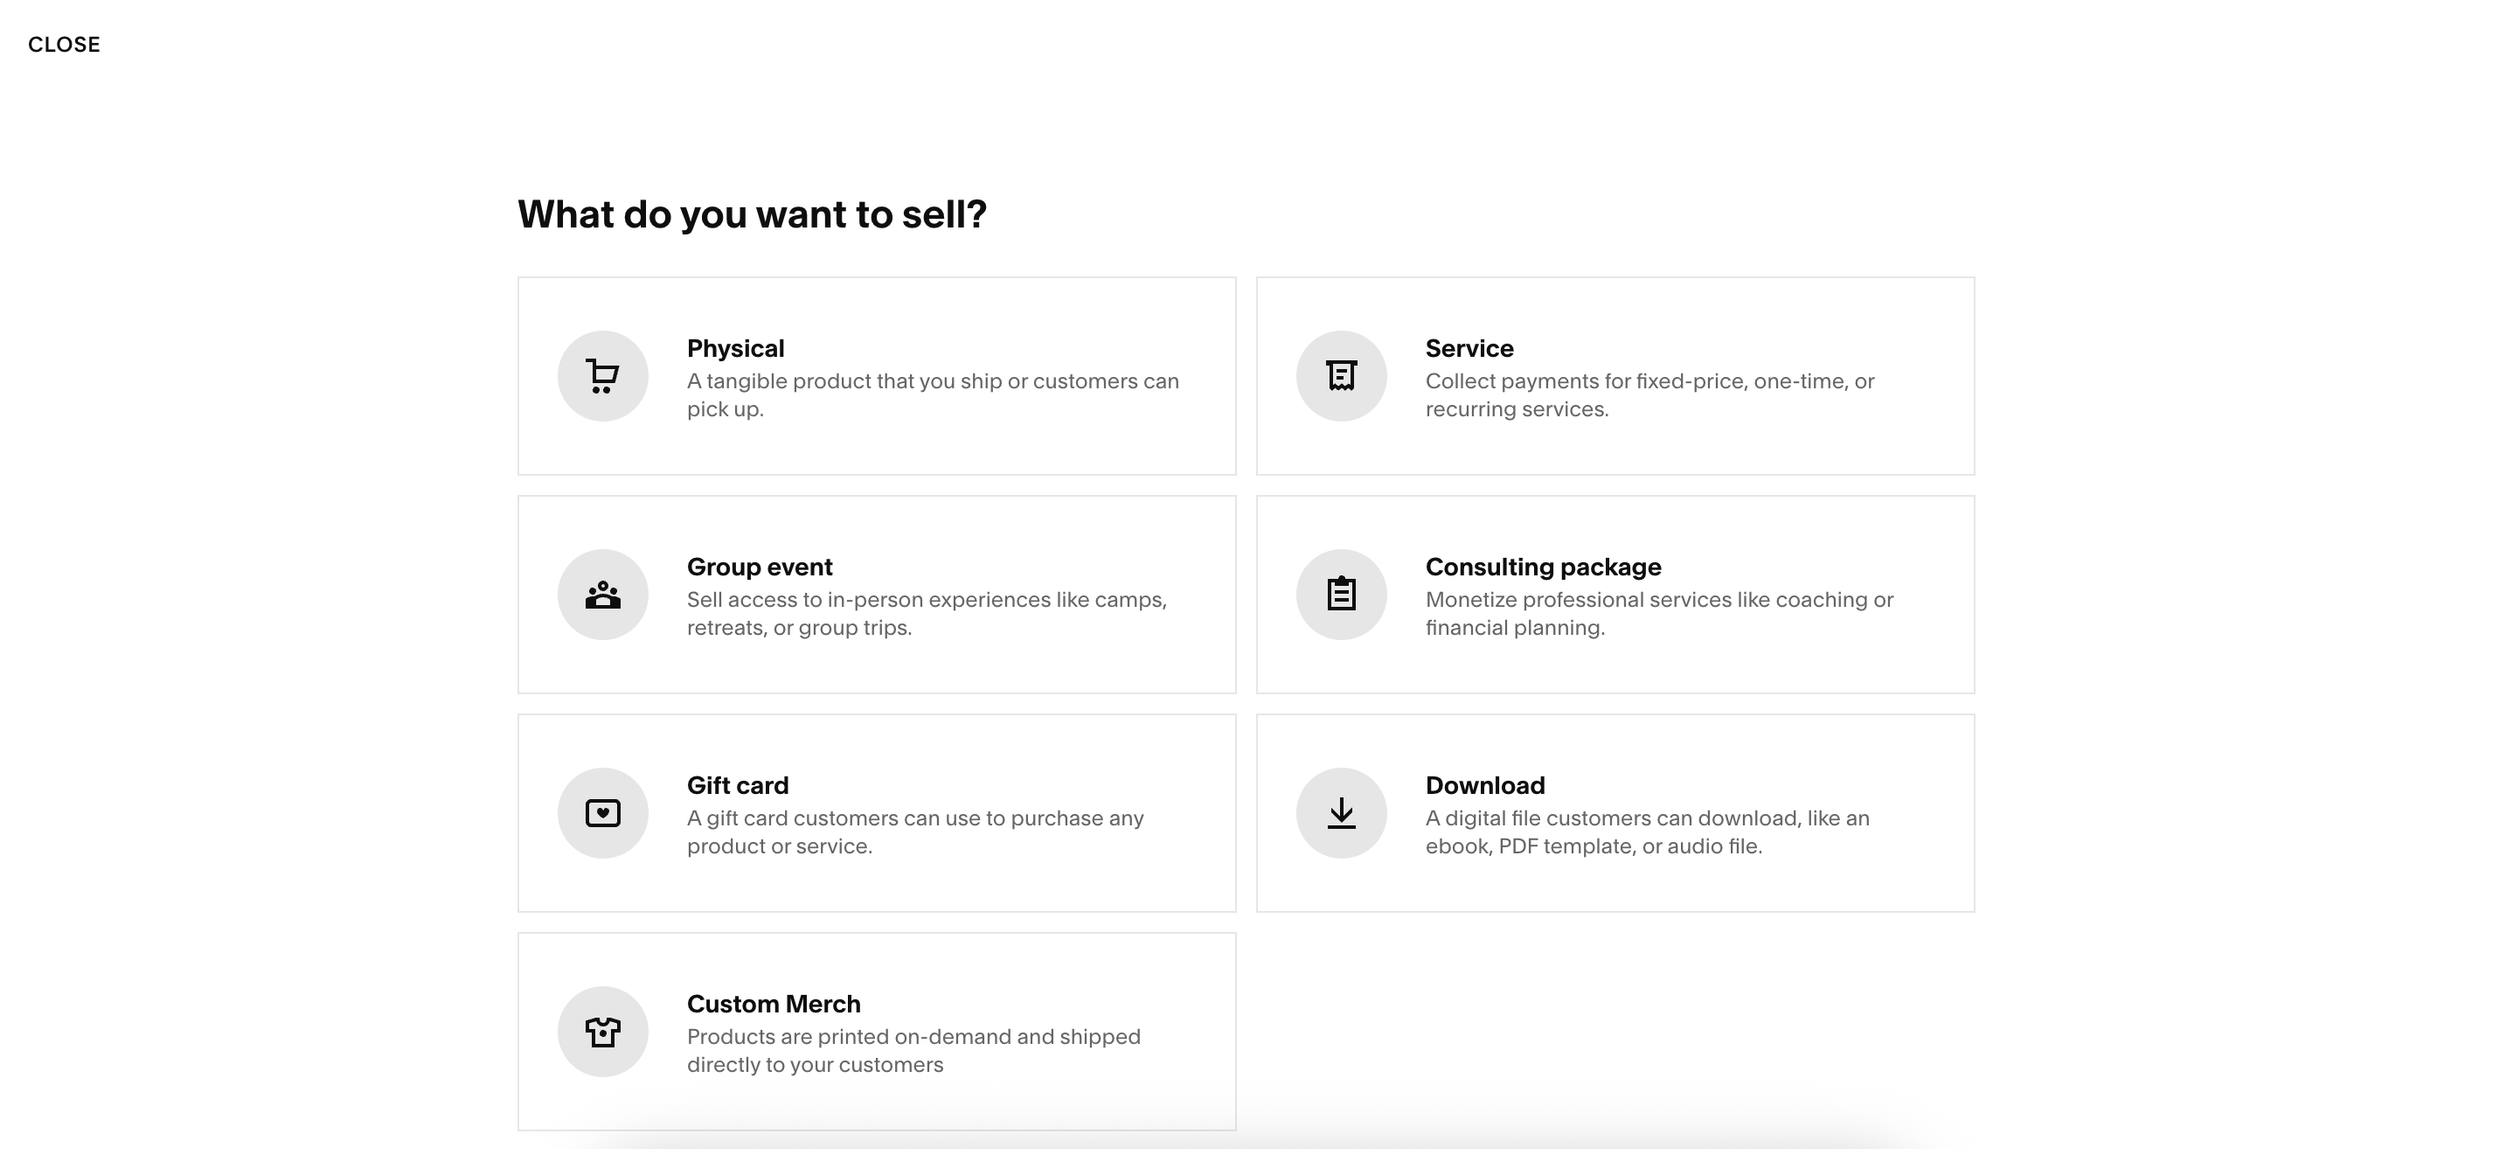
Step 4: Add Products to Your Store
To add a new item:
Click the + (Add Product) button
Choose the type of product you want to sell
Squarespace allows several product types, including:
Physical products
Digital downloads
Services
Gift cards
After selecting a product type, you can add:
Product name
Description
Images
Price
Variants (size, color, etc.)
Once saved, the product will automatically appear in your store.
Step 5: Add Services to Your Store
Many website owners think they must create separate stores for services and products, but that’s not necessary.
You can add services by:
Clicking + Add Page
Going to Sell
Selecting Services
Squarespace may create another store page for those services.
But don’t worry, this can easily be reorganized.
Step 6: Combine Multiple Stores into One
If Squarespace creates separate store sections (for example one for products and one for services), you can merge them.
Here’s how:
Select the items in one store
Click Move
Move them into your main store
Once everything is inside a single store, you can delete the extra store page.
This allows you to run one store containing both products and services, which makes navigation easier for customers.
Tips for Organizing Your Squarespace Store
To make your store easier for customers to browse:
Use categories - Group similar items together
Add clear product images - High-quality photos improve conversions
Write detailed descriptions - Help customers understand what they’re buying
Offer multiple product types - You can sell services and products together
Final Thoughts
Setting up an online store in Squarespace is still a quick and beginner-friendly process, even with the updated menu structure.
By using the Sell section, you can easily create a store, add products or services, and organize everything into a single storefront.
Once your store is live, you’ll be able to manage orders, update products, and grow your online business directly from your Squarespace dashboard.