


How to Pin a Block on Squarespace [Full Guide]
Squarespace has been steadily rolling out more pro-level design tools, and one feature that continues to stand out is the ability to pin blocks.
While it’s not the newest feature, it’s incredibly powerful for creating modern, dynamic layouts, especially if you want elements to stay fixed while the rest of your content scrolls.
In this guide, you’ll learn exactly how to pin blocks in Squarespace, customize their position, and use them to create more engaging website designs.
What Does “Pinning a Block” Mean in Squarespace?
Pinning a block allows you to fix an element (like an image or text) in place while other content scrolls around it.
This is perfect for:
Keeping images visible while text scrolls
Creating split-screen layouts
Adding a more interactive, professional feel to your site
Example Use Case
Imagine you have:
An image on the left
Text and a button on the right
Without pinning, everything scrolls normally, often leaving awkward empty space.
With pinning, you can:
Keep the image fixed
Let the text scroll alongside it
This creates a much smoother and more visually appealing experience.

Want a framework for designing the perfect homepage?

Need an expert to build your Squarespace website?
Book a free kick-off call with our team to discuss your project requirements in detail.
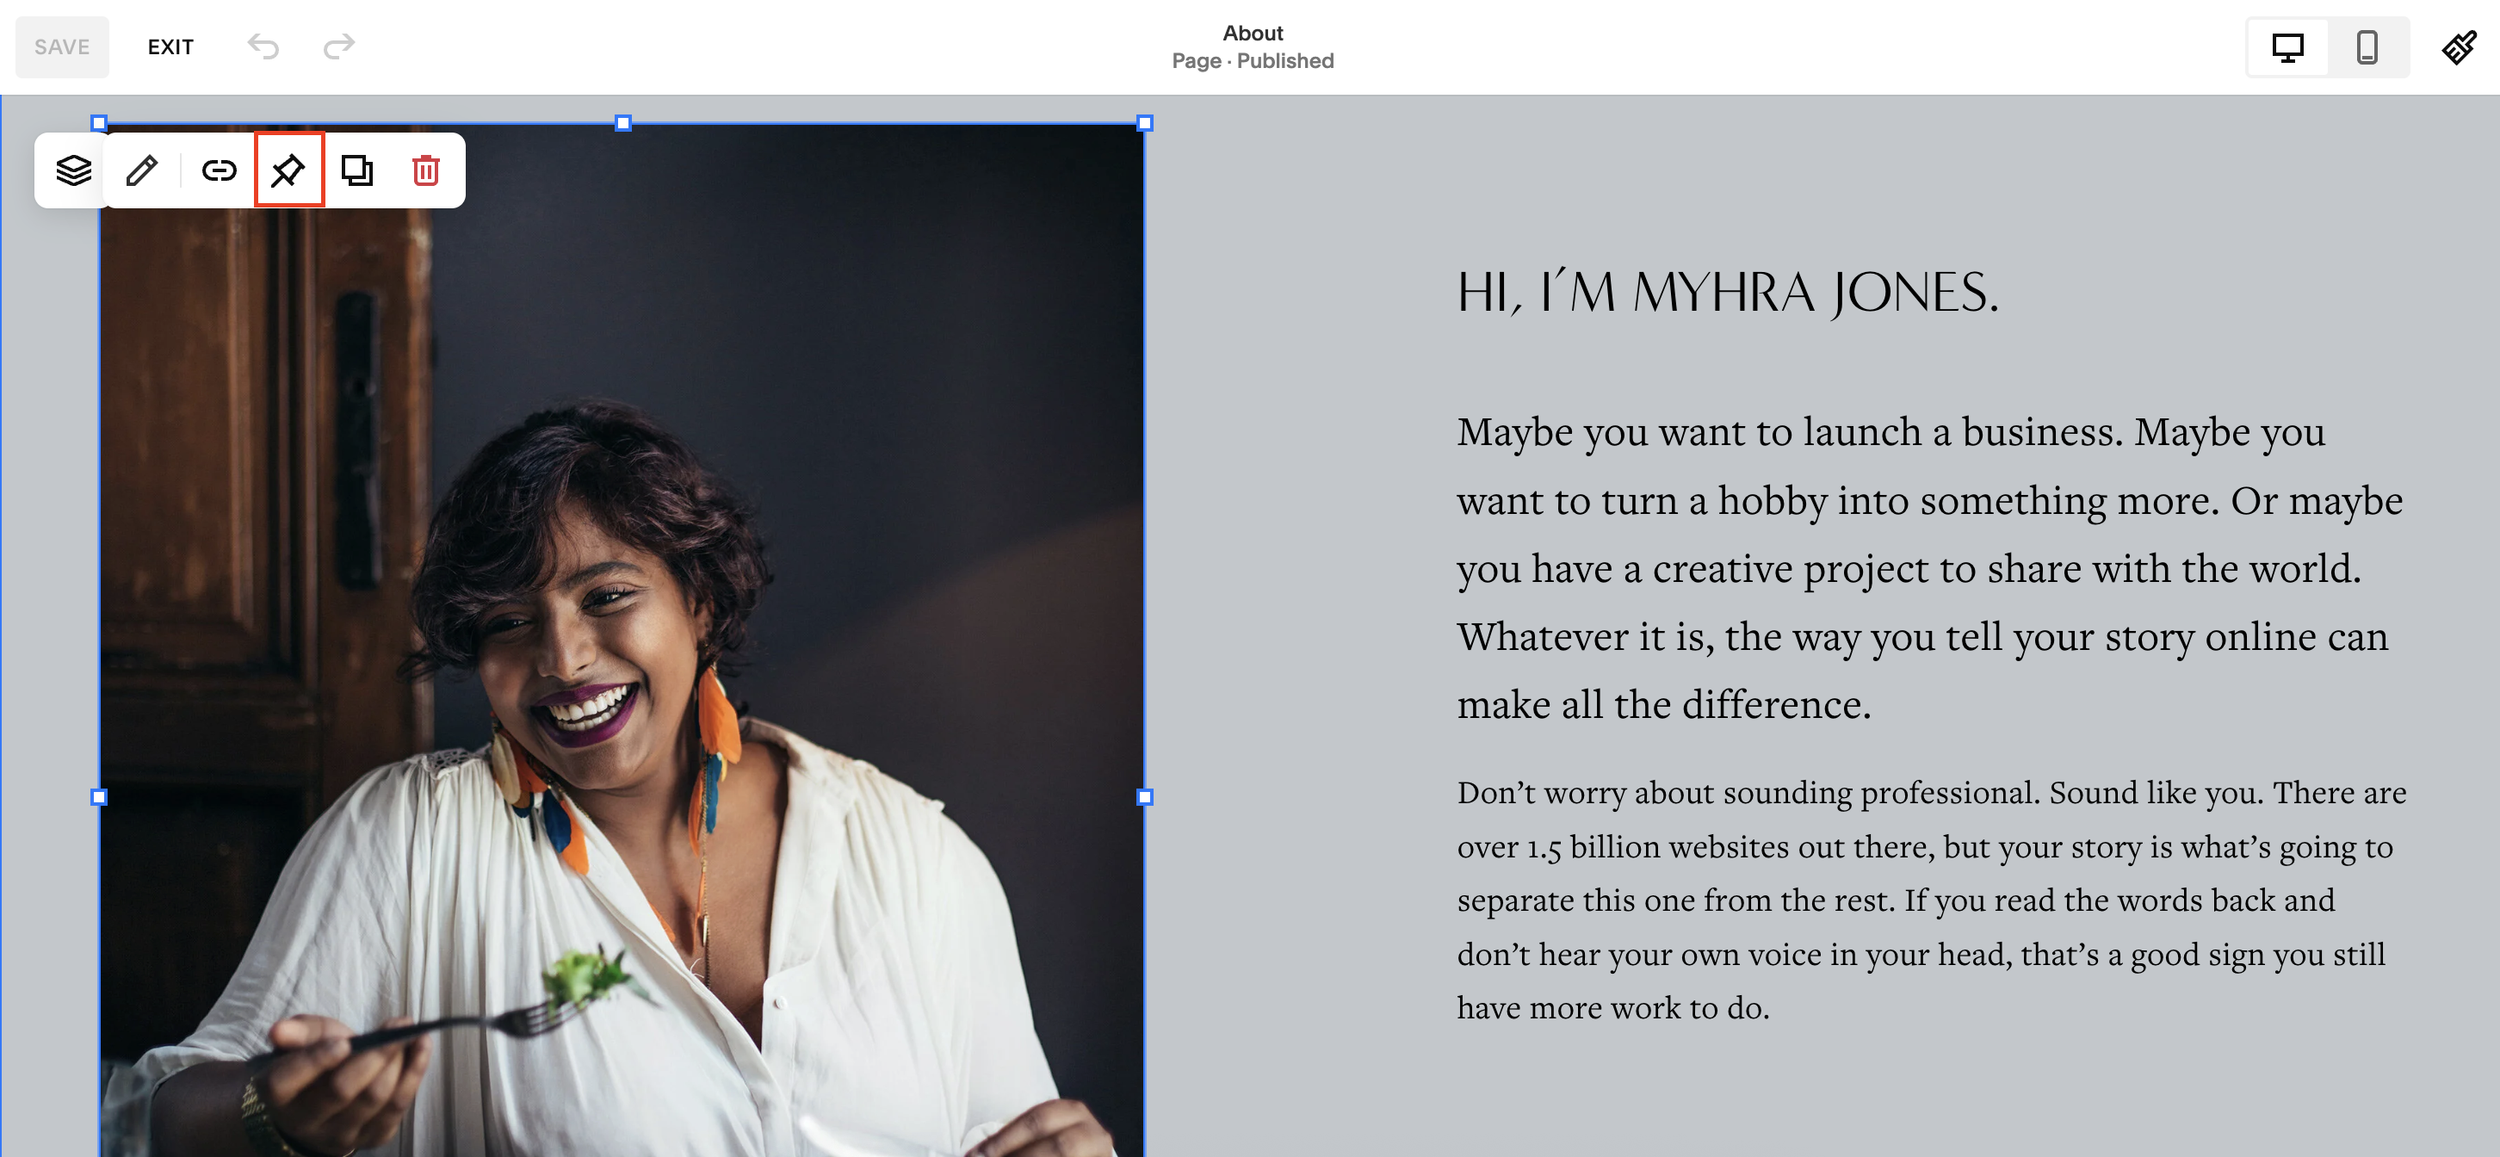
How to Pin a Block in Squarespace
Follow these simple steps:
Step 1: Open the Editor
Go to your Squarespace page and enter Edit Mode.
Step 2: Select the Block
Click on the block you want to pin (e.g. an image).
Step 3: Click the Pin Icon
Once selected, click the pin icon in the toolbar.
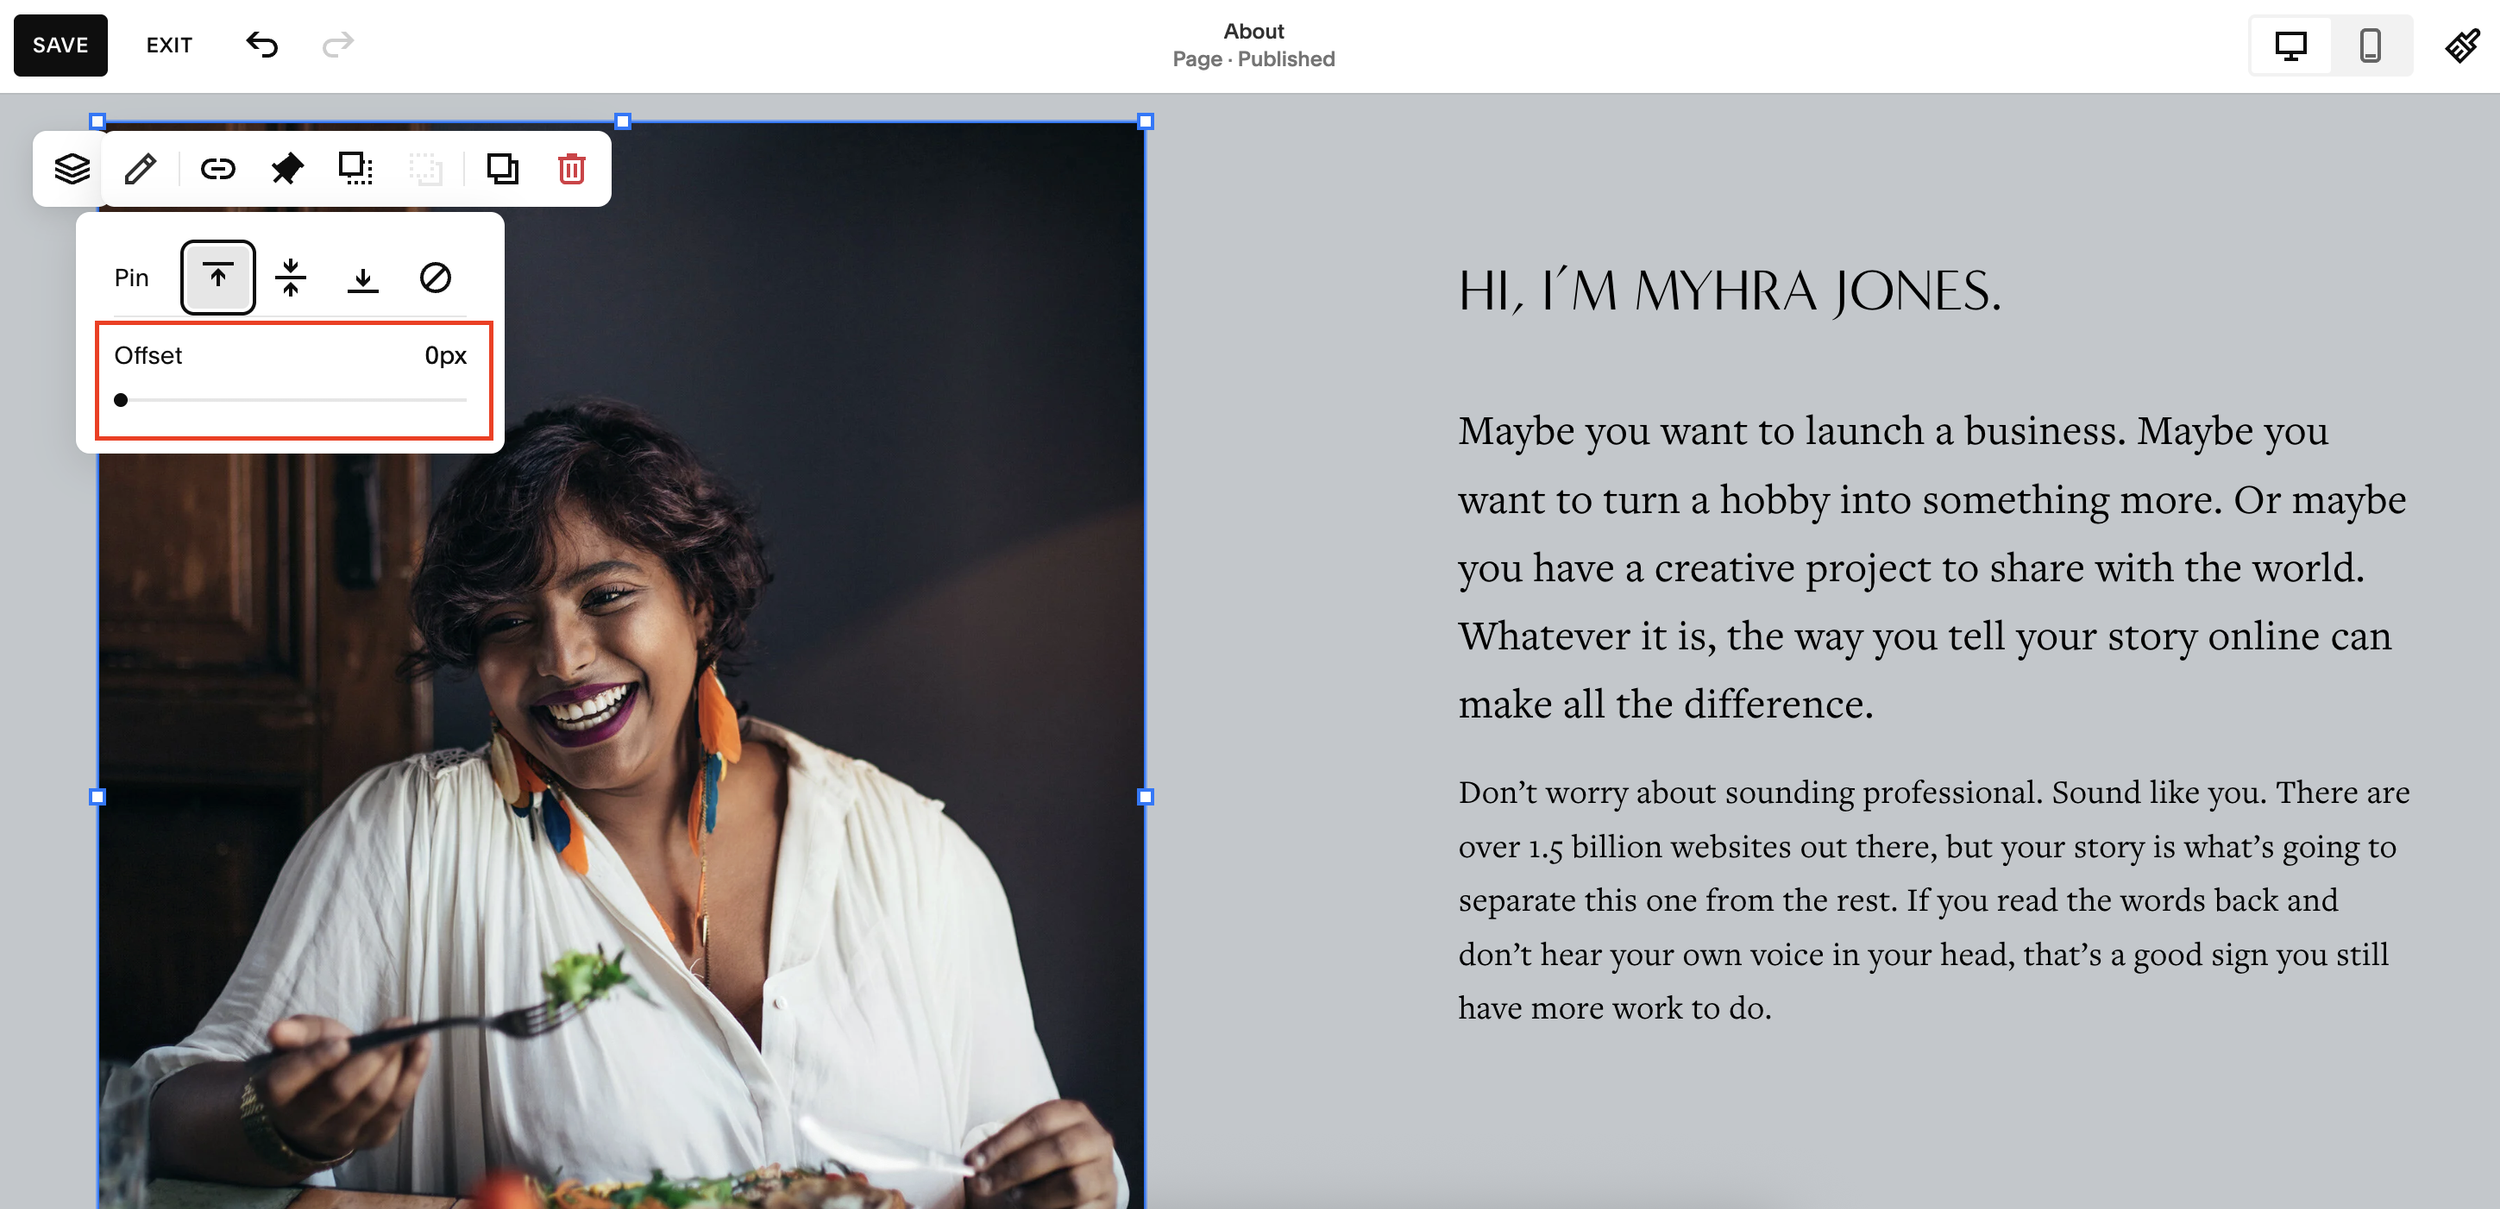
Step 4: Set the Offset
Start with an offset of 0px
This determines when the pinning begins
Step 5: Save and Preview
Click Save, exit the editor, and scroll your page to see the effect.
Adjusting the Offset for Better Spacing
If your pinned element feels too tight against the top of the screen, you can add spacing.
Example:
Set offset to 20px or 40px
This creates a buffer between the block and the top of the browser
This small tweak makes your design feel more polished and intentional.
Pin Position Options Explained
Squarespace lets you pin elements in different positions on the screen:
Pin to Top (Most Popular)
Keeps the block fixed at the top of the viewport
Best for clean, professional layouts
Pin to Center
Keeps the block centered as users scroll
Great for storytelling or visual emphasis
Pin to Bottom
Anchors the block to the bottom of the screen
Useful for unique or experimental designs
What Happens When You Reach the End of a Section?
Pinned elements only stay fixed within their section.
Once you scroll past the section:
The block returns to normal positioning
The next section behaves as usual
This ensures your design stays structured and doesn’t overlap awkwardly.
Best Practices for Using Pinned Blocks
To get the most out of this feature:
Use pinned images alongside scrolling text
Add spacing (offset) for better visual balance
Stick to top pinning for most professional designs
Test on mobile to ensure responsiveness
Why Use Pinned Blocks?
Using pinned blocks can instantly elevate your website by:
Improving user experience
Creating smoother scrolling interactions
Making your design feel more modern
Highlighting key visuals or messages
Final Thoughts
Pinning blocks in Squarespace is a simple feature that can have a big impact on your site’s design. With just a few clicks, you can create dynamic layouts that look clean, professional, and engaging.
If you’re not already using this feature, it’s definitely worth experimenting with, especially for landing pages or portfolio sections.