


Saved Pages on Squarespace Explained [NEW Feature!]
Squarespace has just introduced a powerful new feature: Saved Pages. If you’re already familiar with saved sections, this update takes things to the next level, allowing you to save and reuse entire pages across your website (or even multiple sites).
In this guide, you’ll learn exactly how to use Squarespace Saved Pages, where to find them, and how to reuse them efficiently.
What Are Squarespace Saved Pages?
Previously, Squarespace allowed users to save individual sections either on a specific site or across their account. Now, with Saved Pages, you can:
Save full page layouts
Reuse them anywhere on your site
Maintain consistent design across multiple pages or projects
This is especially useful for:
Landing pages
Service pages
Reusable design templates
Client website builds

Want a framework for designing the perfect homepage?

Need an expert to build your Squarespace website?
Book a free kick-off call with our team to discuss your project requirements in detail.
How to Create a Saved Page in Squarespace
Follow these simple steps to create and save a page:
1. Create a New Page
Start by adding a new blank page to your website.
2. Add Content Sections
Click “Add Section” and insert the layouts you want. For example:
A hero section
A content block underneath
Repeat this process until your page layout is complete.
3. Save Your Page
Once you’re happy with the design:
Click Save
Exit the page editor
4. Save the Page to Your Account
Now for the key step:
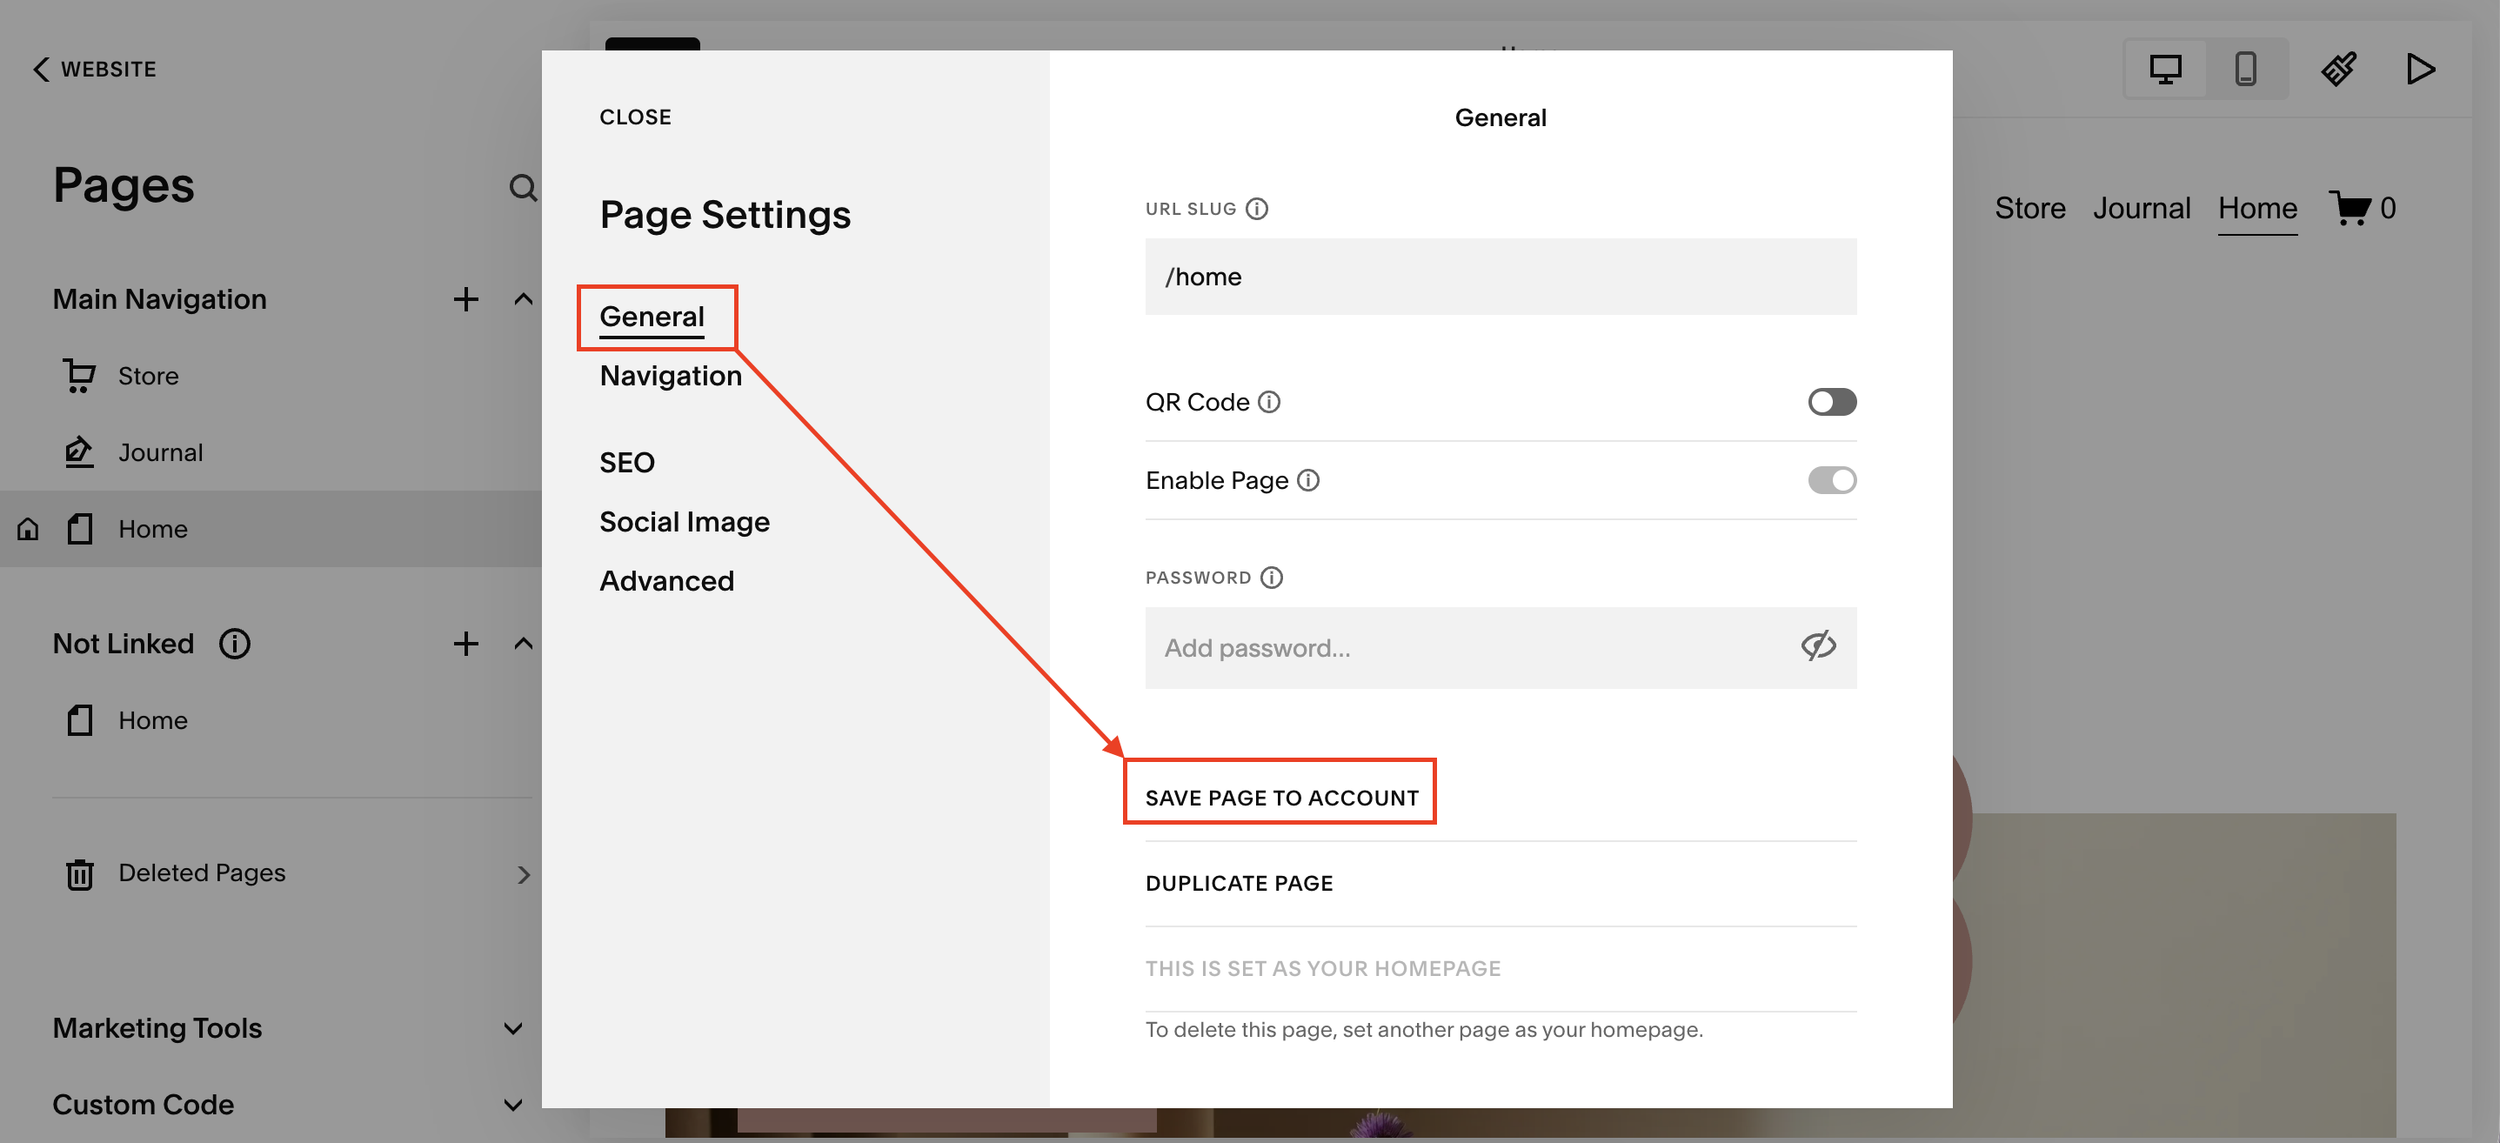
Go to your Pages menu
Click the settings (cog icon) on the page
Scroll down and select “Save Page”
5. Name Your Saved Page
Give your page a clear, reusable name such as:
“Intro Style Page”
“Landing Page Template”
“Service Layout”
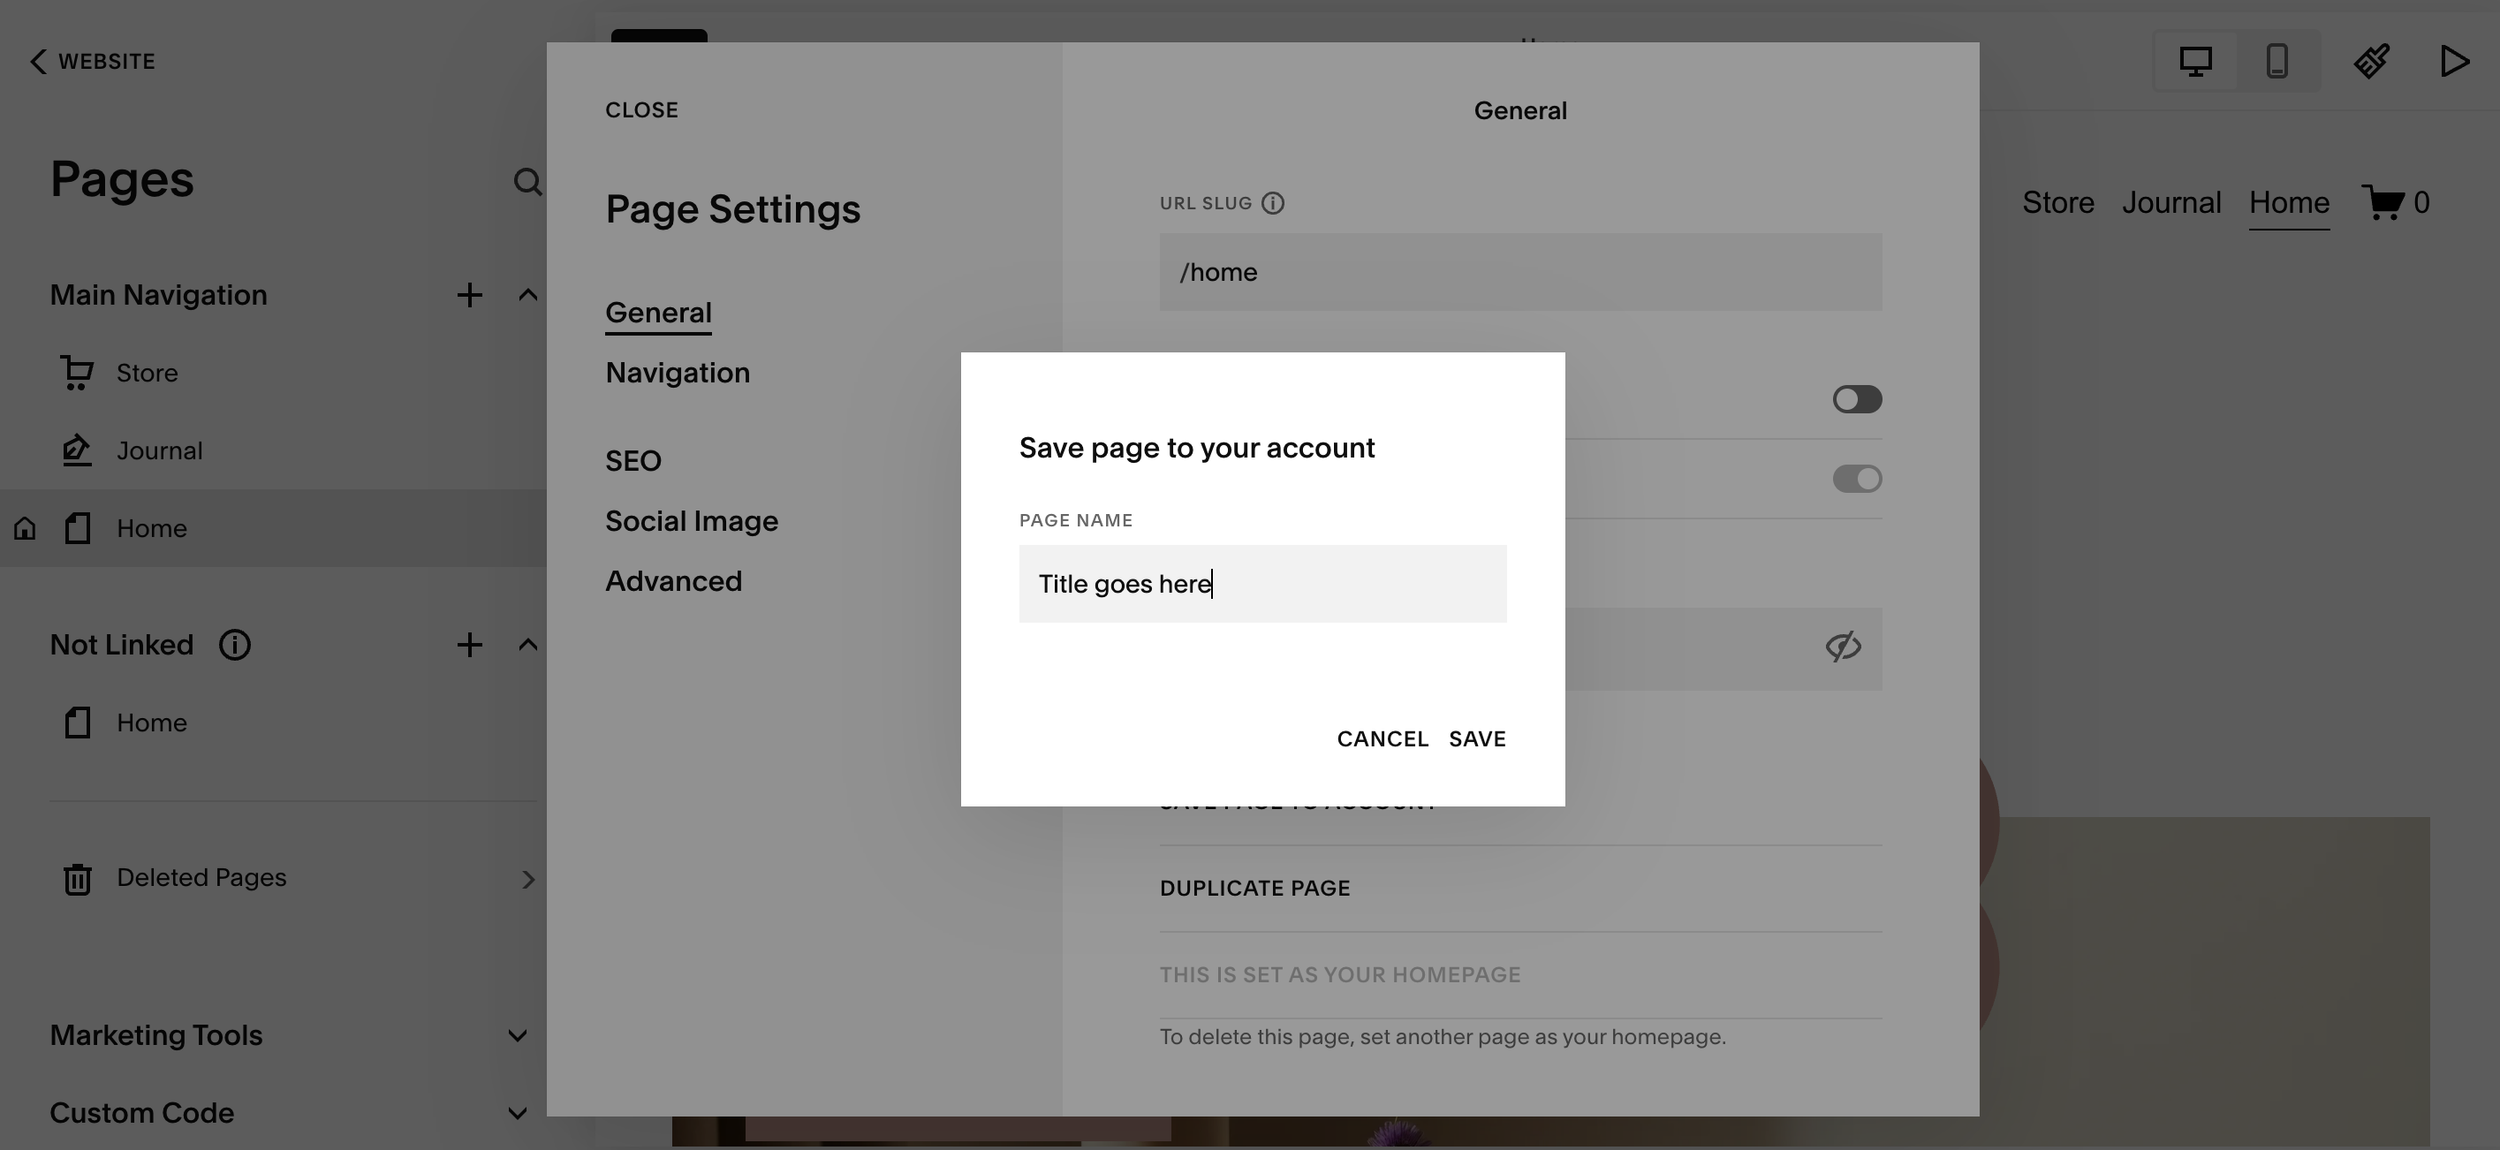
This helps you stay organised, especially if you plan to reuse it across multiple projects.
How to Reuse a Saved Page
Once your page is saved, reusing it is incredibly easy:
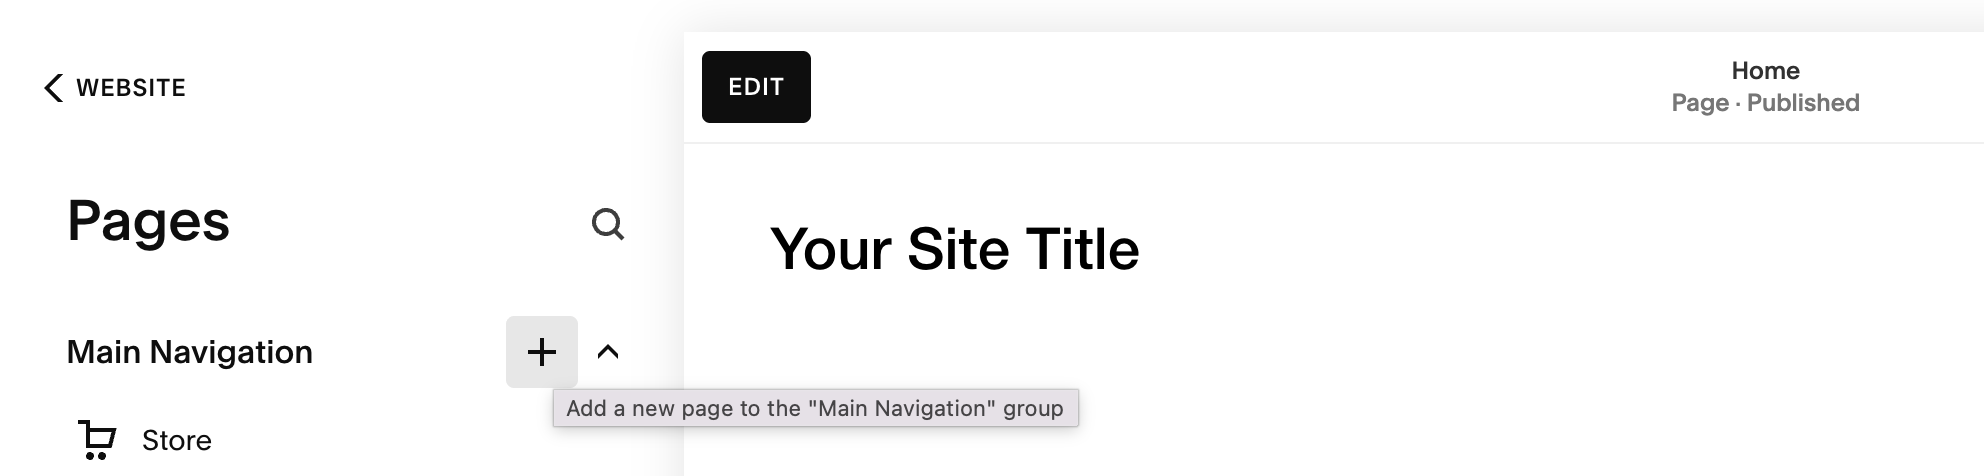
1. Go to the Pages Panel
Navigate to where you want to add the saved page (e.g. Not Linked or Main Navigation).
2. Click the “+” Button
Select Saved Pages from the options.
3. Choose Your Saved Page
Pick the page you previously saved, and it will instantly be added with:
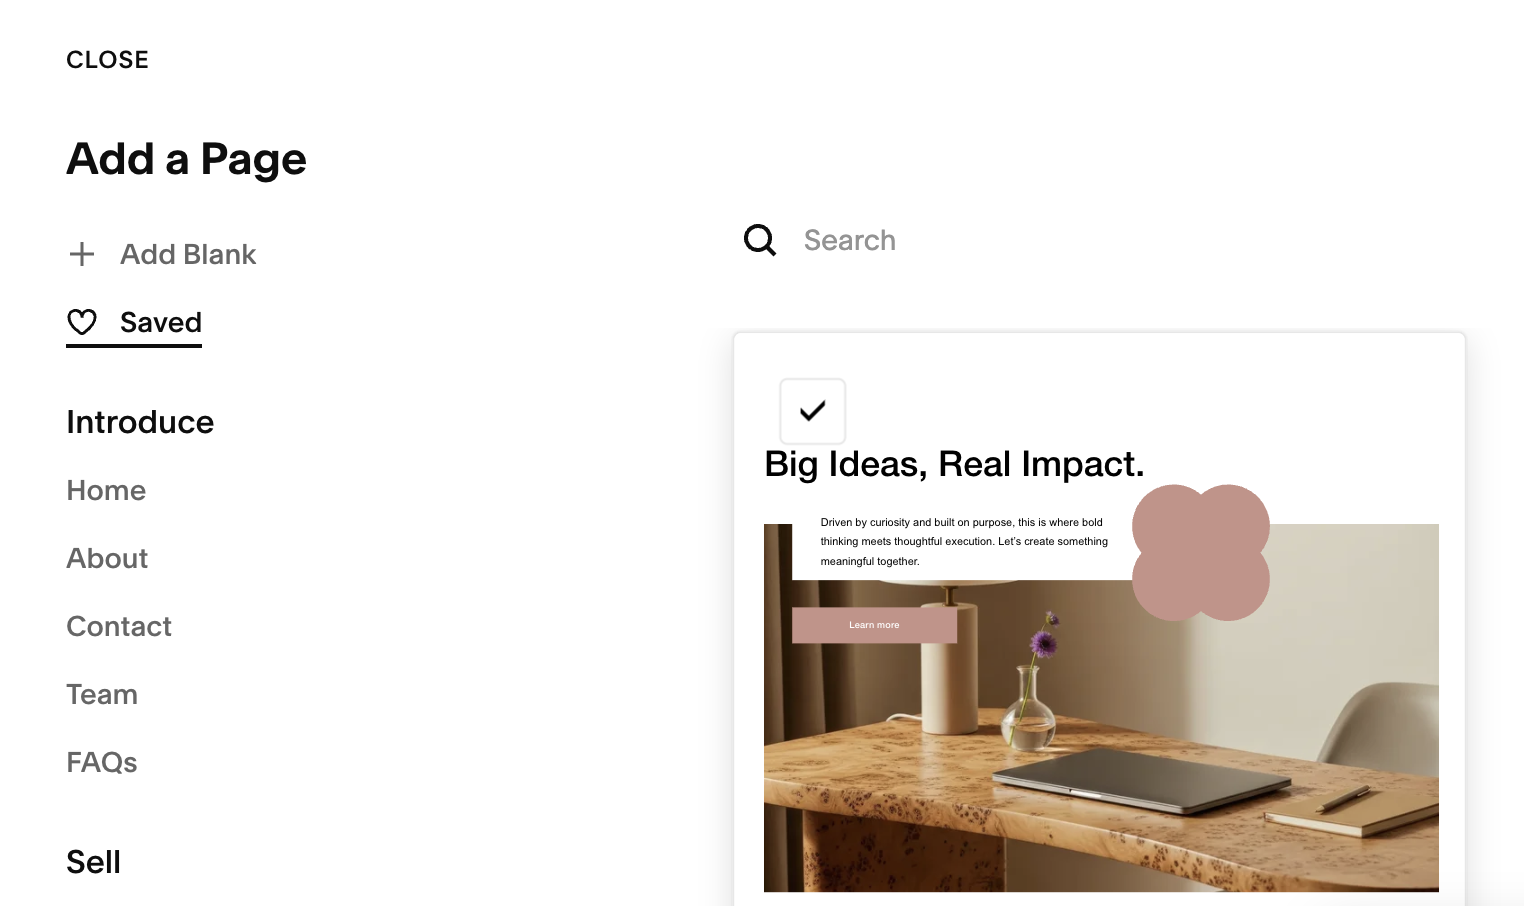
The same layout
The same content
The same structure
Important Notes
The URL will be different for each instance of the page
You can edit each reused page independently after adding it
This feature is perfect for speeding up your workflow and maintaining consistency
Why Saved Pages Are a Game-Changer
The new Saved Pages feature in Squarespace can dramatically improve your workflow:
Build pages faster
Keep designs consistent
Reuse high-performing layouts
Ideal for freelancers and agencies managing multiple sites
Final Thoughts
Squarespace Saved Pages make it easier than ever to scale your website design process. Whether you're building one site or managing multiple client projects, this feature can save you hours of repetitive work.
If you’re not already using it, now’s the perfect time to start.