


Setting Up 301 Redirects on Squarespace
If you're migrating a website to Squarespace, whether from WordPress, Webflow, or another platform, there's a good chance not every page will make the journey across. Maybe your client wants to consolidate duplicate contact pages, rename their blog, or simply retire some outdated content. Whatever the reason, failing to handle those dead pages correctly can cost you hard-earned SEO rankings.
The solution? Setting up redirects.
In this guide, we'll walk you through exactly how to configure 301 (permanent) and 302 (temporary) redirects in Squarespace using URL mappings, and explain when to use each type.
Why Redirects Matter for SEO
When a page is removed or its URL changes, search engines need to be told where to look next. Without a redirect, visitors and crawlers hit a dead end, a 404 error, and any "SEO juice" that page had built up simply evaporates.
A properly configured redirect passes that authority to the new URL, preserving your rankings and keeping the user experience smooth.
Common scenarios where you'll need redirects:
Consolidating two contact pages into one
Renaming your blog section to "Resources"
Retiring a hiring page temporarily during a hiring freeze
Restructuring your site navigation after a rebrand
301 vs 302 Redirects: What's the Difference?
Before diving into the setup, it's important to understand which type of redirect to use:
301 - A permanent redirect, the old page is gone for good
302 - A temporary redirect, the old page may return in the future.
301 redirects tell search engines: "This page has permanently moved, update your index." Use this when merging pages, renaming URLs, or retiring content you'll never bring back.
302 redirects tell search engines: "This page is temporarily unavailable, don't update your index yet." Use this if, for example, you're taking down a job listings page during a hiring pause but plan to reinstate it later.

Want a framework for designing the perfect homepage?

Need an expert to build your Squarespace website?
Book a free kick-off call with our team to discuss your project requirements in detail.
How to Set Up Redirects in Squarespace
Squarespace handles redirects through its URL Mappings tool. Here's how to access it and configure your redirects.
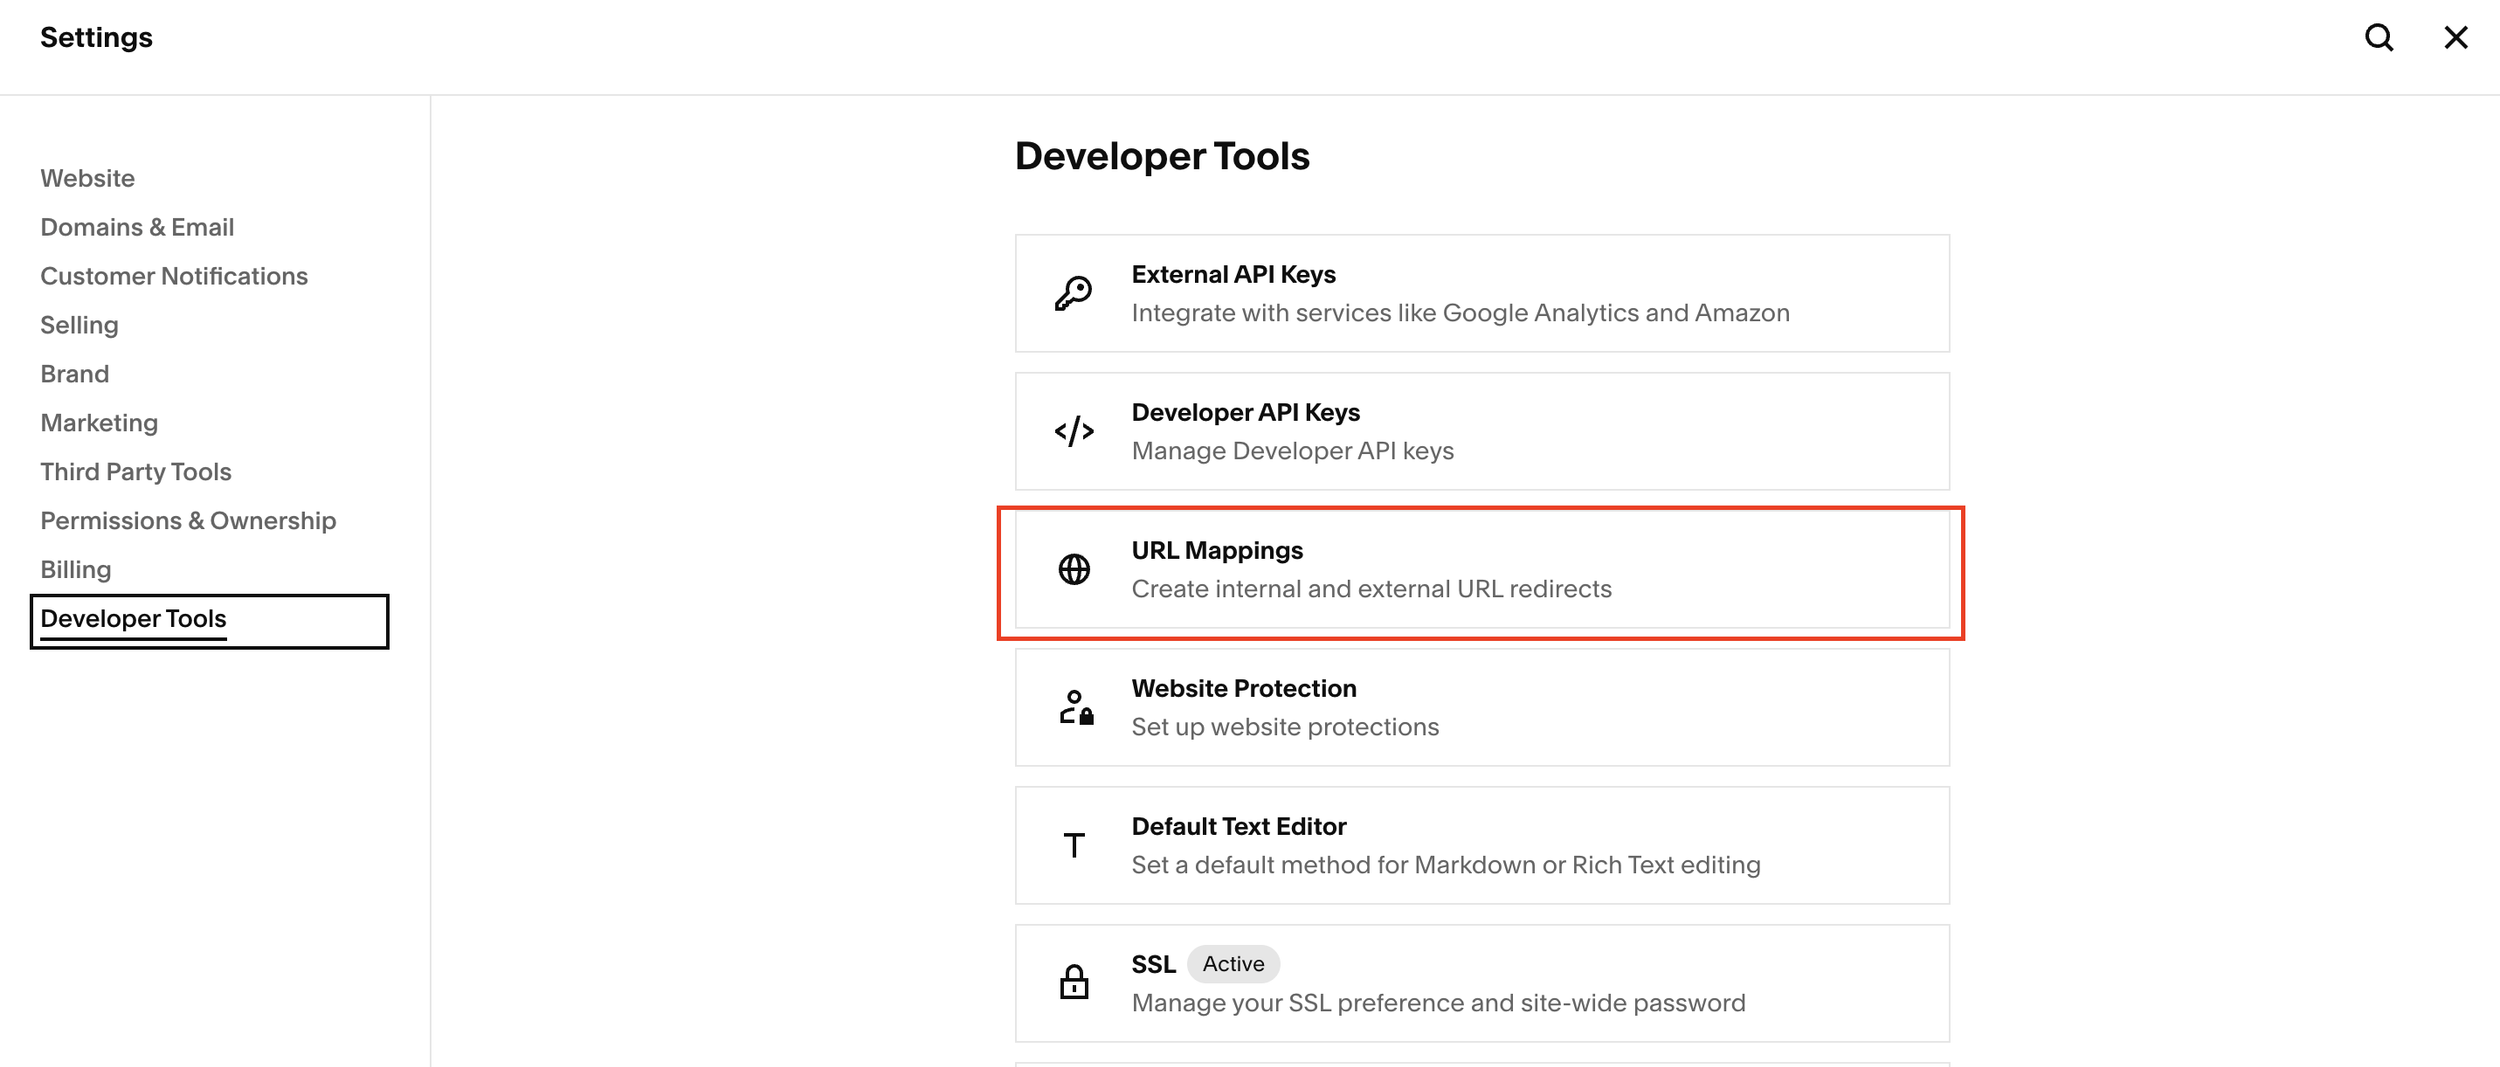
Step 1: Open URL Mappings
From your Squarespace dashboard, go to Settings
Scroll down to Developer Tools
Click on URL Mappings
You'll see a text input area where you can enter your redirect rules, along with a reference guide.
Step 2: Write Your Redirect Rules
Each redirect follows this format:
<original url> -> <new url> <redirect type>Eg.
/journal -> /blog 301
You can add as many redirect rules as you need, one per line.
Step 3: Save Your Changes
Once you've entered your redirect rules, click Save. Squarespace will validate the entries, if there's an error (for example, typing 30 instead of 301), it will flag the problematic row and tell you exactly what went wrong, making it easy to correct.
Common Mistakes to Avoid
Using an invalid redirect type: Squarespace only accepts 301 or 302. Anything else (e.g., 30, 300) will throw an error.
Using a 301 when you should use a 302: If there's any chance a page will return, use a 302. Once a 301 is crawled, search engines may de-index the old URL, which can be difficult to reverse.
Forgetting redirects during a migration entirely: This is one of the most common causes of post-migration SEO drops. Always audit your old site's URLs before launching on Squarespace.
Final Thoughts
Setting up redirects in Squarespace is straightforward once you know where to look. The URL Mappings tool gives you full control over 301 and 302 redirects, helping you protect your SEO during site migrations, page consolidations, and structural changes.
Whether you're a Squarespace developer managing client migrations or a site owner restructuring your own content, taking five minutes to configure your redirects properly can save you months of SEO recovery work down the line.