


Create a Simple Testimonial Slider For Your Squarespace Website
One of the most requested features from clients building websites on Squarespace? Testimonial sliders.
While it might surprise you that many larger brands skip this feature, it's a must-have for small business owners, service providers, and freelancers looking to build credibility and trust with potential clients.
In this guide, you'll learn exactly how to create a testimonial slider (carousel) using Squarespace’s tools, even with some of the platform’s quirks.
Why Add a Testimonial Slider to Your Squarespace Site?
Client testimonials build trust, reduce buyer hesitation, and help convert visitors into paying customers. A testimonial carousel offers a clean, dynamic way to show off multiple reviews without cluttering your page.
Typical use cases:
Coaching websites
Freelancer portfolios
Agency service pages
Small business websites

Want a framework for designing the perfect homepage?

Need an expert to build your Squarespace website?
Book a free kick-off call with our team to discuss your project requirements in detail.
Step-by-Step Guide: Creating a Testimonial Carousel in Squarespace
1. Create a New Section
Navigate to the page where you want your testimonials to appear.
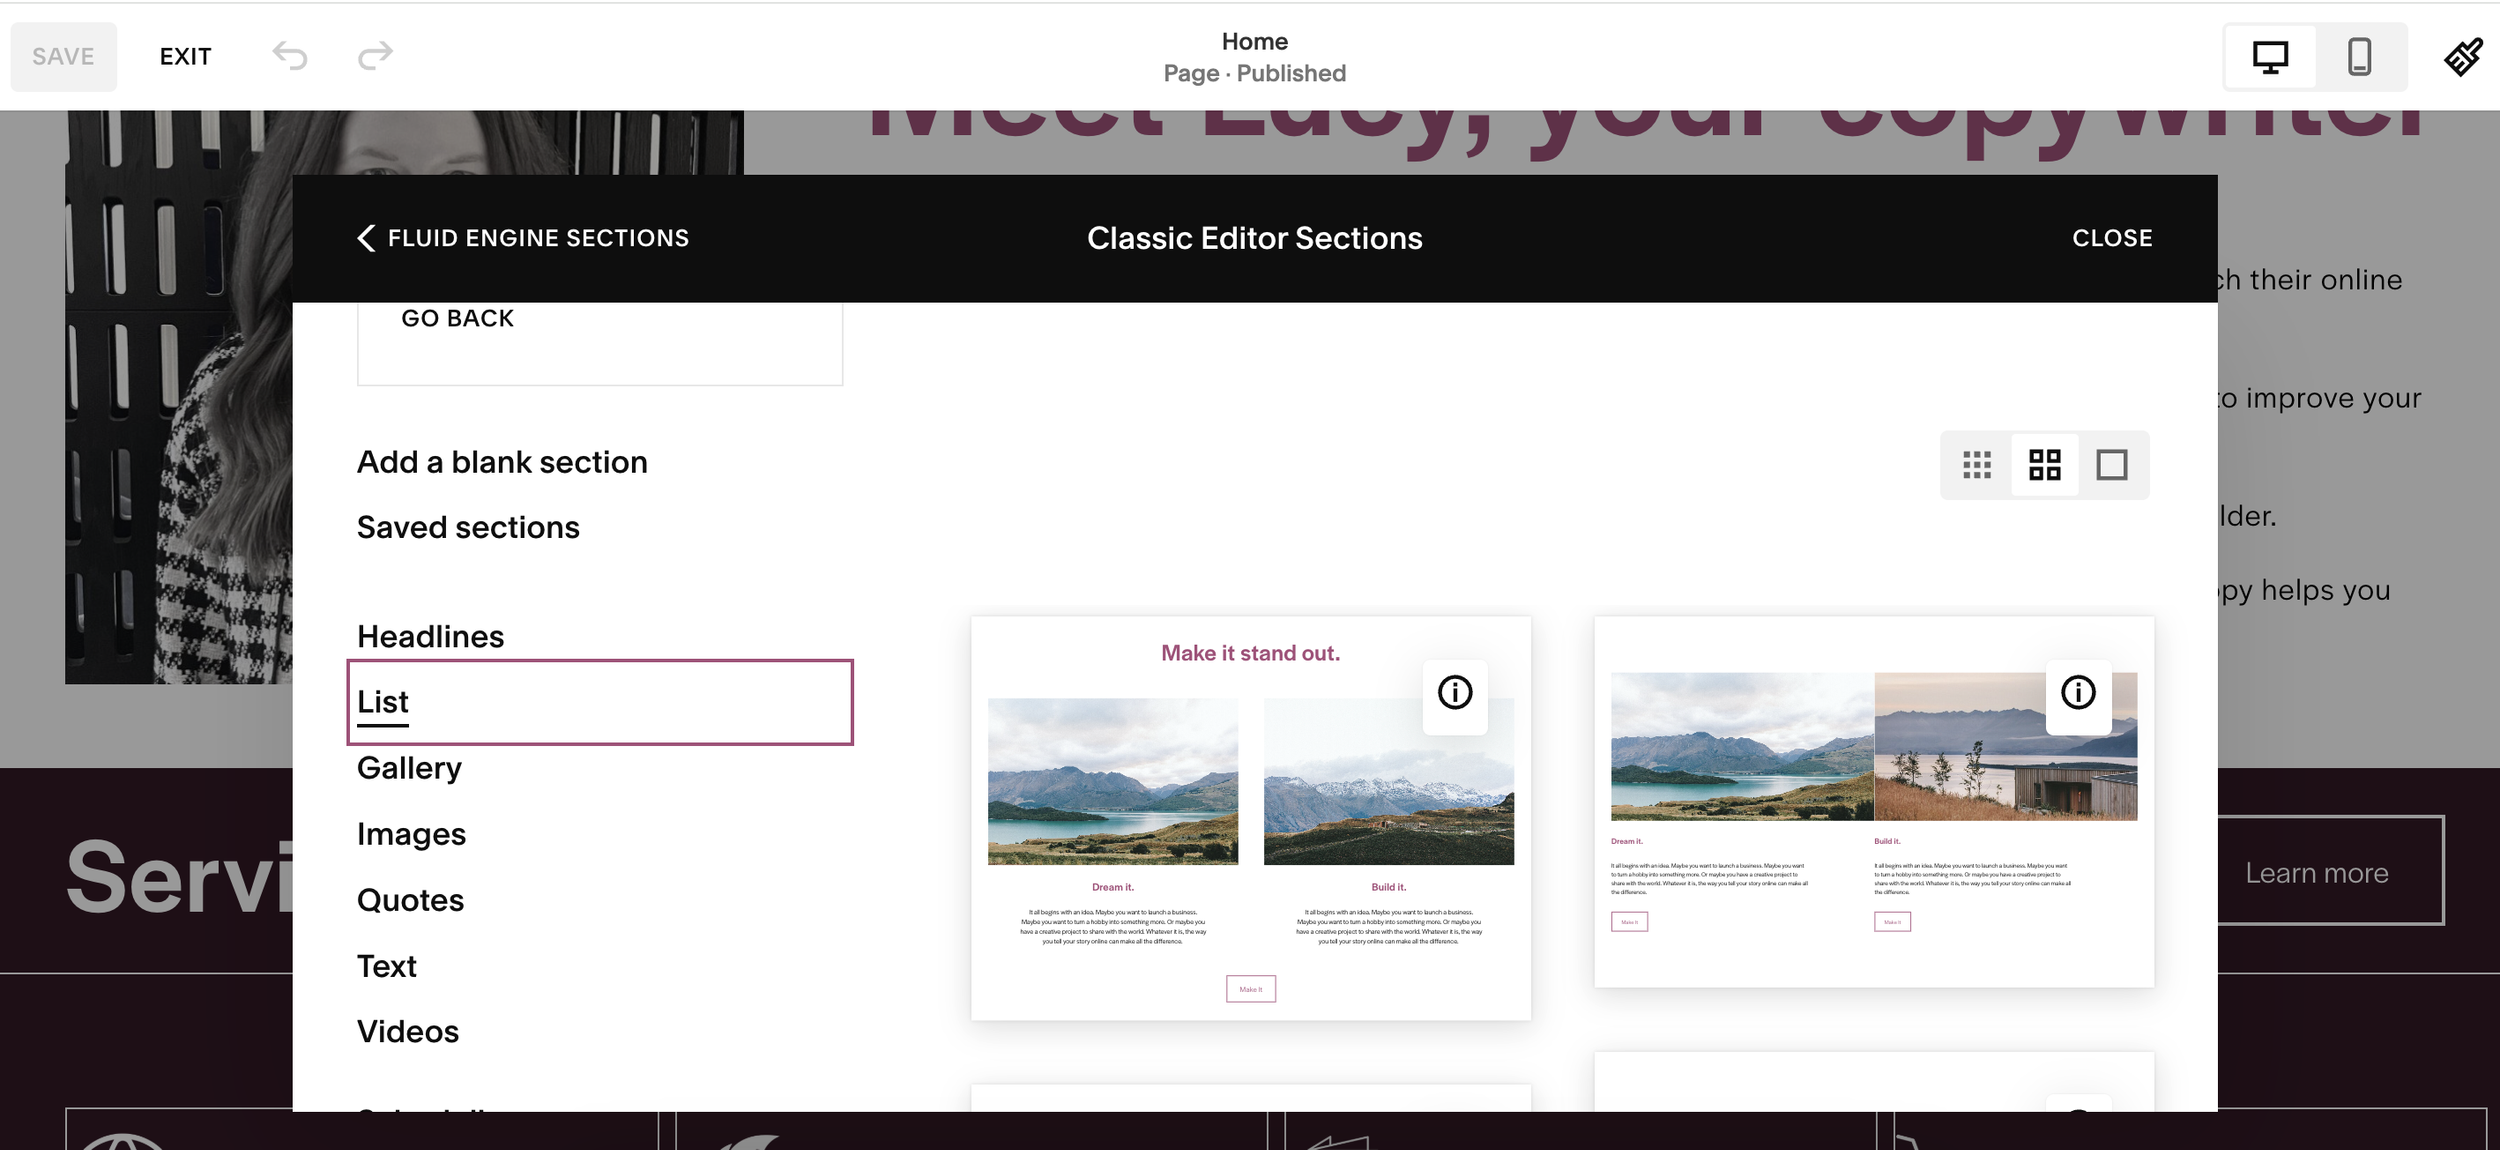
Click Edit, then Add Section.
Choose a List Section. (Tip: If you don’t see it in the new menu system, open the Classic Editor - you’ll find it there under “People” or “List”.)
2. Add and Format Your Testimonials
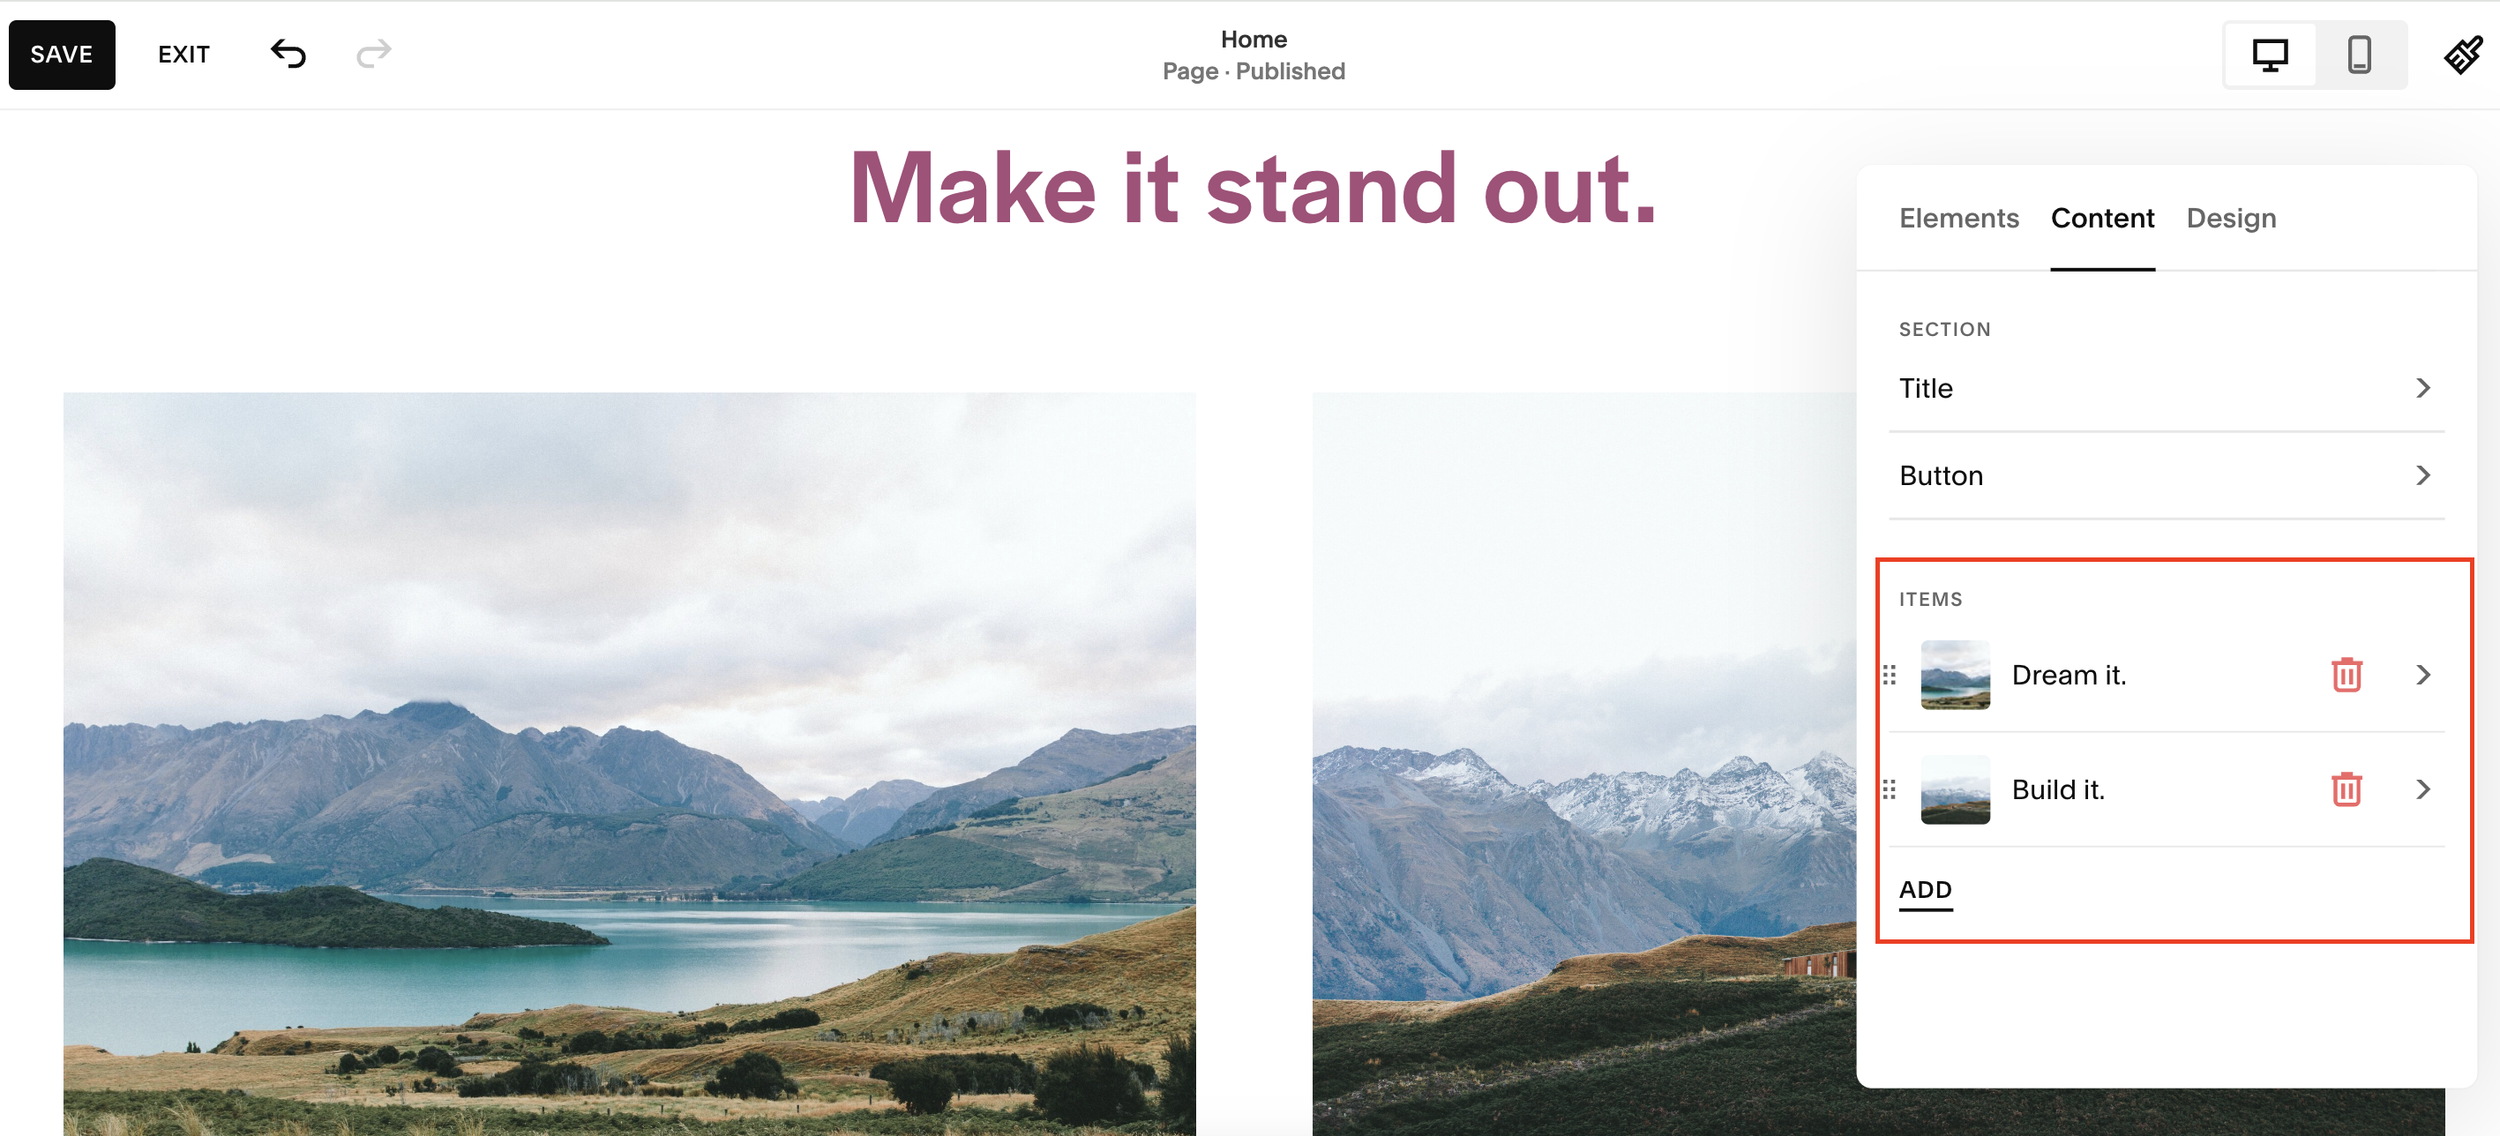
Under Edit Content > Items, start adding your testimonials.
Use emojis or image icons (e.g. ⭐️ or star images) to represent a 5-star rating.
Add the testimonial text as the title.
Add the client’s name in the description area.
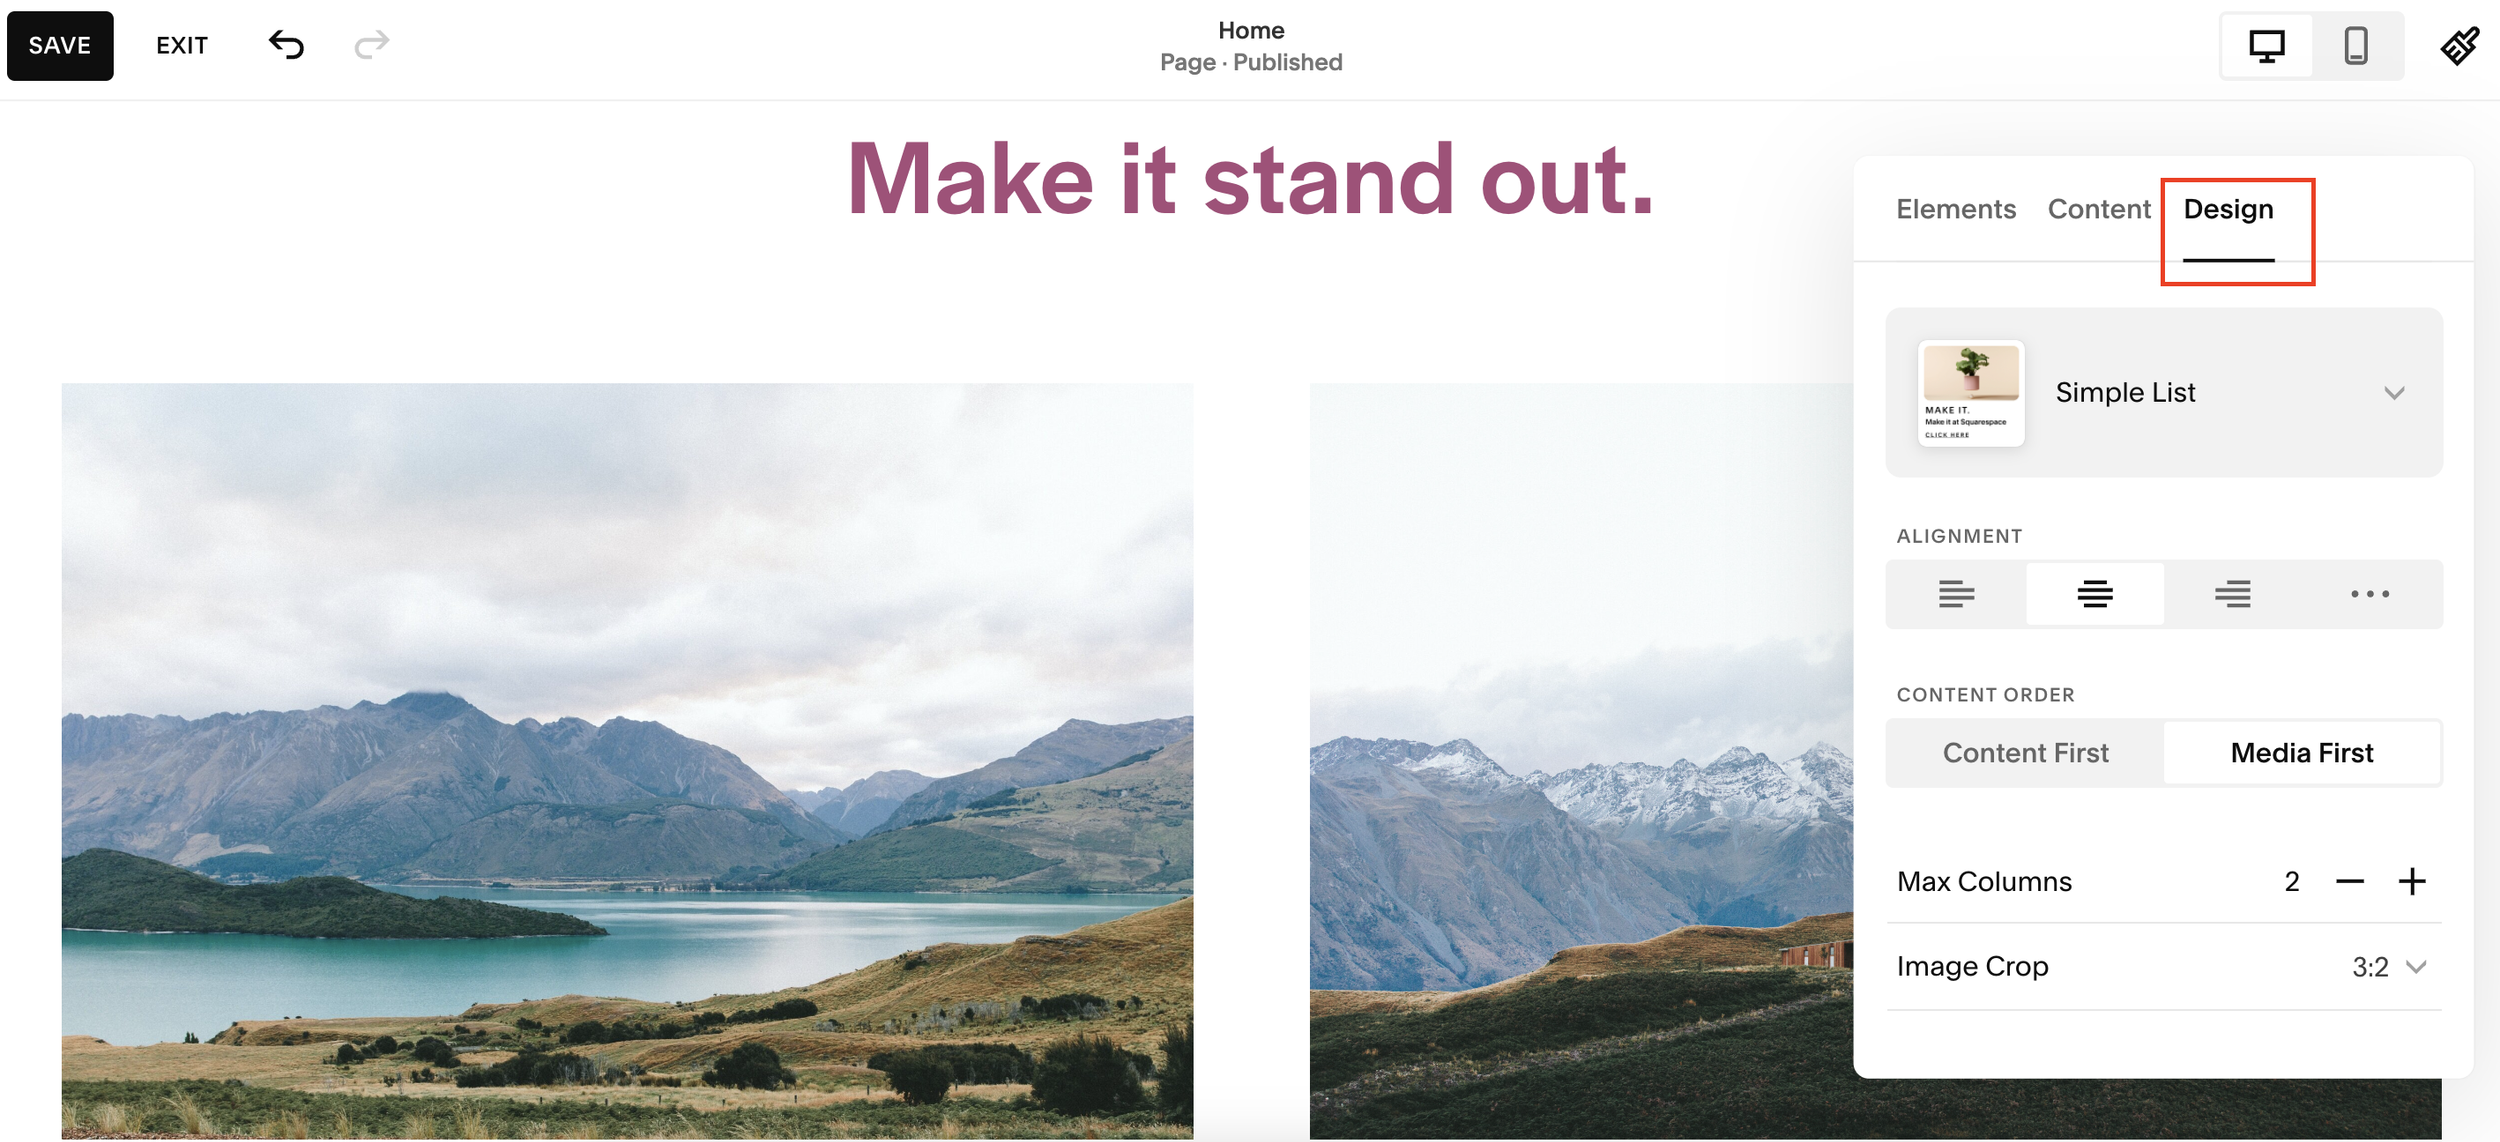
Left-align the content for a cleaner layout:
Design > Alignment > LeftDuplicate the item 2–3 times to fill out your slider with multiple testimonials.
3. Customize Design: Style & Layout
Now, let’s make it visually appealing.
Go to Design > Style > Card
Adjust:
Padding: Set to large for breathing room
Text size: Make the quote larger and more readable
Spacing: Set column/row spacing under Size & Space
Image & Button: Disable these in Elements
4. Change Colors for Better Contrast
To customize the card and text colors:
Go to Site Styles > Colors
Choose the correct section palette (usually "Lightest")
5. Turn the List into a Carousel (Slider)
Now let’s transform your list section into a testimonial slider:
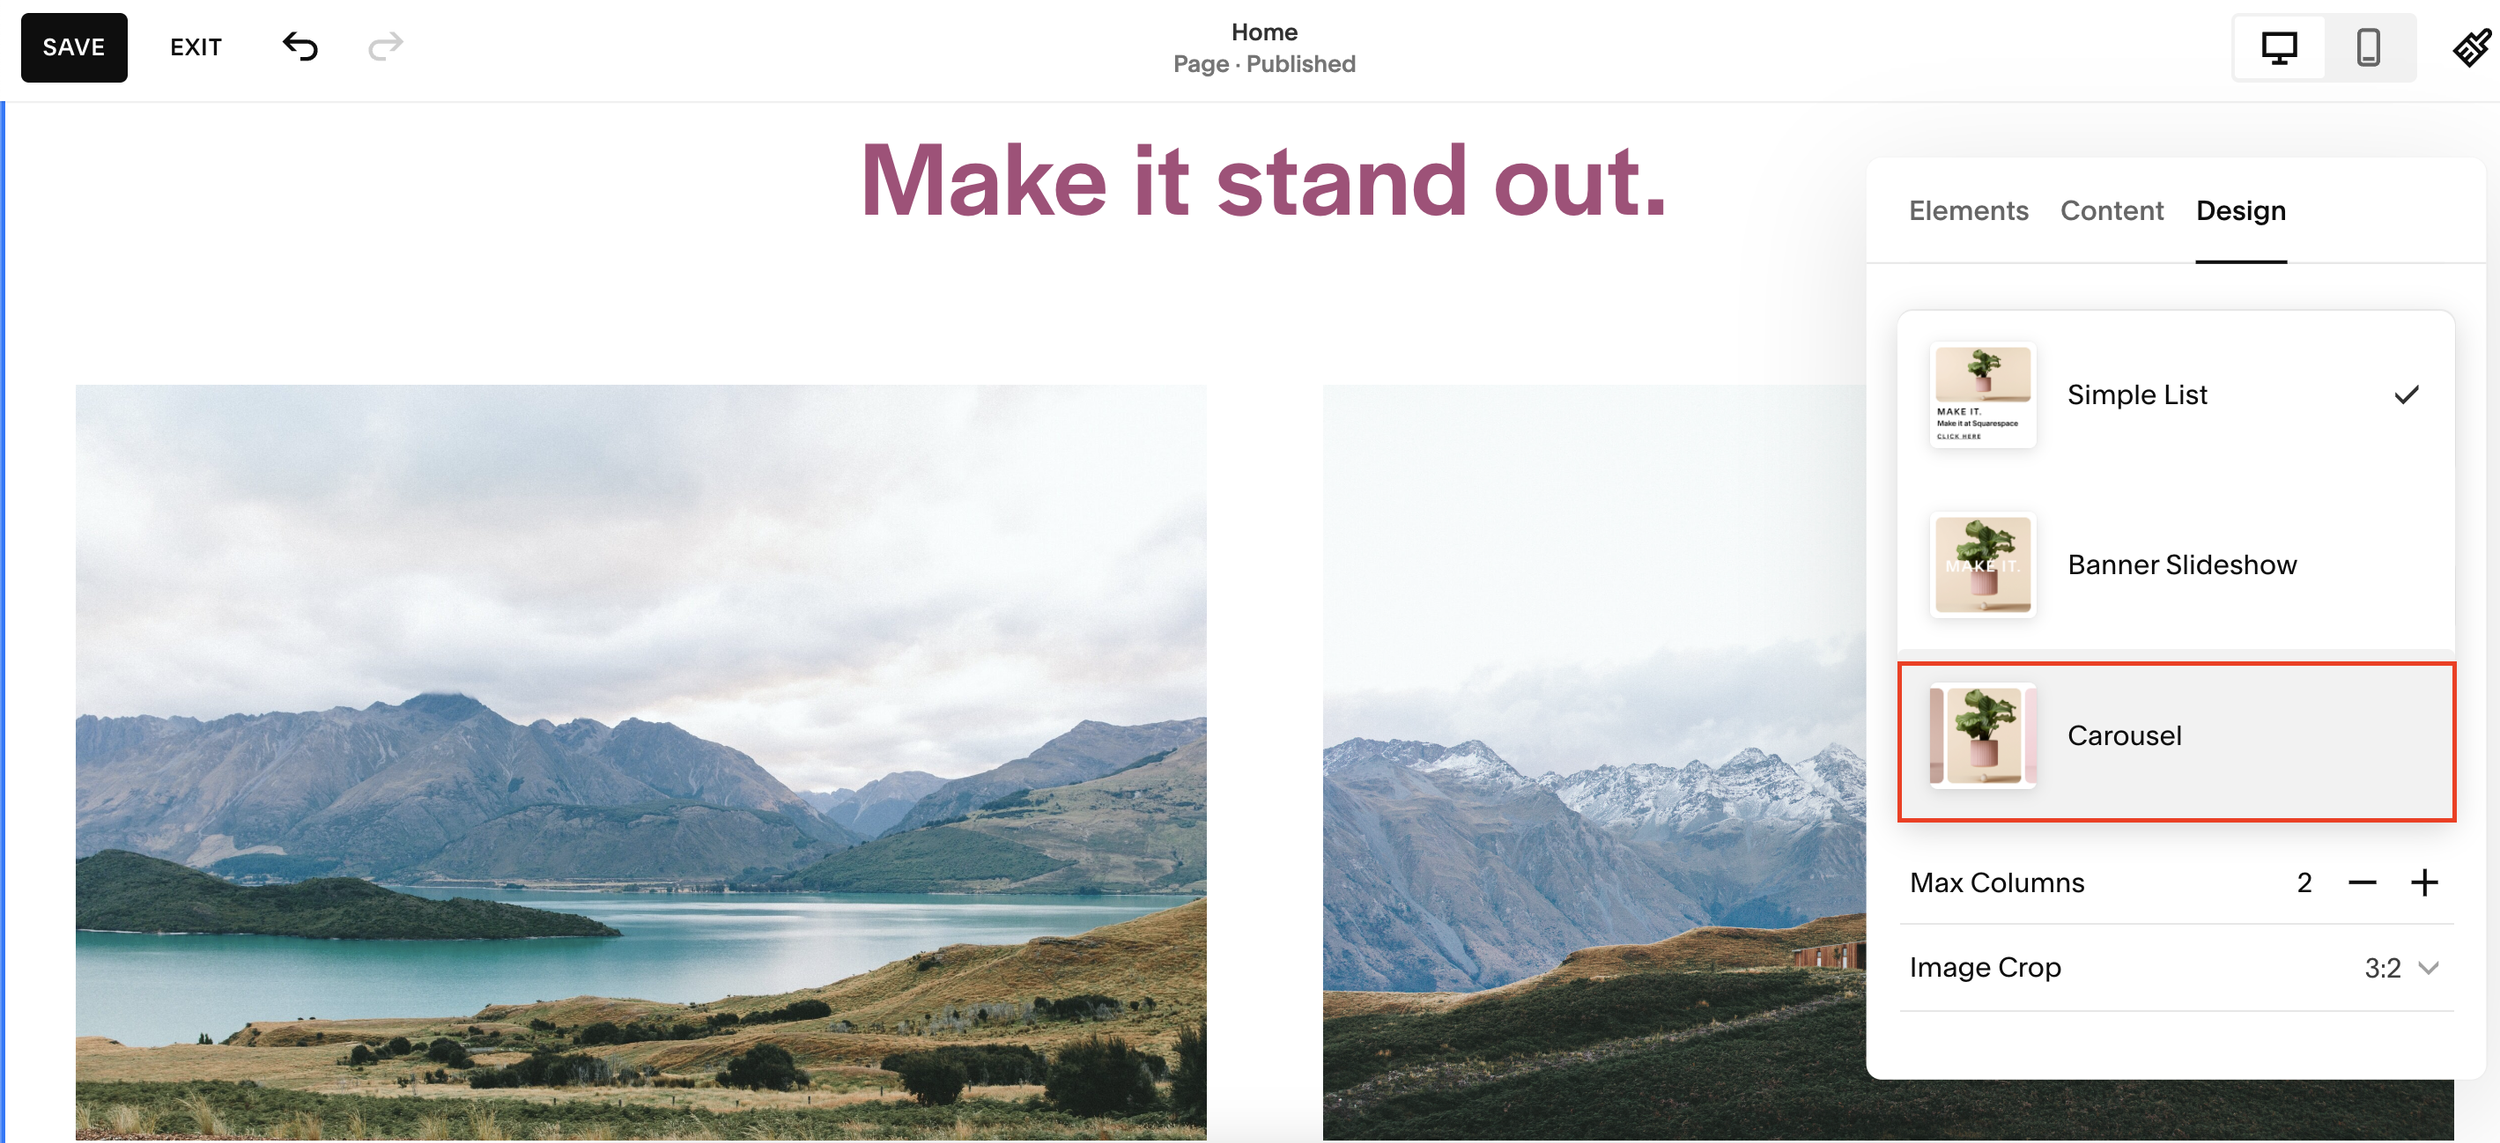
Go to Edit Content > Design
Switch layout to Carousel
Toggle off Image and Button
Adjust design preferences:
Show adjacent slides for a 3D carousel feel
Infinite scroll to keep testimonials looping
Style as Card with large padding
Add spacing between slides in Size & Space
Final Touch: Update Section Colors for Carousel
Sometimes, Squarespace doesn’t expose all customization options easily. To adjust the carousel card background:
Go to Site Styles > Show All
Search for List > Carousel
Customize:
Card Background
Card Title (stars)
Text colors
Summary: Why You Should Add a Testimonial Slider in Squarespace
Adding a testimonial slider to your Squarespace website helps:
Boost social proof and trust
Keep your pages clean and organized
Add movement and engagement to your content
With a few tweaks in styling and layout, you can build a professional-looking testimonial carousel that converts.