


How to A/B Test Sections on Squarespace
If you’ve ever wondered how to run an A/B test on your Squarespace site without using third-party tools, the good news is, it’s actually very simple. A/B testing allows you to compare two versions of a section (for example, an image section vs. a video section) to see which one performs better in terms of engagement, clicks, and conversions.
In this guide, I’ll show you exactly how to A/B test a section on Squarespace using the built-in features and Squarespace Analytics.
Why A/B Testing on Squarespace Matters
A/B testing (also called split testing) is one of the easiest ways to optimize your website for conversions. Instead of guessing which design or content works best, you test two variations with real visitors and measure results. On Squarespace, this can help you figure out:
Whether an image or video drives more clicks
Which section layout keeps visitors engaged longer
How design changes affect bounce rate and conversions
The best part? You don’t need any fancy tools to get started.

Want a framework for designing the perfect homepage?

Need an expert to build your Squarespace website?
Book a free kick-off call with our team to discuss your project requirements in detail.
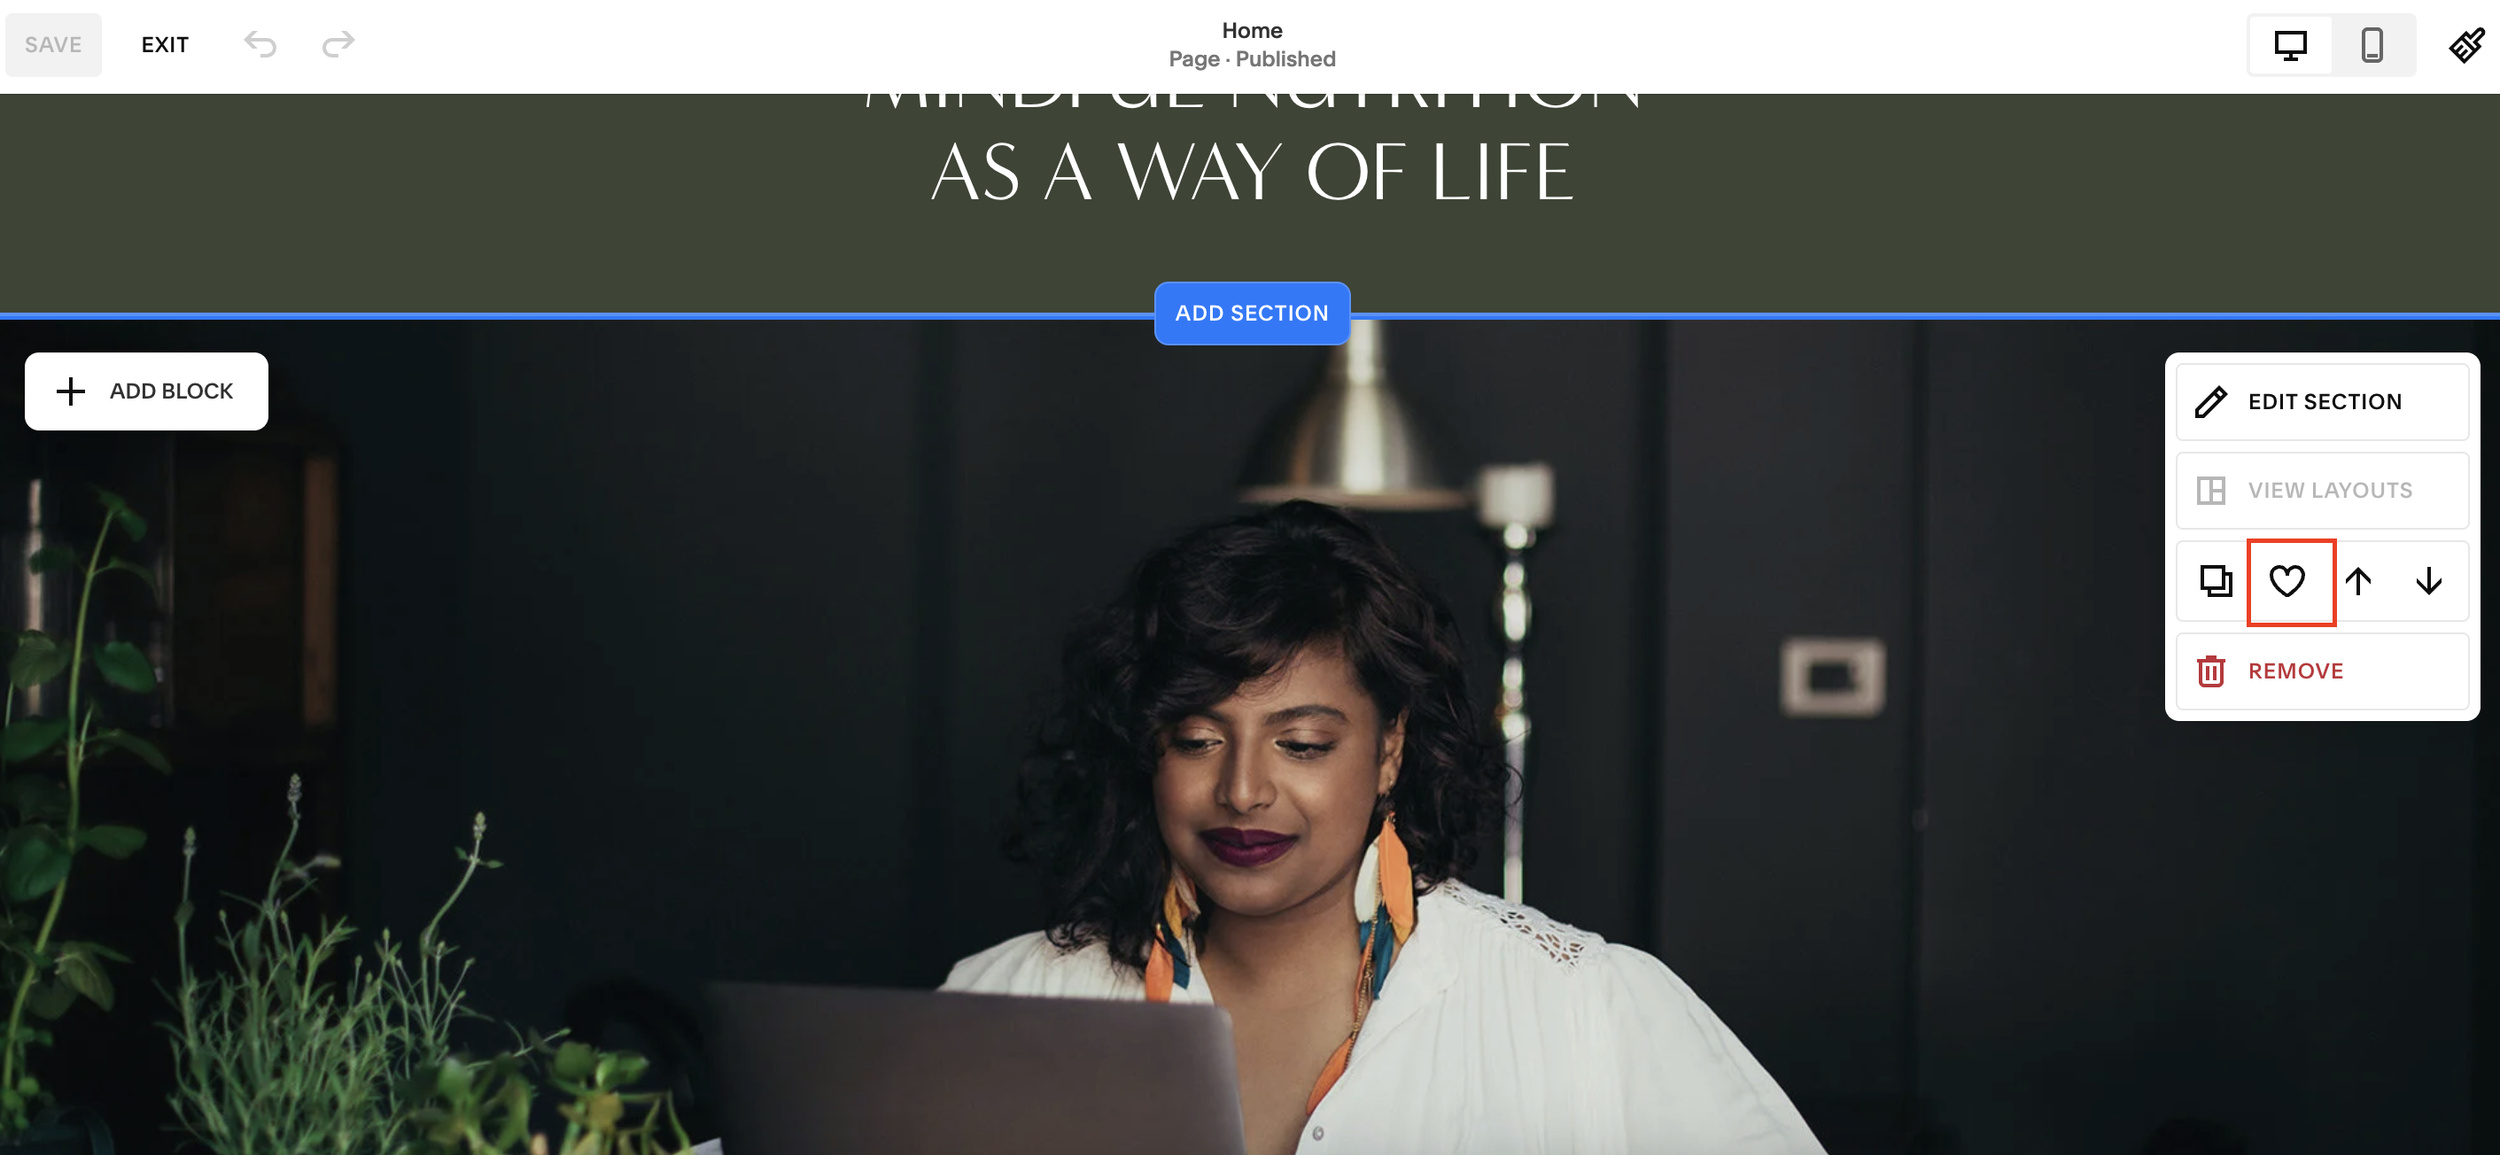
Step 1: Save Your Existing Section
Go to the page you want to test in Squarespace.
Click Edit in the top-left corner.
Hover over the section you want to test and click Save Section.
Give it a name and save it to your site.
This ensures you can easily swap between versions without losing your original content.
Step 2: Create Your Test Variant
Now, create the alternative version of your section (e.g., replacing an image with a video block).
Save this new version as a Saved Section as well.
You should now have two saved sections: one with an image, one with a video.
Step 3: Run the First Test
Choose which version you want to start with (e.g. the image).
Keep that live on your page and run the test for a set period of time, usually 7 days.
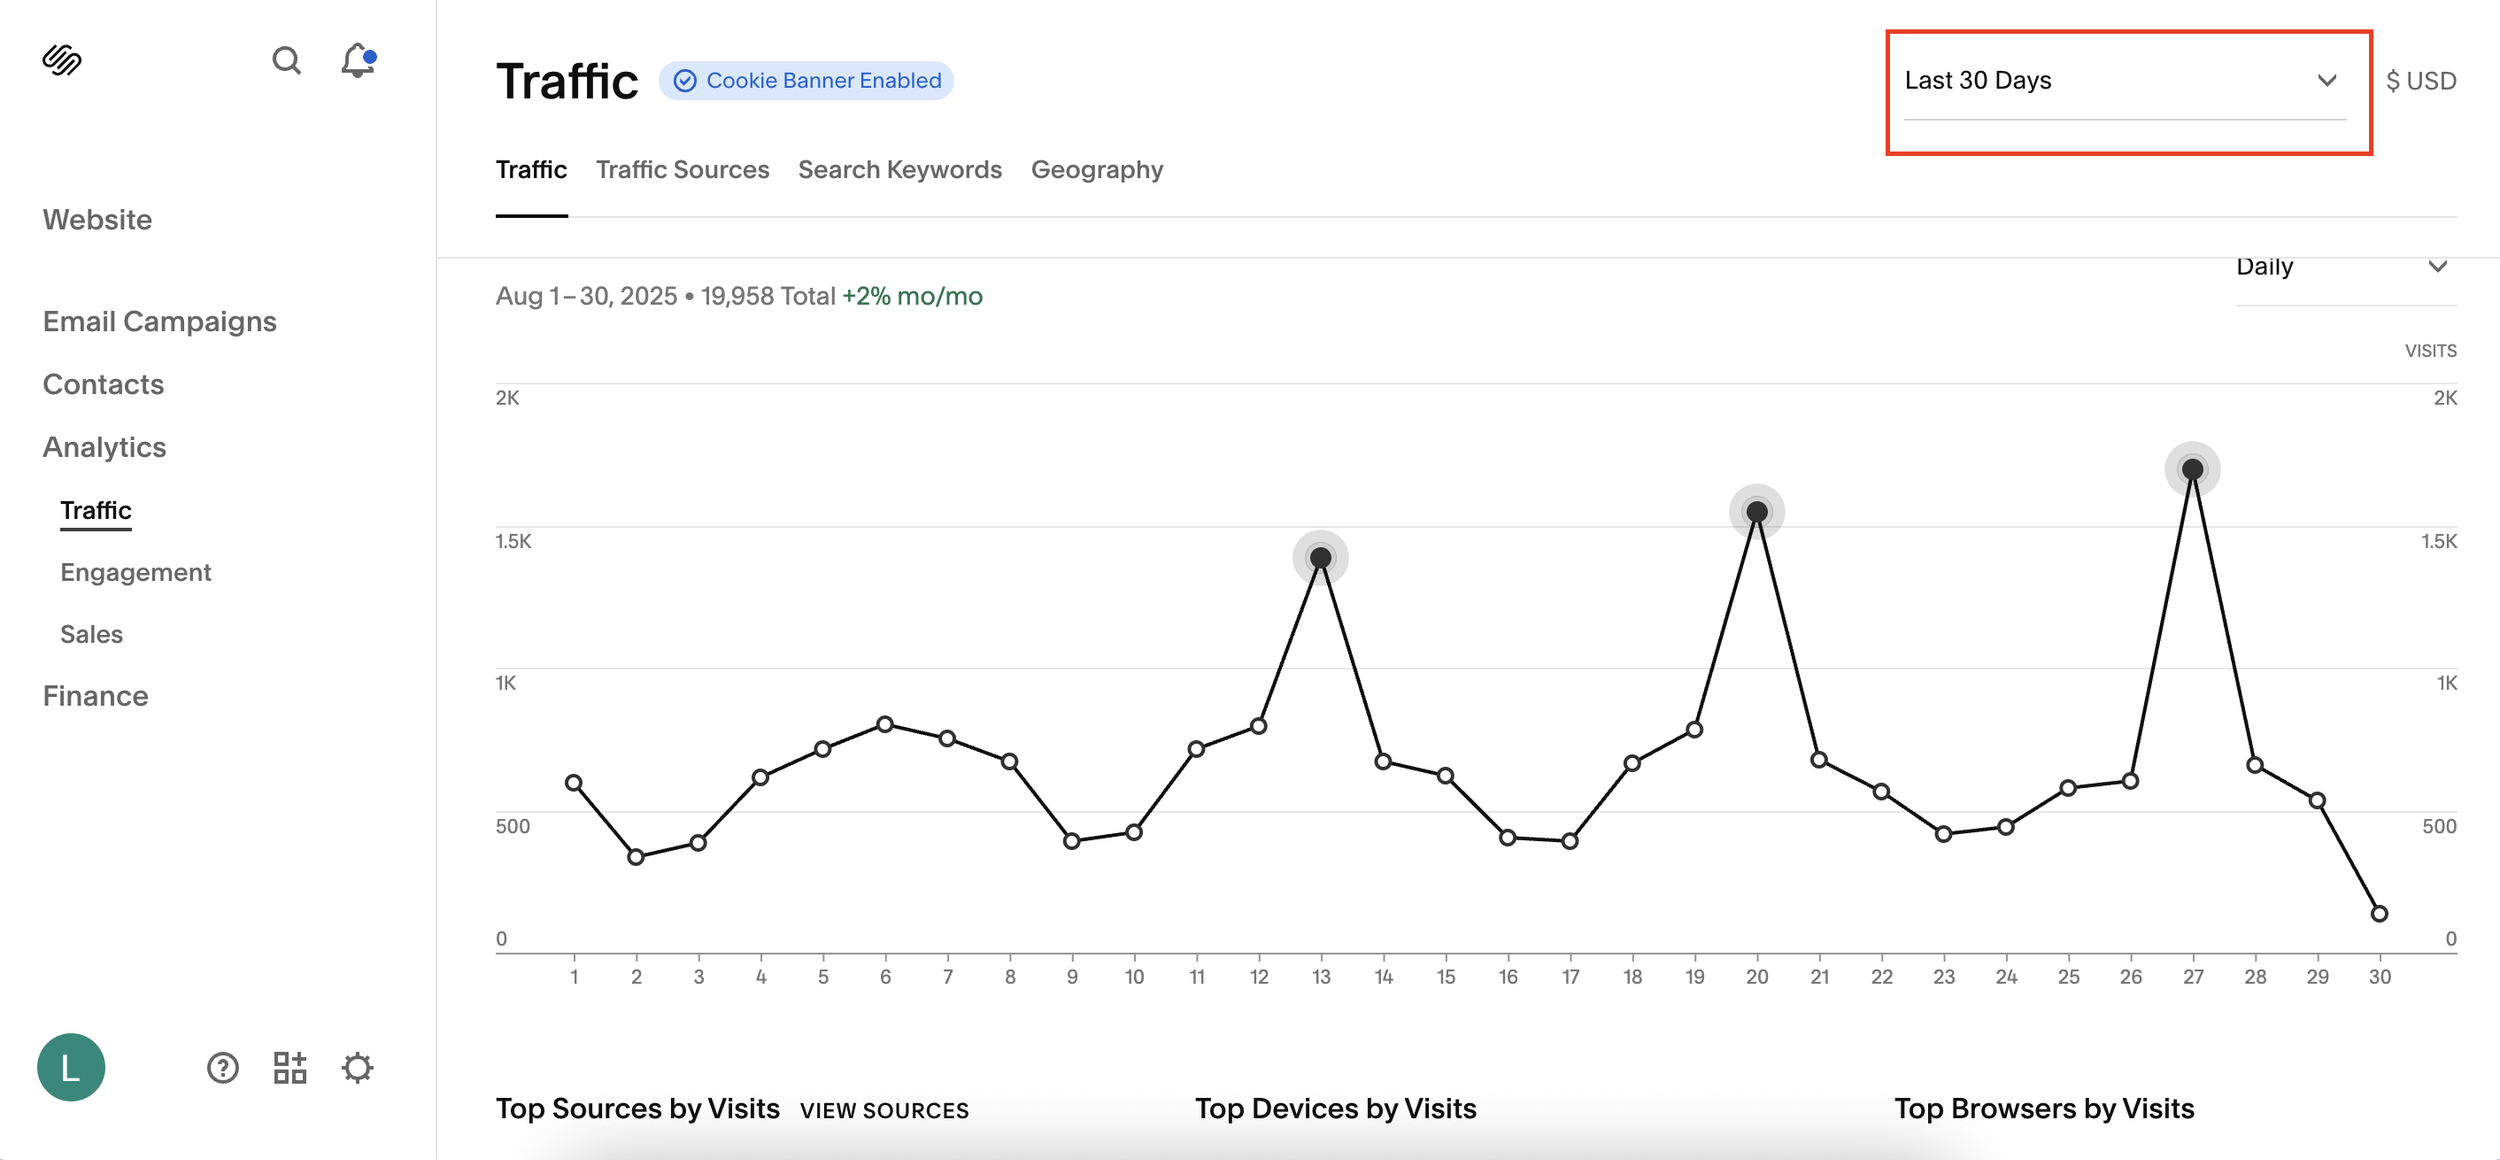
Step 4: Measure Performance with Squarespace Analytics
Head into Analytics > Traffic > Custom Date Range.
For your test week, review key metrics like:
Page visits
Click-through rates
Bounce rate
Engagement time
Pro tip: For more detailed insights, you can integrate Google Analytics or Microsoft Clarity alongside Squarespace’s built-in tools.
Step 5: Swap the Section and Repeat
Once the first week is done:
Go back to your page.
Remove the first section (don’t delete, it’s saved).
Add your second section from Saved Sections.
Run the new version for the same amount of time.
Step 6: Compare and Decide
After testing both versions, compare your data side by side:
Did the video section increase engagement?
Did the image section lower bounce rates?
Which version brought in more clicks or conversions?
Once you know which performs best, you can make it your permanent section.
Final Thoughts
Running an A/B test on Squarespace is straightforward, but it can make a big difference in how your audience interacts with your website. By testing one section at a time, you can make data-driven decisions that improve engagement and conversions.