Adding a Cookie Banner to Squarespace (Updated 2025)
If you’ve been using Squarespace for any amount of time, you’ll know the platform has a habit of shifting things around in the menu system. One of the most common casualties of this reshuffling is the cookie banner.
Recently, I noticed something new: when searching for “cookie” in Squarespace, you now get two different options. This can cause confusion, especially if you’re trying to comply with GDPR or just want your website visitors to have a smooth browsing experience.
In this guide, I’ll walk you through:
The difference between the two cookie banner options in Squarespace
How to style your cookie banner
Where to add and edit the actual cookie banner text and settingsHow to ensure your site is compliant and user-friendly
Why This Matters
With privacy regulations tightening worldwide, a properly set up cookie banner isn’t just a good practice, it’s often a legal requirement. Squarespace splitting cookie banner styling and content into two separate menus may feel confusing at first, but once you know where to look, the process is straightforward.
Want a framework for designing the perfect homepage?
Need an expert to build your Squarespace website?
Book a free kick-off call with our team to discuss your project requirements in detail.
Step 1: Finding the Cookie Banner in Squarespace
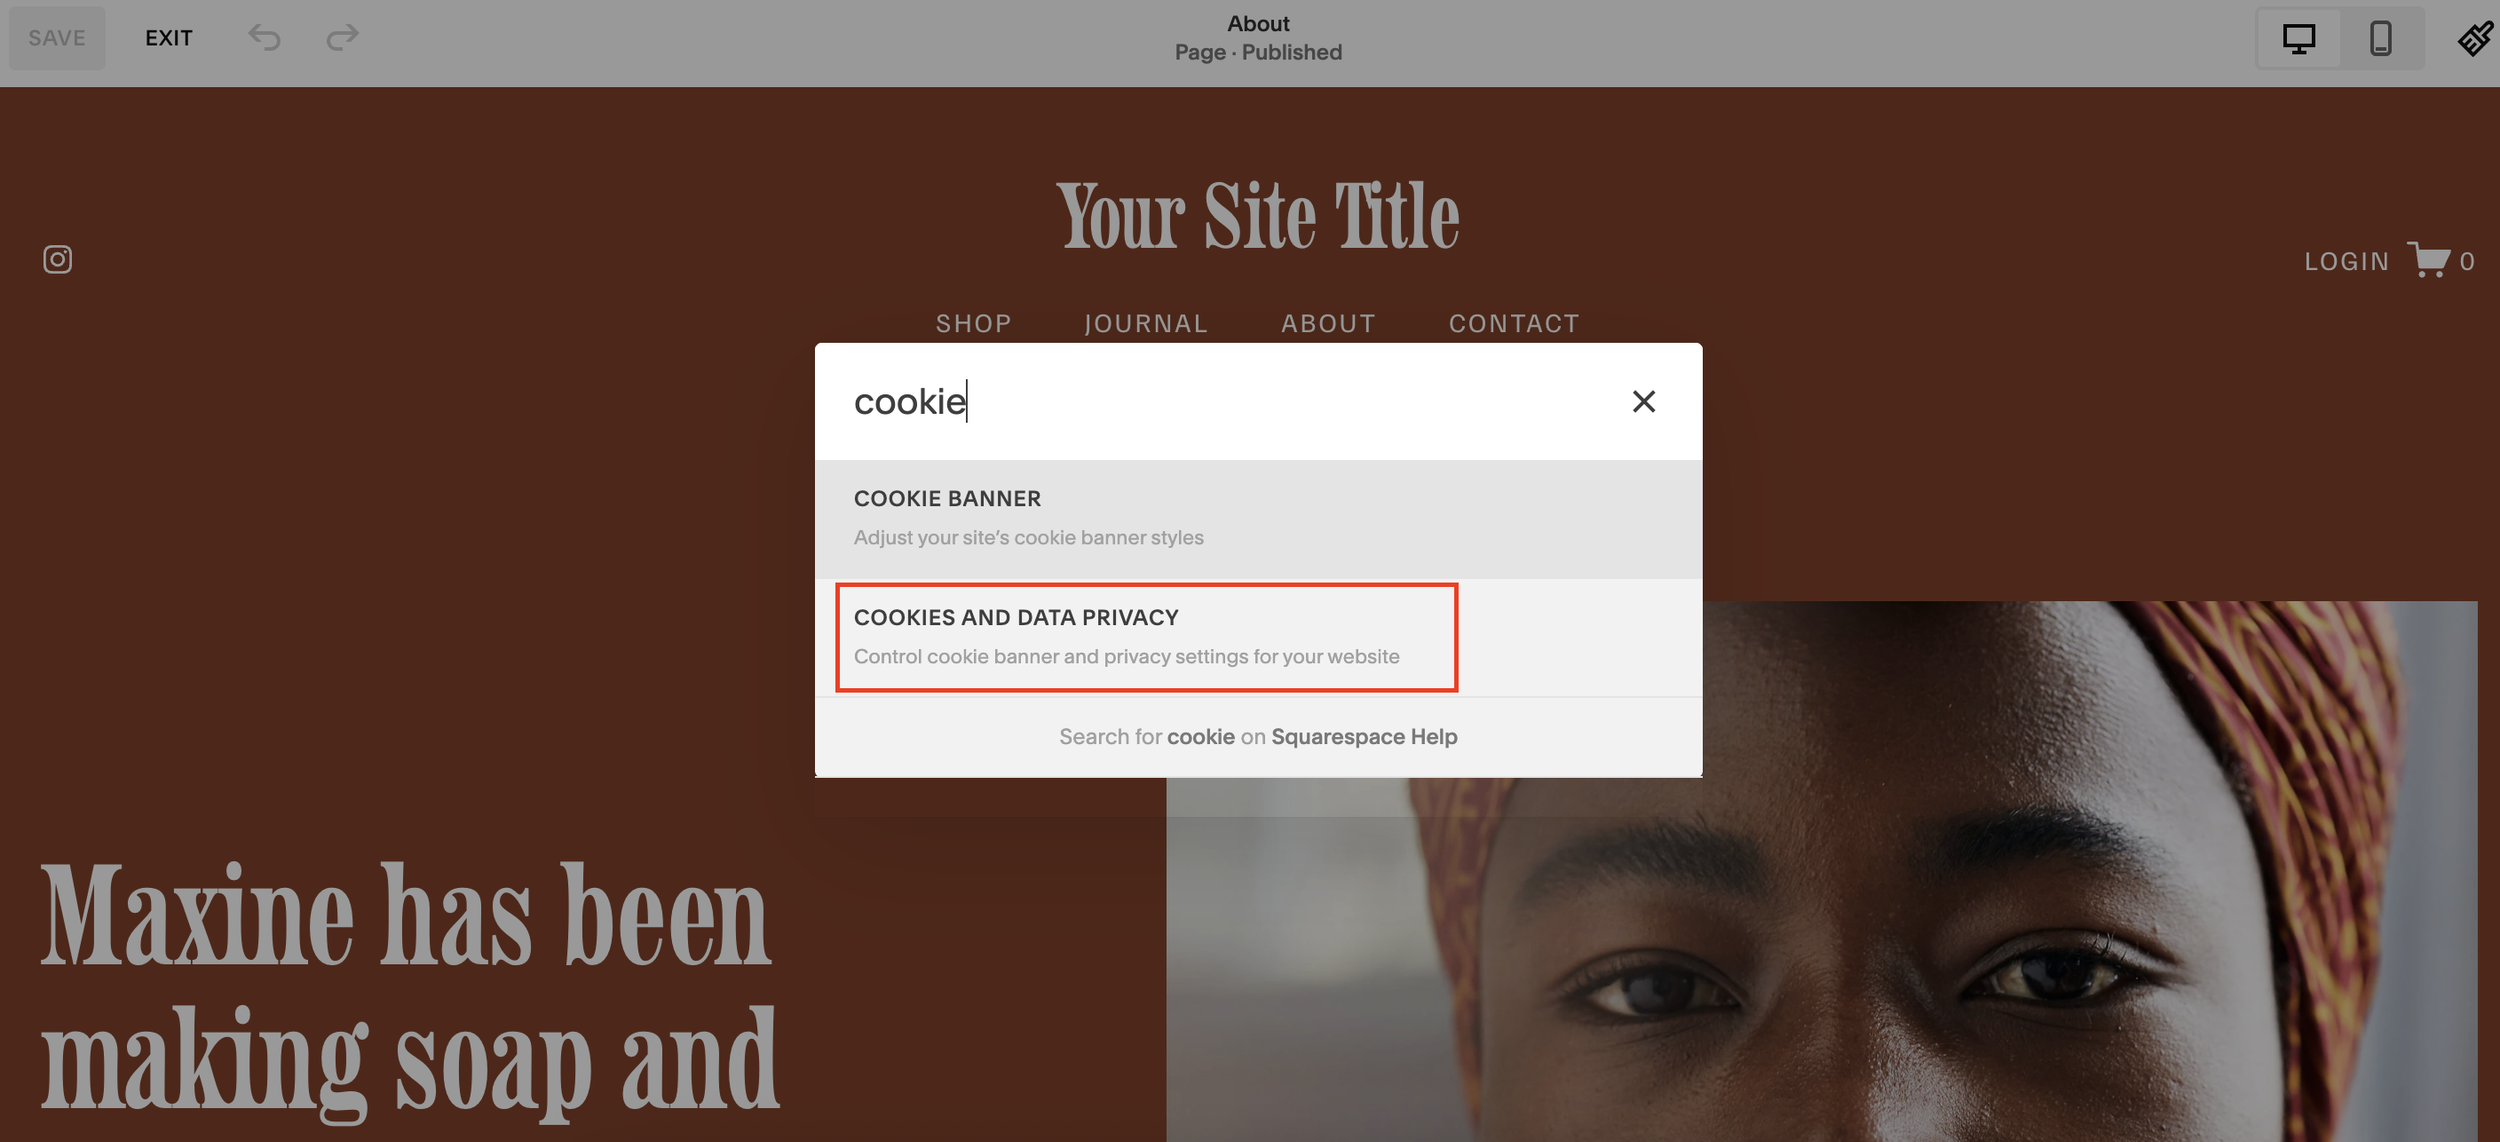
The quickest way to find cookie banner settings in Squarespace is to use the forward slash ( / ) search shortcut.
When you type in “cookie,” you’ll see two results:
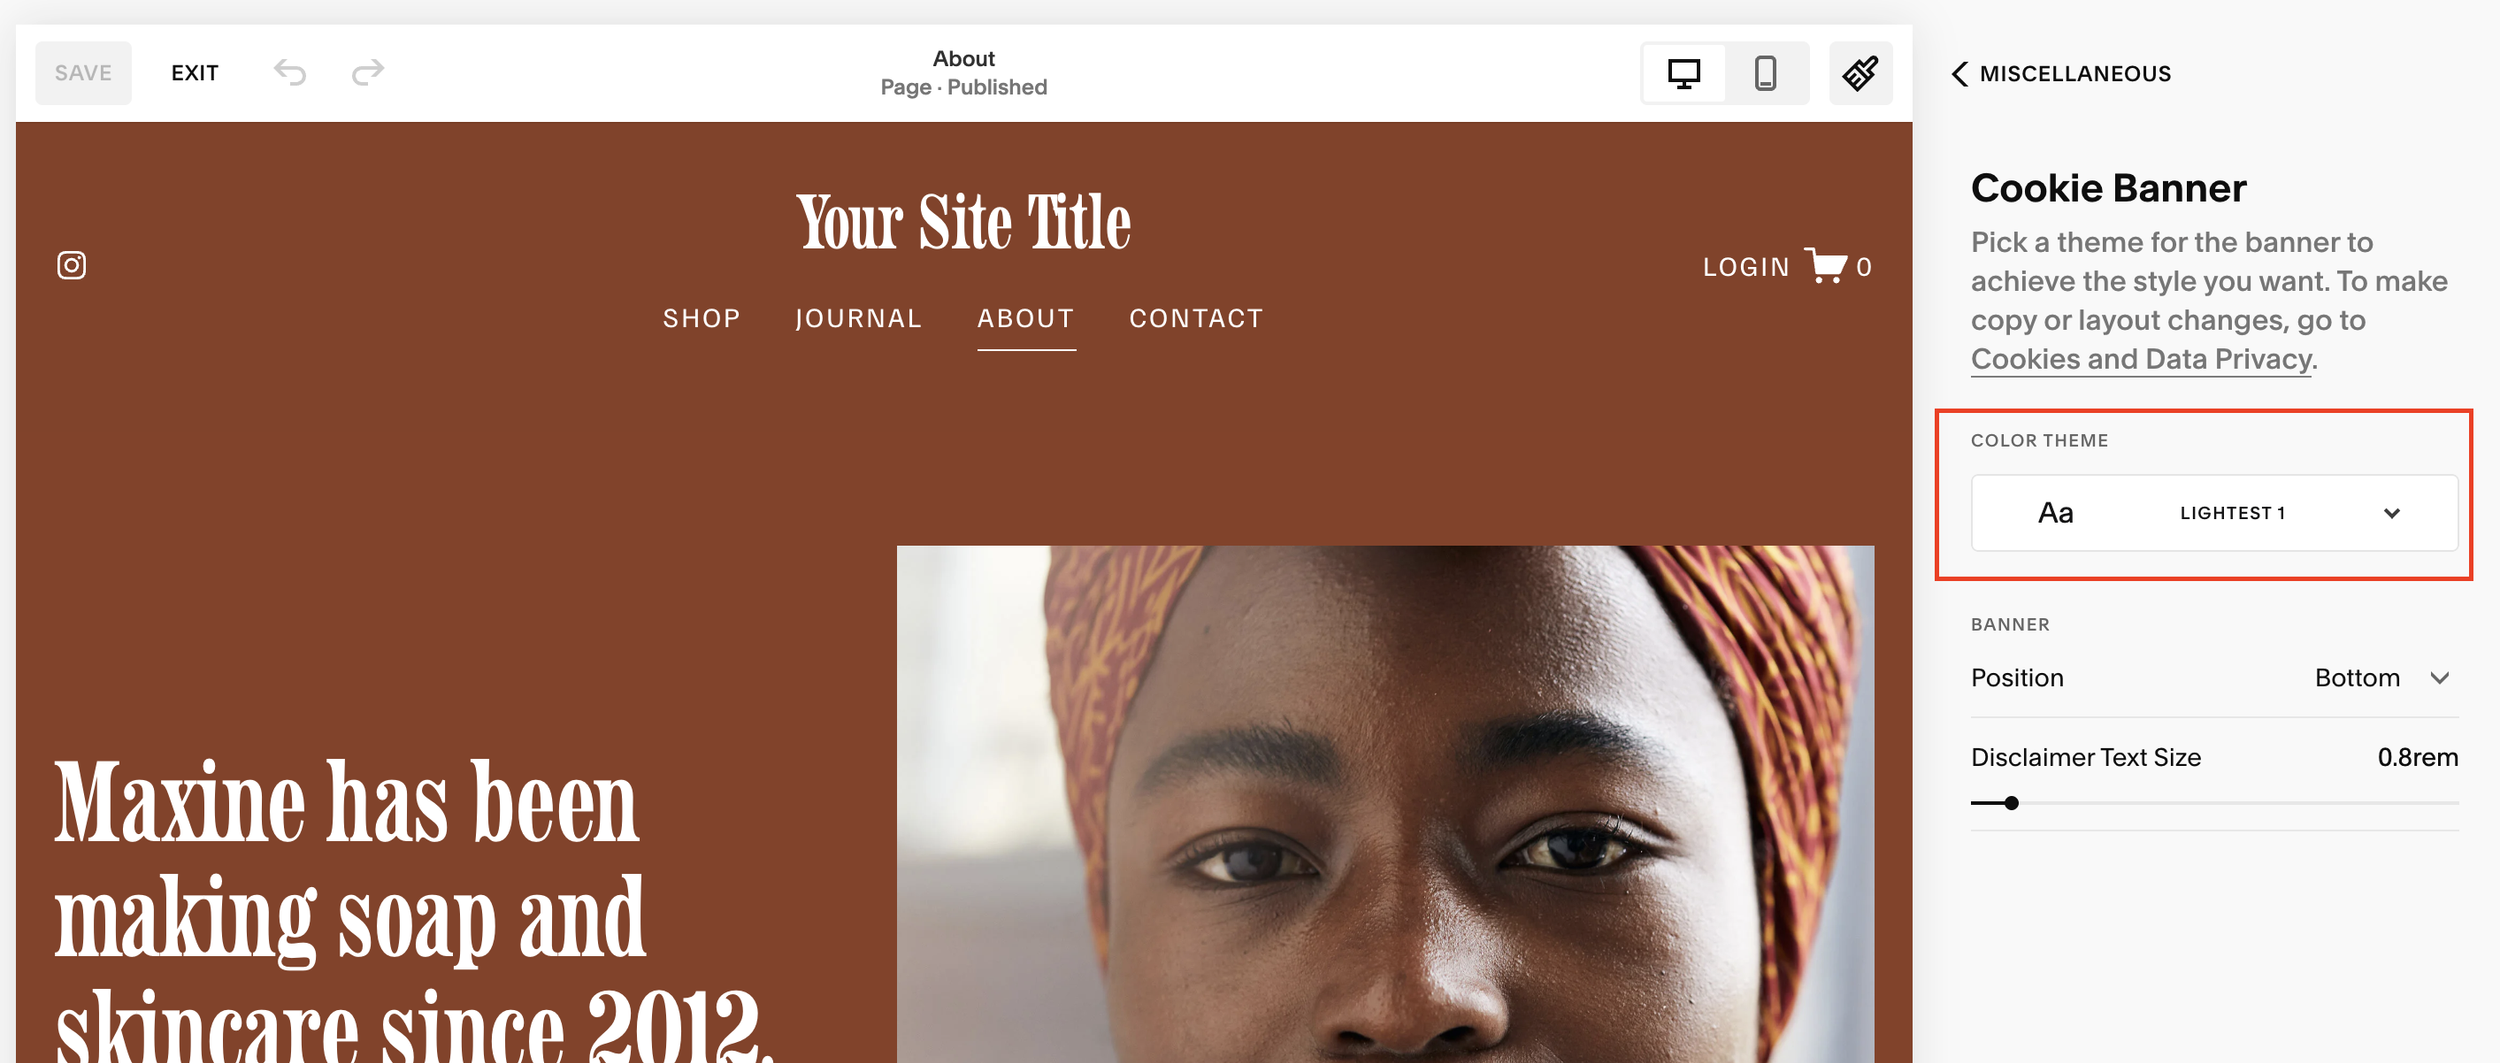
Cookie Banner - this takes you to the styling options only.
Cookies and Data Privacy - this is where you can enable, customise, and manage the content of your cookie banner.
Many users click the first option by default, but that only lets you choose placement and styling (top, bottom, left, right). The real functionality lives in the second option.
Step 2: Styling Your Cookie Banner
In the Cookie Banner styling section, you can:
Choose the banner position (bottom is most common).
Select colours that match your site’s branding.
Adjust visibility for desktop and mobile.
This is purely about the look and feel. The actual text and options come later.
Step 3: Enabling and Customising Cookie Banner Content
To add the text and functionality of your cookie banner, head to:
Settings → Website → Cookies and Data Privacy
Here, you can:
Enable the cookie banner
Add a custom message or disclaimer text (helpful if you need legally approved wording for GDPR/CCPA)
Choose whether to display:
Accept All button
Decline button (recommended for compliance)
Manage Cookies button (opens a preferences popup)
This gives visitors three clear choices: Accept, Decline, or Manage.
Step 4: Cookie Preferences Layout
Once users accept or decline, Squarespace also lets you configure the cookie preferences option:
Display it as a pill button
Or have it sit under the footer
This allows visitors to adjust their cookie settings later, a small but important detail for transparency and compliance.
Step 5: Final Settings
Before saving, double-check:
Cookie Preferences Label - usually best to leave as default
Activity Log - always toggle this on, so you have a record of user consent
Finally, hit Save. Your cookie banner is now active, styled, and compliant.
Final Thoughts
Squarespace’s cookie banner system could definitely be more intuitive, but with the right setup, you can:
Keep your site compliant
Offer visitors a clear choice
Maintain a professional, on-brand design


