


Add an Overlay Color to Images on Squarespace
If you’ve ever wanted to make your Squarespace website look more on-brand by using color overlays on your images, you’re in the right place.
A lot of my clients have really strong branding, and one thing I often see is the use of color overlays, for example, adding a blue tint to images if the brand’s primary color is blue. This not only makes your visuals look cohesive but also instantly signals to visitors: “Hey, this is our brand.”
The best part? You don’t need Photoshop or Figma to do it. You can add color overlays directly in Squarespace, quickly and easily.
Why Use Image Overlays on Squarespace?
Adding color overlays isn’t just about aesthetics, it’s a branding and usability tool. Here’s why it works so well:
Enhances brand consistency: Keeps your visuals aligned with your brand colors.
Improves readability: Helps text stand out when layered over images.
Saves time: No need to open Photoshop or Figma - edit overlays directly in Squarespace.
Easy to update: You can change overlay colors or opacity anytime without re-uploading images.

Want a framework for designing the perfect homepage?

Need an expert to build your Squarespace website?
Book a free kick-off call with our team to discuss your project requirements in detail.
Step-by-Step: How to Add a Color Overlay in Squarespace
1. Go to Your Site Editor
Start by opening your Squarespace website editor. Navigate to the page and section where your image lives.
2. Select the Image Block
Scroll to the image you want to edit and double-click on it to open the image settings.
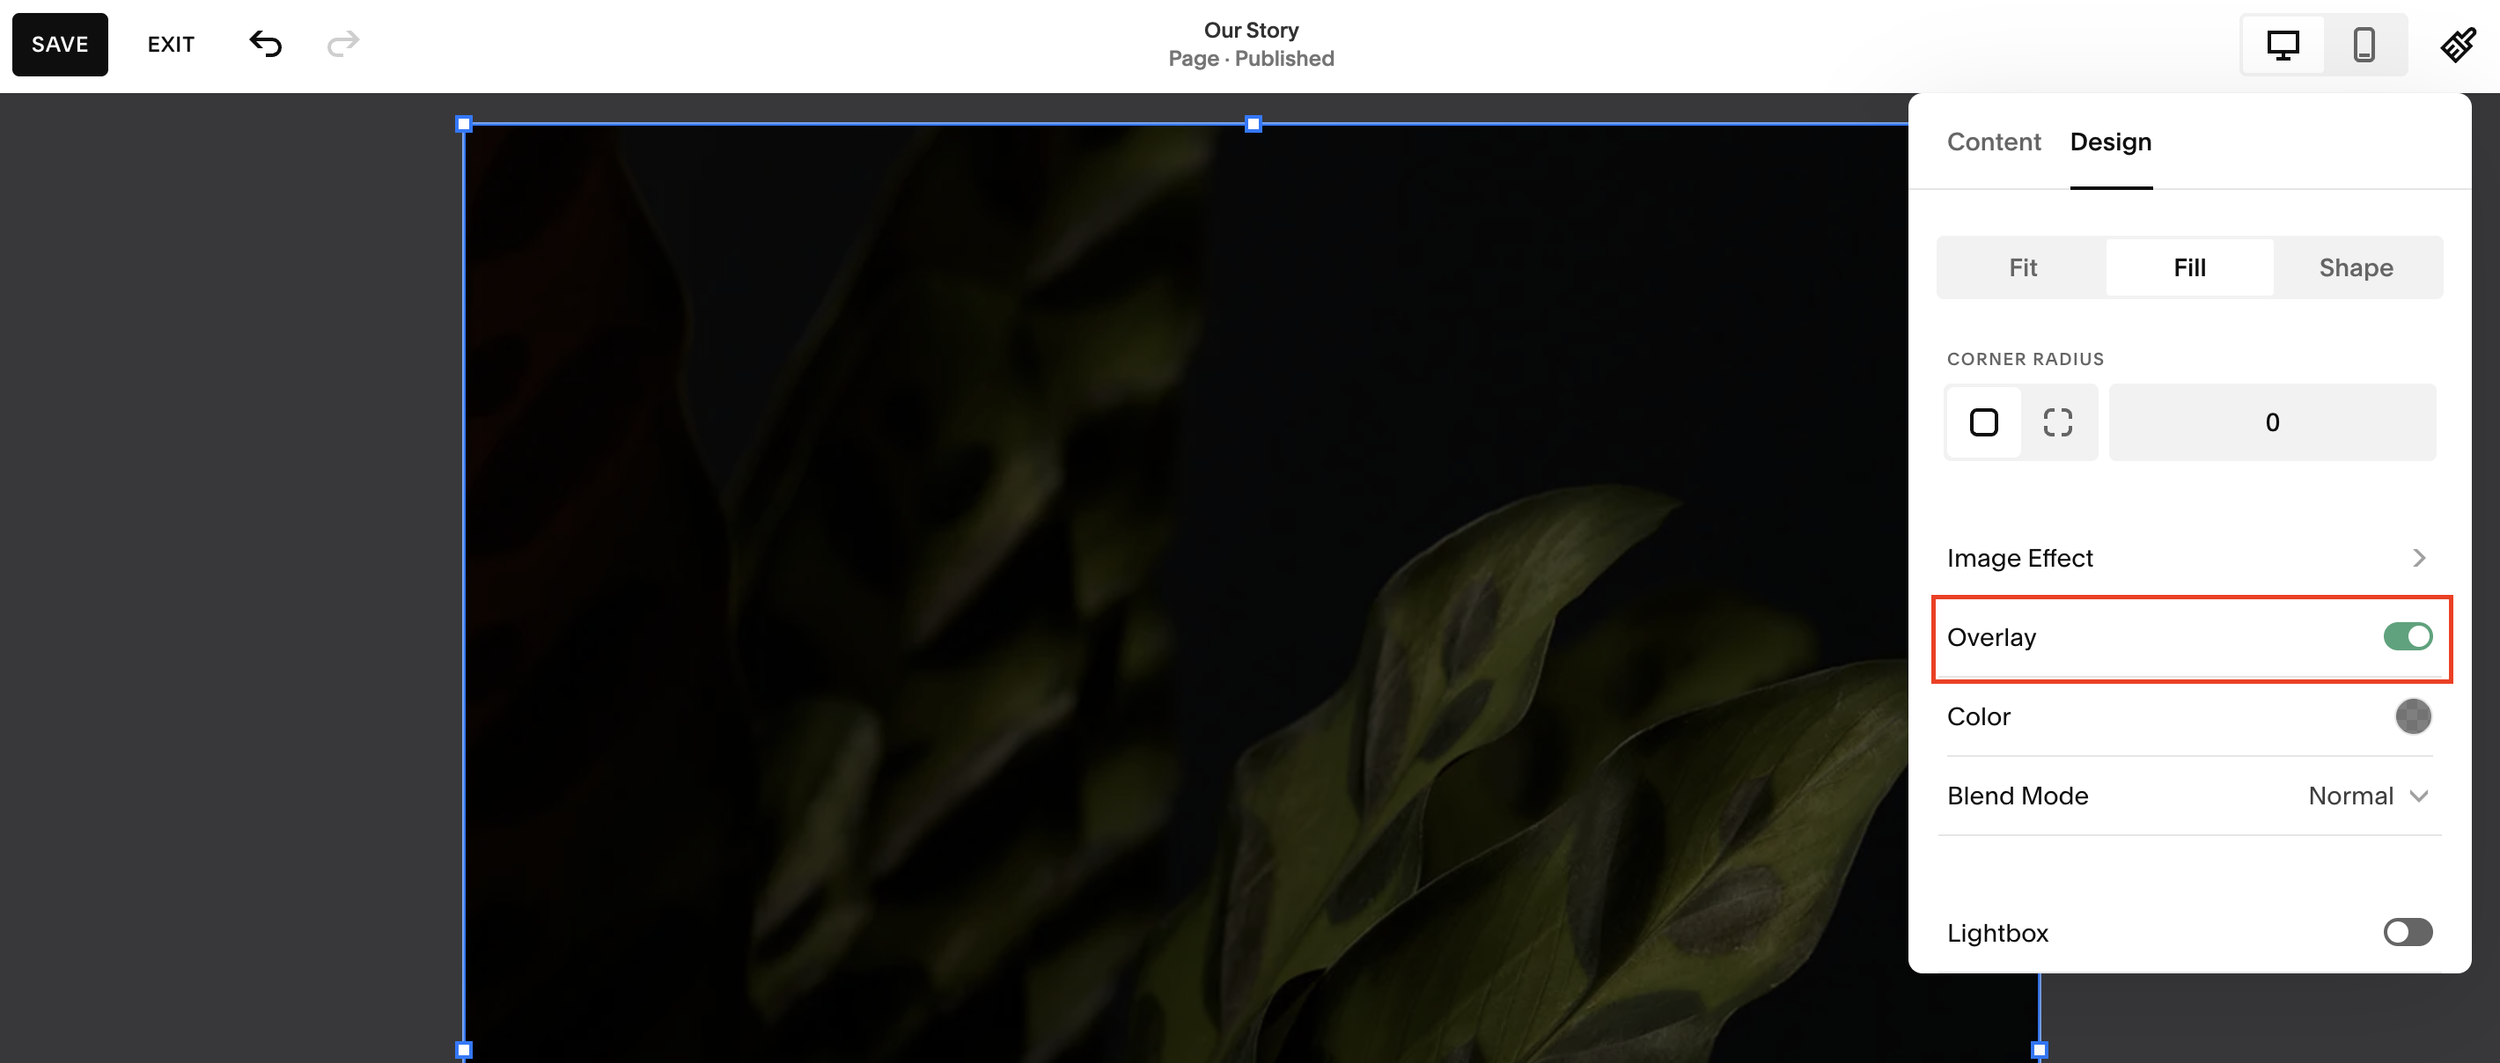
3. Go to the Design Tab
In the editor, select Design > Overlay. You’ll now see an option to toggle an overlay on or off.
4. Enable the Overlay
Switch the Overlay toggle on. This applies a standard color overlay to your image.
You’ll also see a slider that lets you adjust the opacity, from fully transparent to fully opaque. Move the slider until you find a balance where the color stands out without overpowering the image.
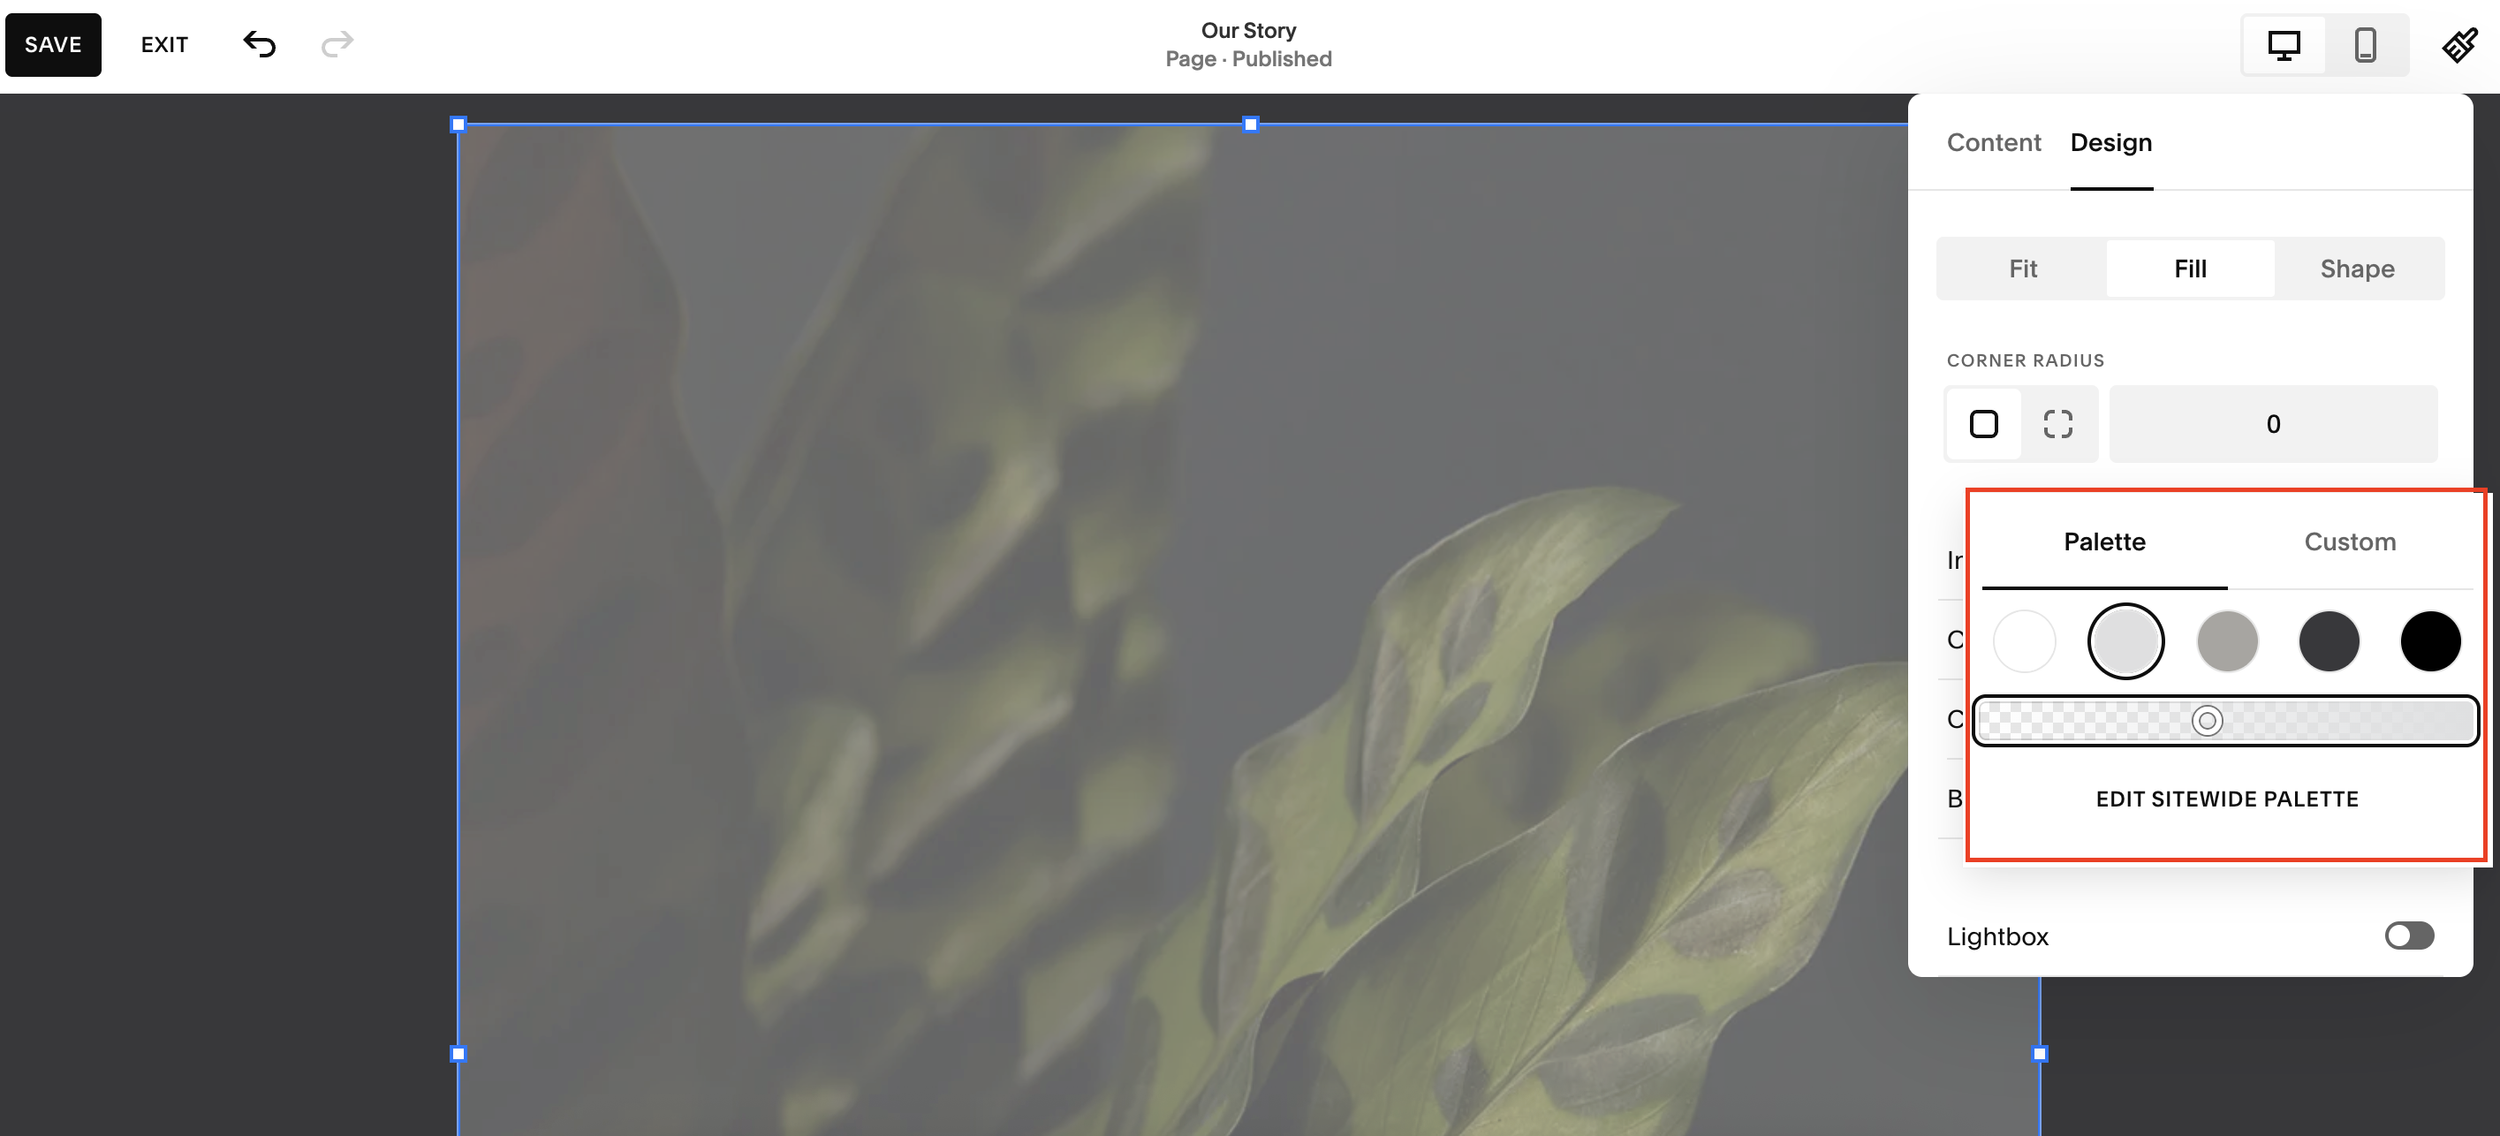
5. Choose Your Brand Color
Click the color picker to select your desired overlay color. You can:
Choose a preset from your brand color palette, or
Click Custom Color to fine-tune the exact shade you want.
For example, if your brand’s main color is blue, choose a subtle blue overlay that enhances, not hides, your imagery.
6. Adjust and Compare
You can apply different overlays to different images to create contrast or highlight specific sections.
For example:
A lighter overlay on one image
A darker overlay on another
This variation can make your design more dynamic while still keeping everything cohesive.
Why Use Image Overlays on Squarespace?
Adding color overlays isn’t just about aesthetics, it’s a branding and usability tool. Here’s why it works so well:
Enhances brand consistency: Keeps your visuals aligned with your brand colors.
Improves readability: Helps text stand out when layered over images.
Saves time: No need to open Photoshop or Figma - edit overlays directly in Squarespace.
Easy to update: You can change overlay colors or opacity anytime without re-uploading images.
Final Thoughts
And that’s it, a simple, built-in Squarespace feature that helps your site look professional and perfectly branded.
No external tools, no extra design steps, just clean, on-brand visuals that are easy to manage and update.