


Change Purchase Email Notifications on Squarespace
One of the most common misconceptions about Squarespace is that you can’t customize the email notifications your customers receive when they place an order in your online store. While it’s true that you don’t have full control over the checkout page itself, you can edit and personalize the automated emails Squarespace sends out, such as order confirmations, fulfillment updates, and subscription emails.
In this guide, I’ll walk you through exactly how to edit Squarespace email notifications to match your brand and improve your customer experience.
Why Customize Squarespace Email Notifications?
When a customer places an order on your Squarespace e-commerce store, they automatically receive emails such as receipts, order confirmations, or fulfillment updates. By default, these emails are fairly plain and don’t reflect much of your brand identity.
Customizing them can help you:
Strengthen your brand consistency
Add visuals like logos or images
Personalize the customer experience
Improve trust and engagement with buyers

Want a framework for designing the perfect homepage?

Need an expert to build your Squarespace website?
Book a free kick-off call with our team to discuss your project requirements in detail.
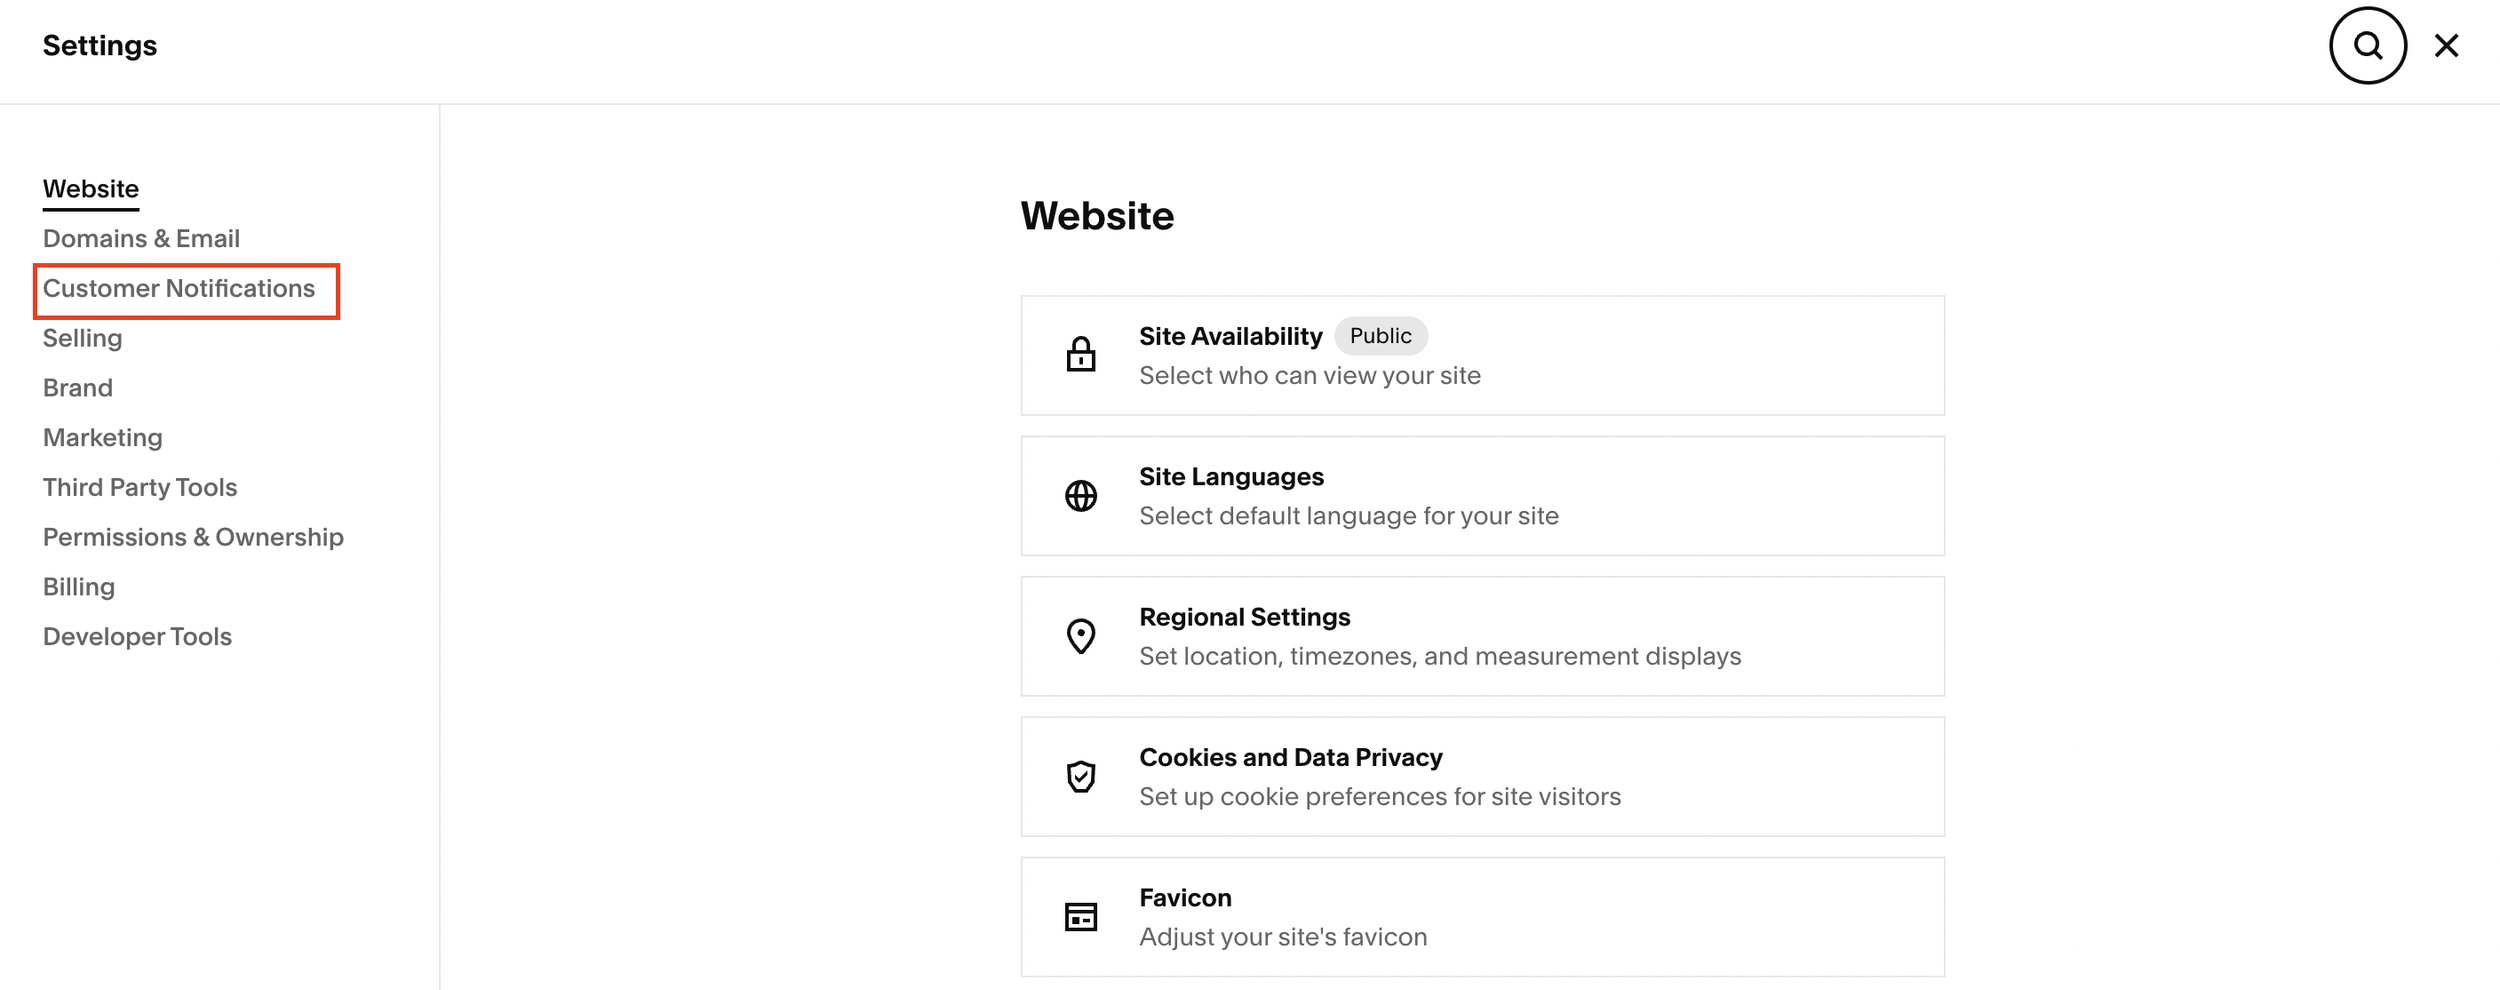
Step 1: Access Customer Notifications
To start editing your email notifications:
Go to your Squarespace dashboard.
Navigate to Settings.
Look for Customer Notifications.
Here you’ll see your Global Email Styles (colors, button styles, and fonts) as well as deeper options for different types of notifications.
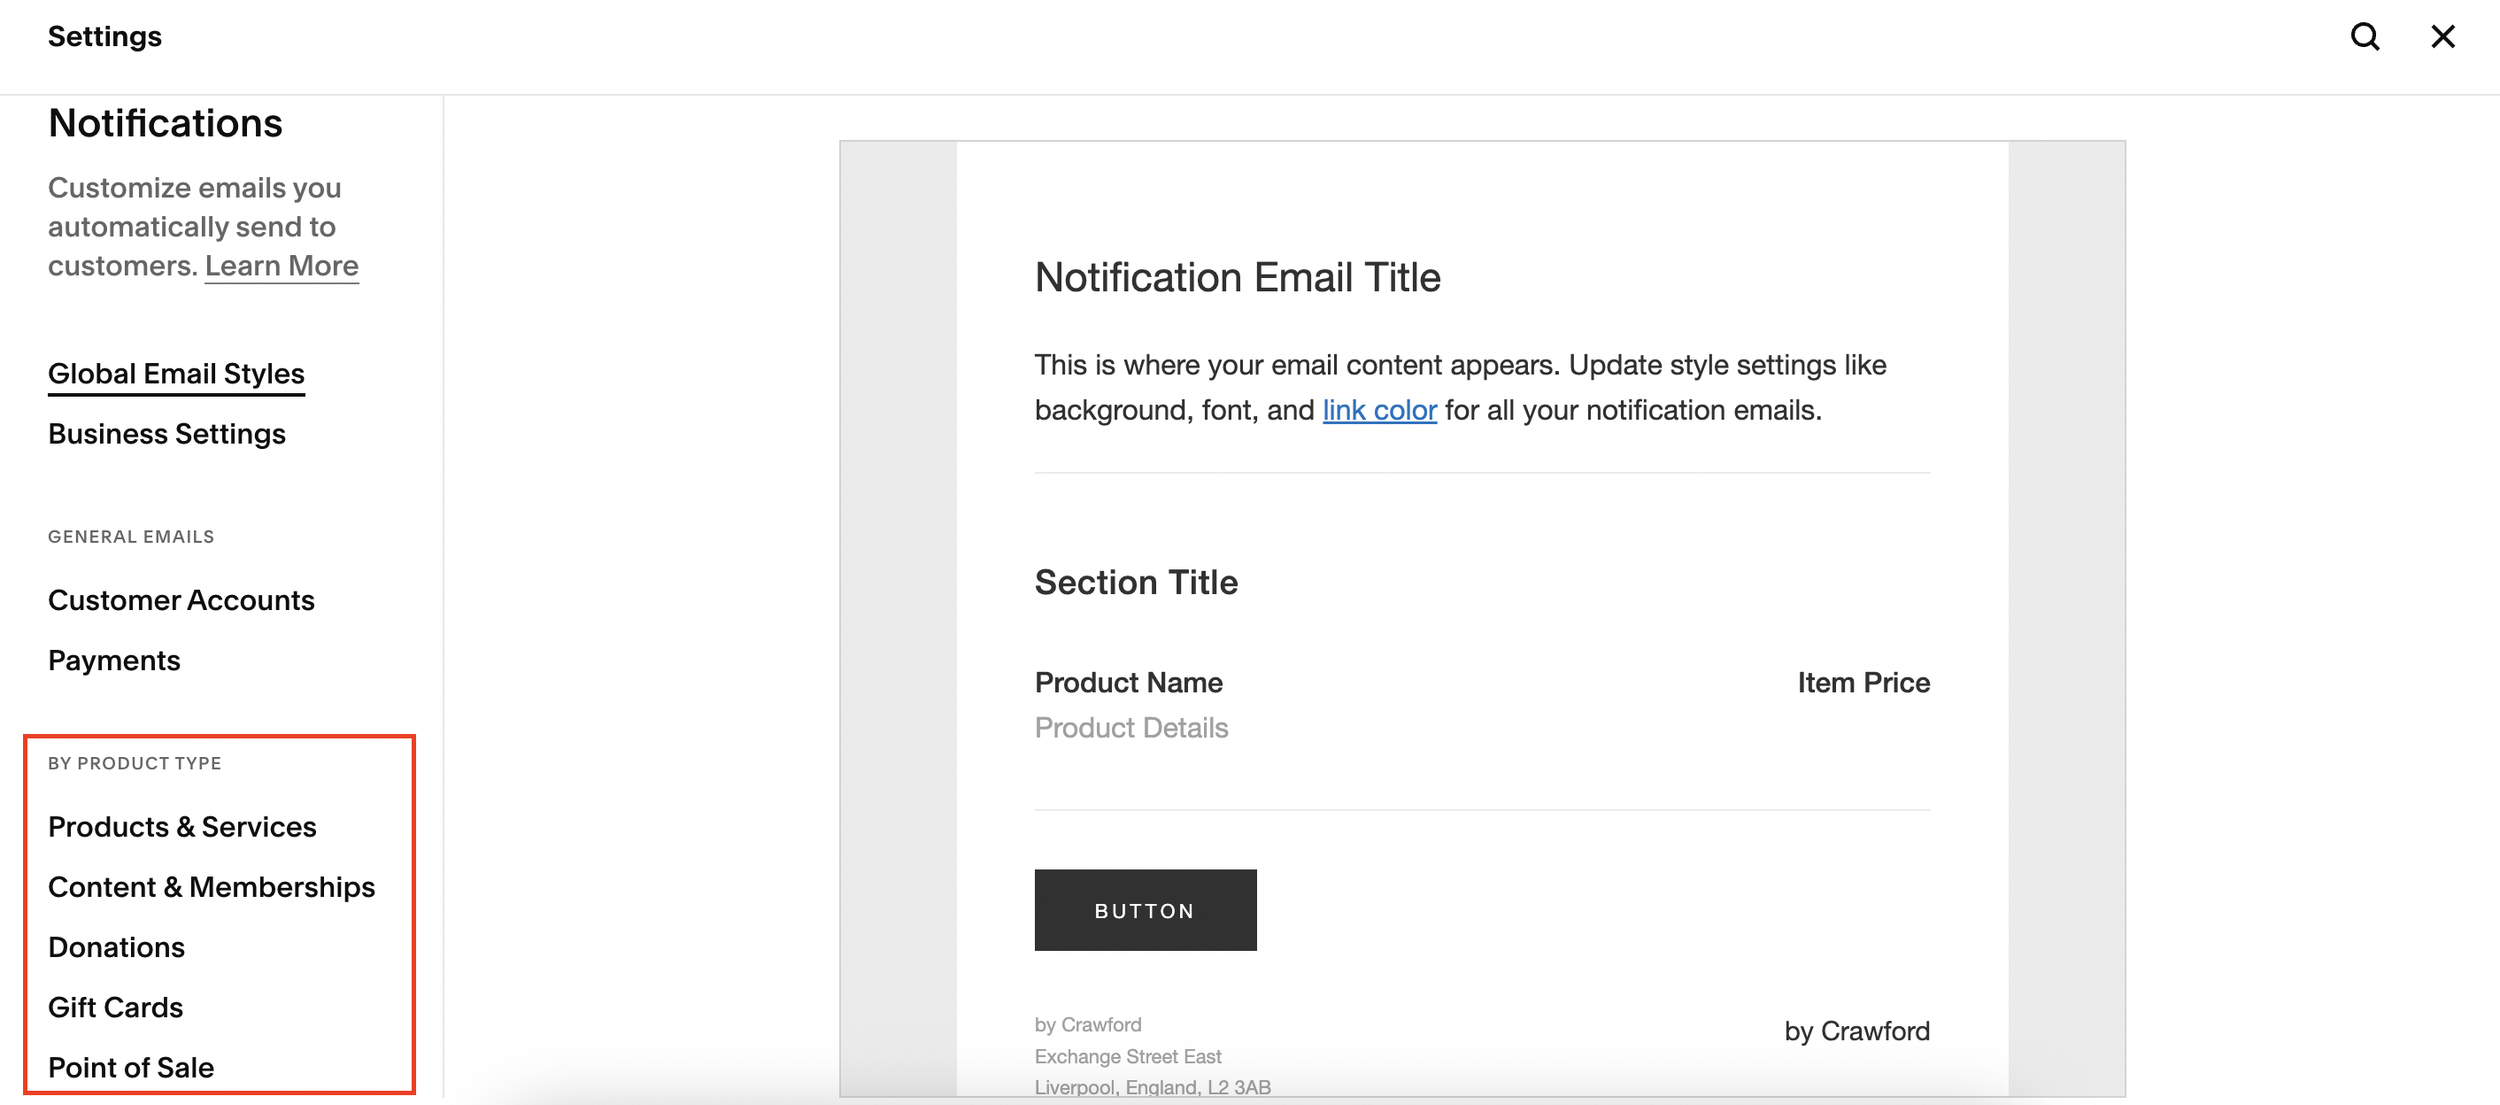
Step 2: Choose Which Emails to Edit
Depending on what you sell, you’ll find different categories under customer notifications:
Products & Services (for online stores)
Content & Memberships (for subscriptions and gated content)
Inside the products section, you can edit emails such as:
Order Confirmed
Fulfillment Emails
Subscription Order Emails
Customer Engagement Emails
Each template is independent, so changes in one won’t affect the others.
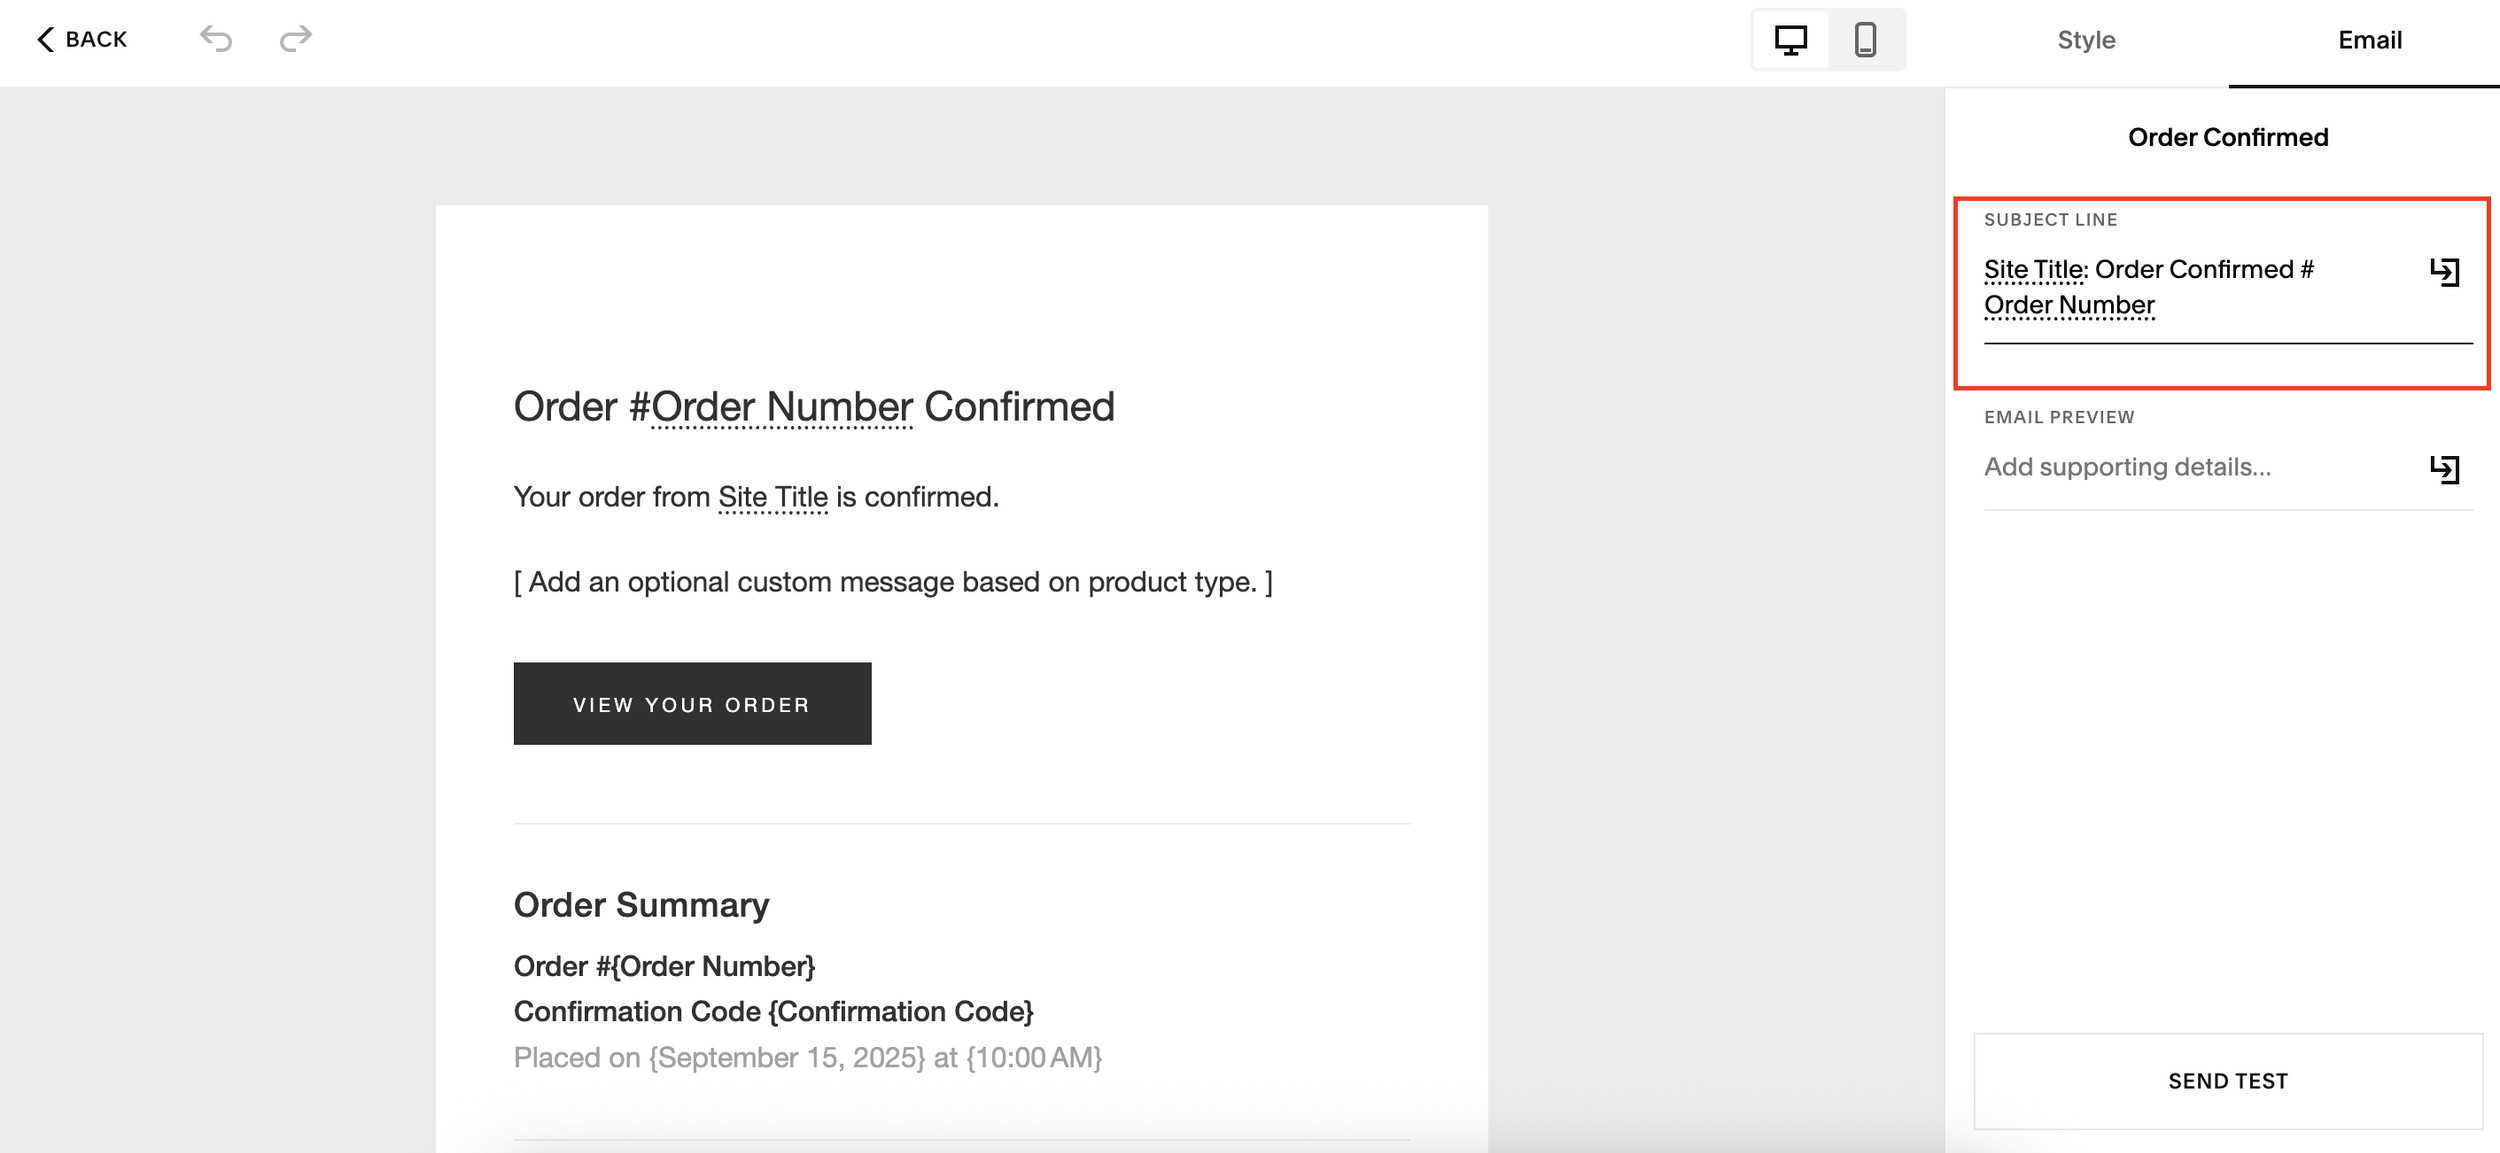
Step 3: Edit the Email Template
When you click on an email (for example, Order Confirmed), you’ll be able to edit it just like you would with a Squarespace email campaign.
Here’s what you can do:
Add sections: Insert images, text blocks, spacers, or buttons.
Upload graphics: Add your logo or product images for a branded look.
Customize text: Replace the default “Order #123” with something more personal, like “Thank you for your order!”.
Adjust layout: Move sections around or prioritize the order summary at the top.
Tweak spacing & dividers: Change padding and line styles for a cleaner design.
Note: The order summary block itself can’t be fully customized (since it’s essential for accuracy), but you can move it within the email layout.
Step 4: Update Subject Line and Preview Text
Squarespace also lets you edit the email subject line and preview text, which appear in your customer’s inbox. This is a great opportunity to:
Make your emails stand out
Reinforce your branding
Add a touch of personality
For example:
Subject: “Your order is on the way 🚀”
Preview text: “We’re excited to get your package to you as quickly as possible.”
Step 5: Save and Publish Your Changes
Once you’re happy with your edits, simply click Save. Your changes will be applied immediately, and customers will start receiving your updated email design right away.
Limitations to Keep in Mind
While Squarespace does give you flexibility, there are a few restrictions:
You can’t insert blog posts or advanced custom blocks into these emails.
Buttons and styling options are tied to your Global Email Styles.
The order summary must remain intact for clarity.
Still, with a little creativity, you can design emails that look professional and reflect your brand.
Final Thoughts
Customizing Squarespace customer email notifications is an underrated way to improve your online store’s professionalism and customer experience. With a few edits, you can transform plain transactional emails into branded, engaging messages that leave a lasting impression.