


Creating a Client-Only Page on Squarespace
If you run a business and want to securely share private information with clients, such as reports, files, or project updates, Squarespace makes it simple to set up a client-only page.
This feature is perfect for finance firms, design agencies, consultants, and service-based businesses that need to create private access for their clients.
In this guide, I’ll walk you through exactly how to create a hidden, password-protected page in Squarespace that only your client can access.
Why Create a Client-Only Page in Squarespace?
There are many reasons you may want to create private pages for your clients:
Finance firms - sharing confidential reports.
Design agencies - showcasing draft projects or mockups.
Coaches or consultants - providing personalized resources.
Law firms - giving clients secure access to documents.
Instead of cluttering your main navigation with dozens of client pages, you can hide them from the public and ensure only the right client can view them.

Want a framework for designing the perfect homepage?

Need an expert to build your Squarespace website?
Book a free kick-off call with our team to discuss your project requirements in detail.
Step 1: Create a Hidden Page in Squarespace
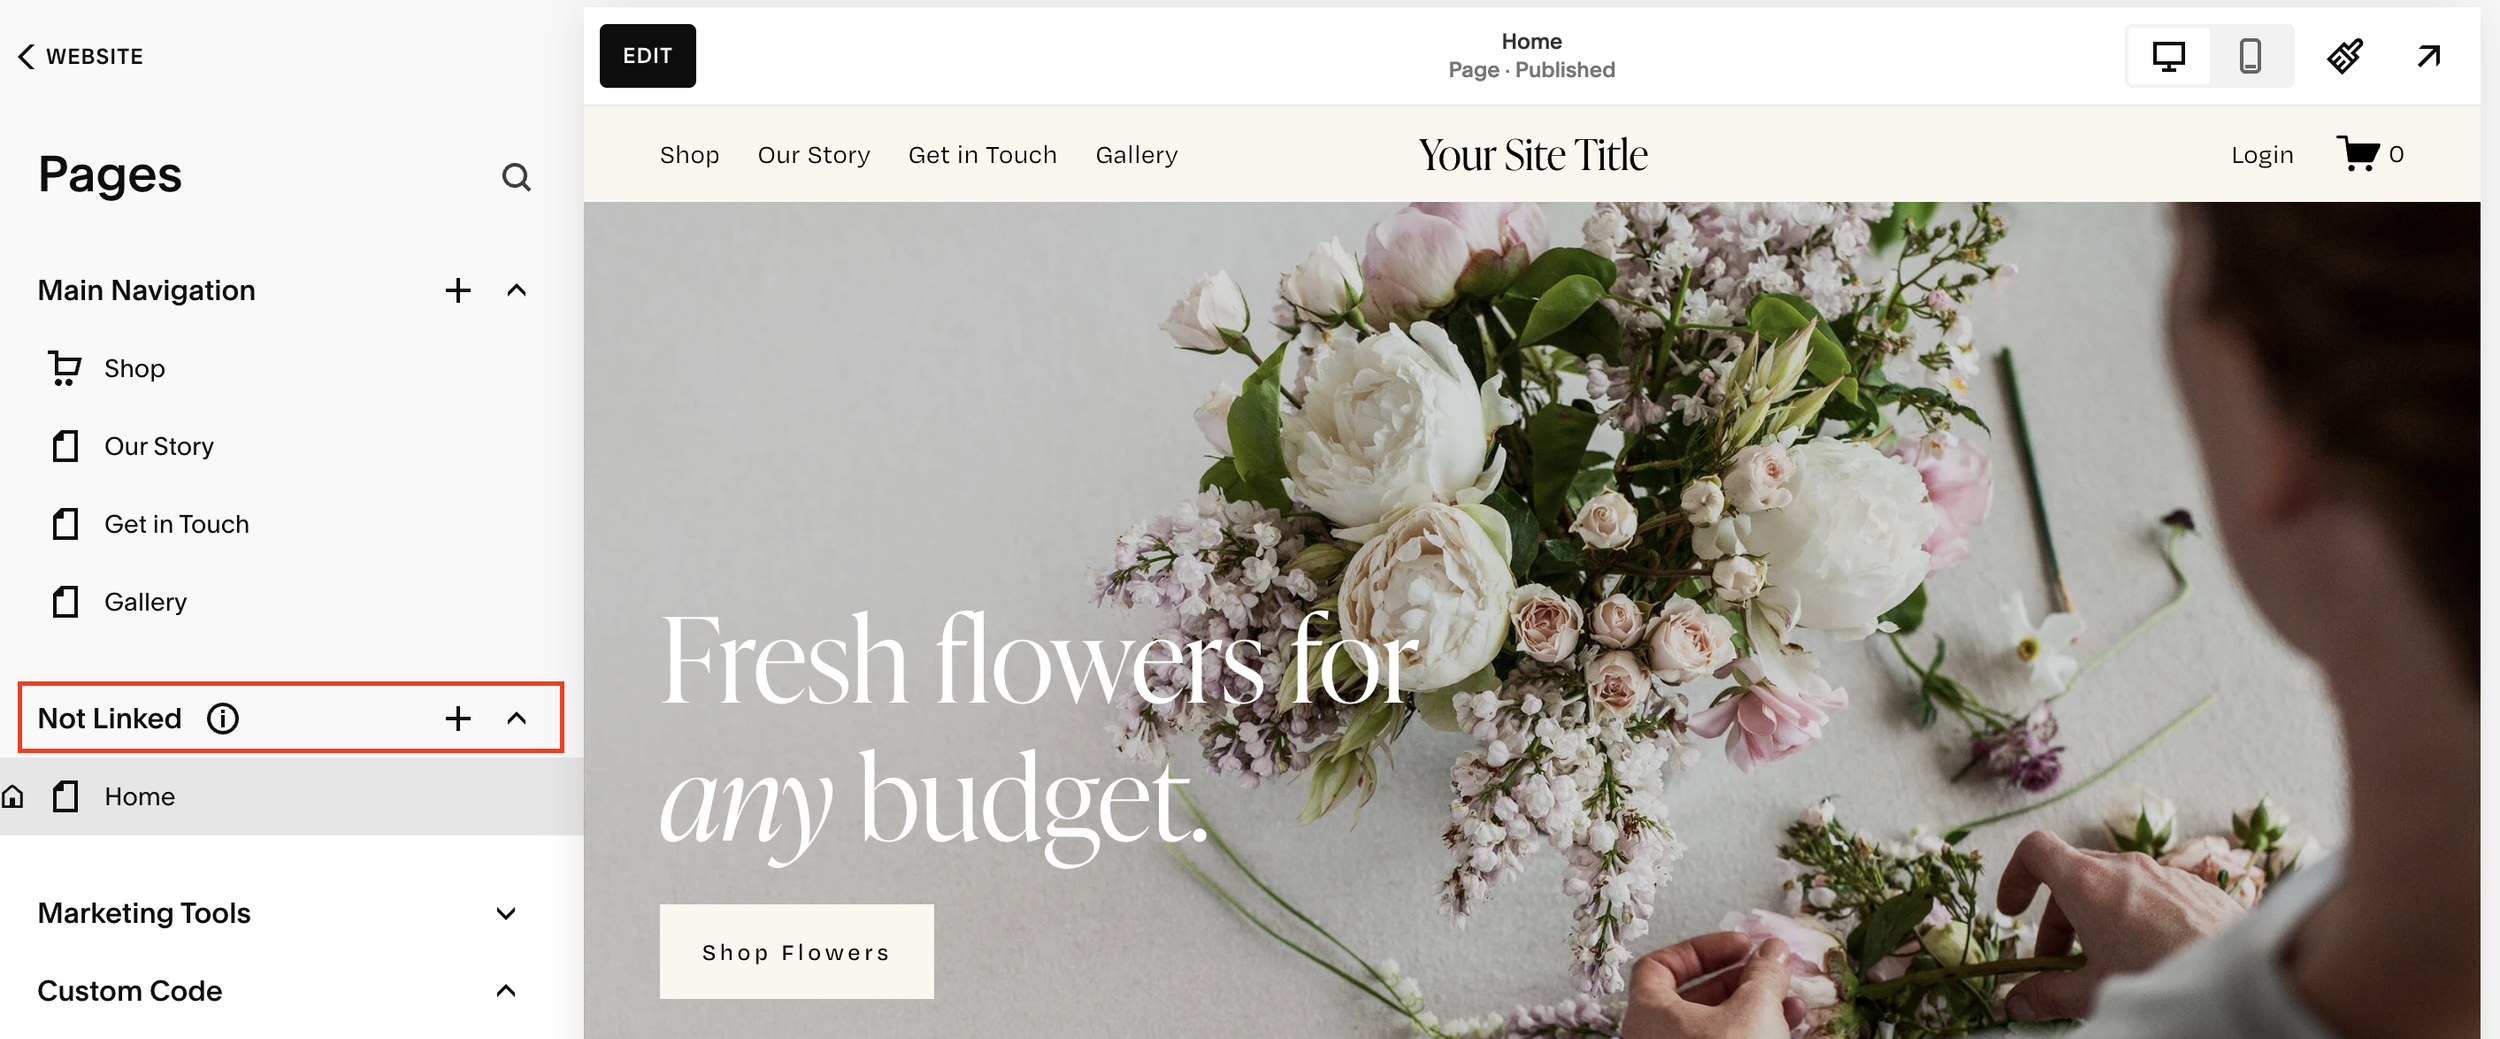
In your Squarespace dashboard, go to Pages.
Scroll to the Not Linked section, this is where you’ll keep private pages that don’t appear in your main navigation.
Click the + button and create a Blank Page.
Name it something like “Client One Report.”
This page won’t be visible in your site’s navigation, so you can create as many as you need without cluttering your website.
Step 2: Add Content for Your Client
Click Edit and start adding content to the page. This could include:
Text, images, or video updates.
Downloadable files or reports.
Custom sections tailored to your client’s needs.
Don’t worry about the design being perfect for now, you can use templates or simple layouts.
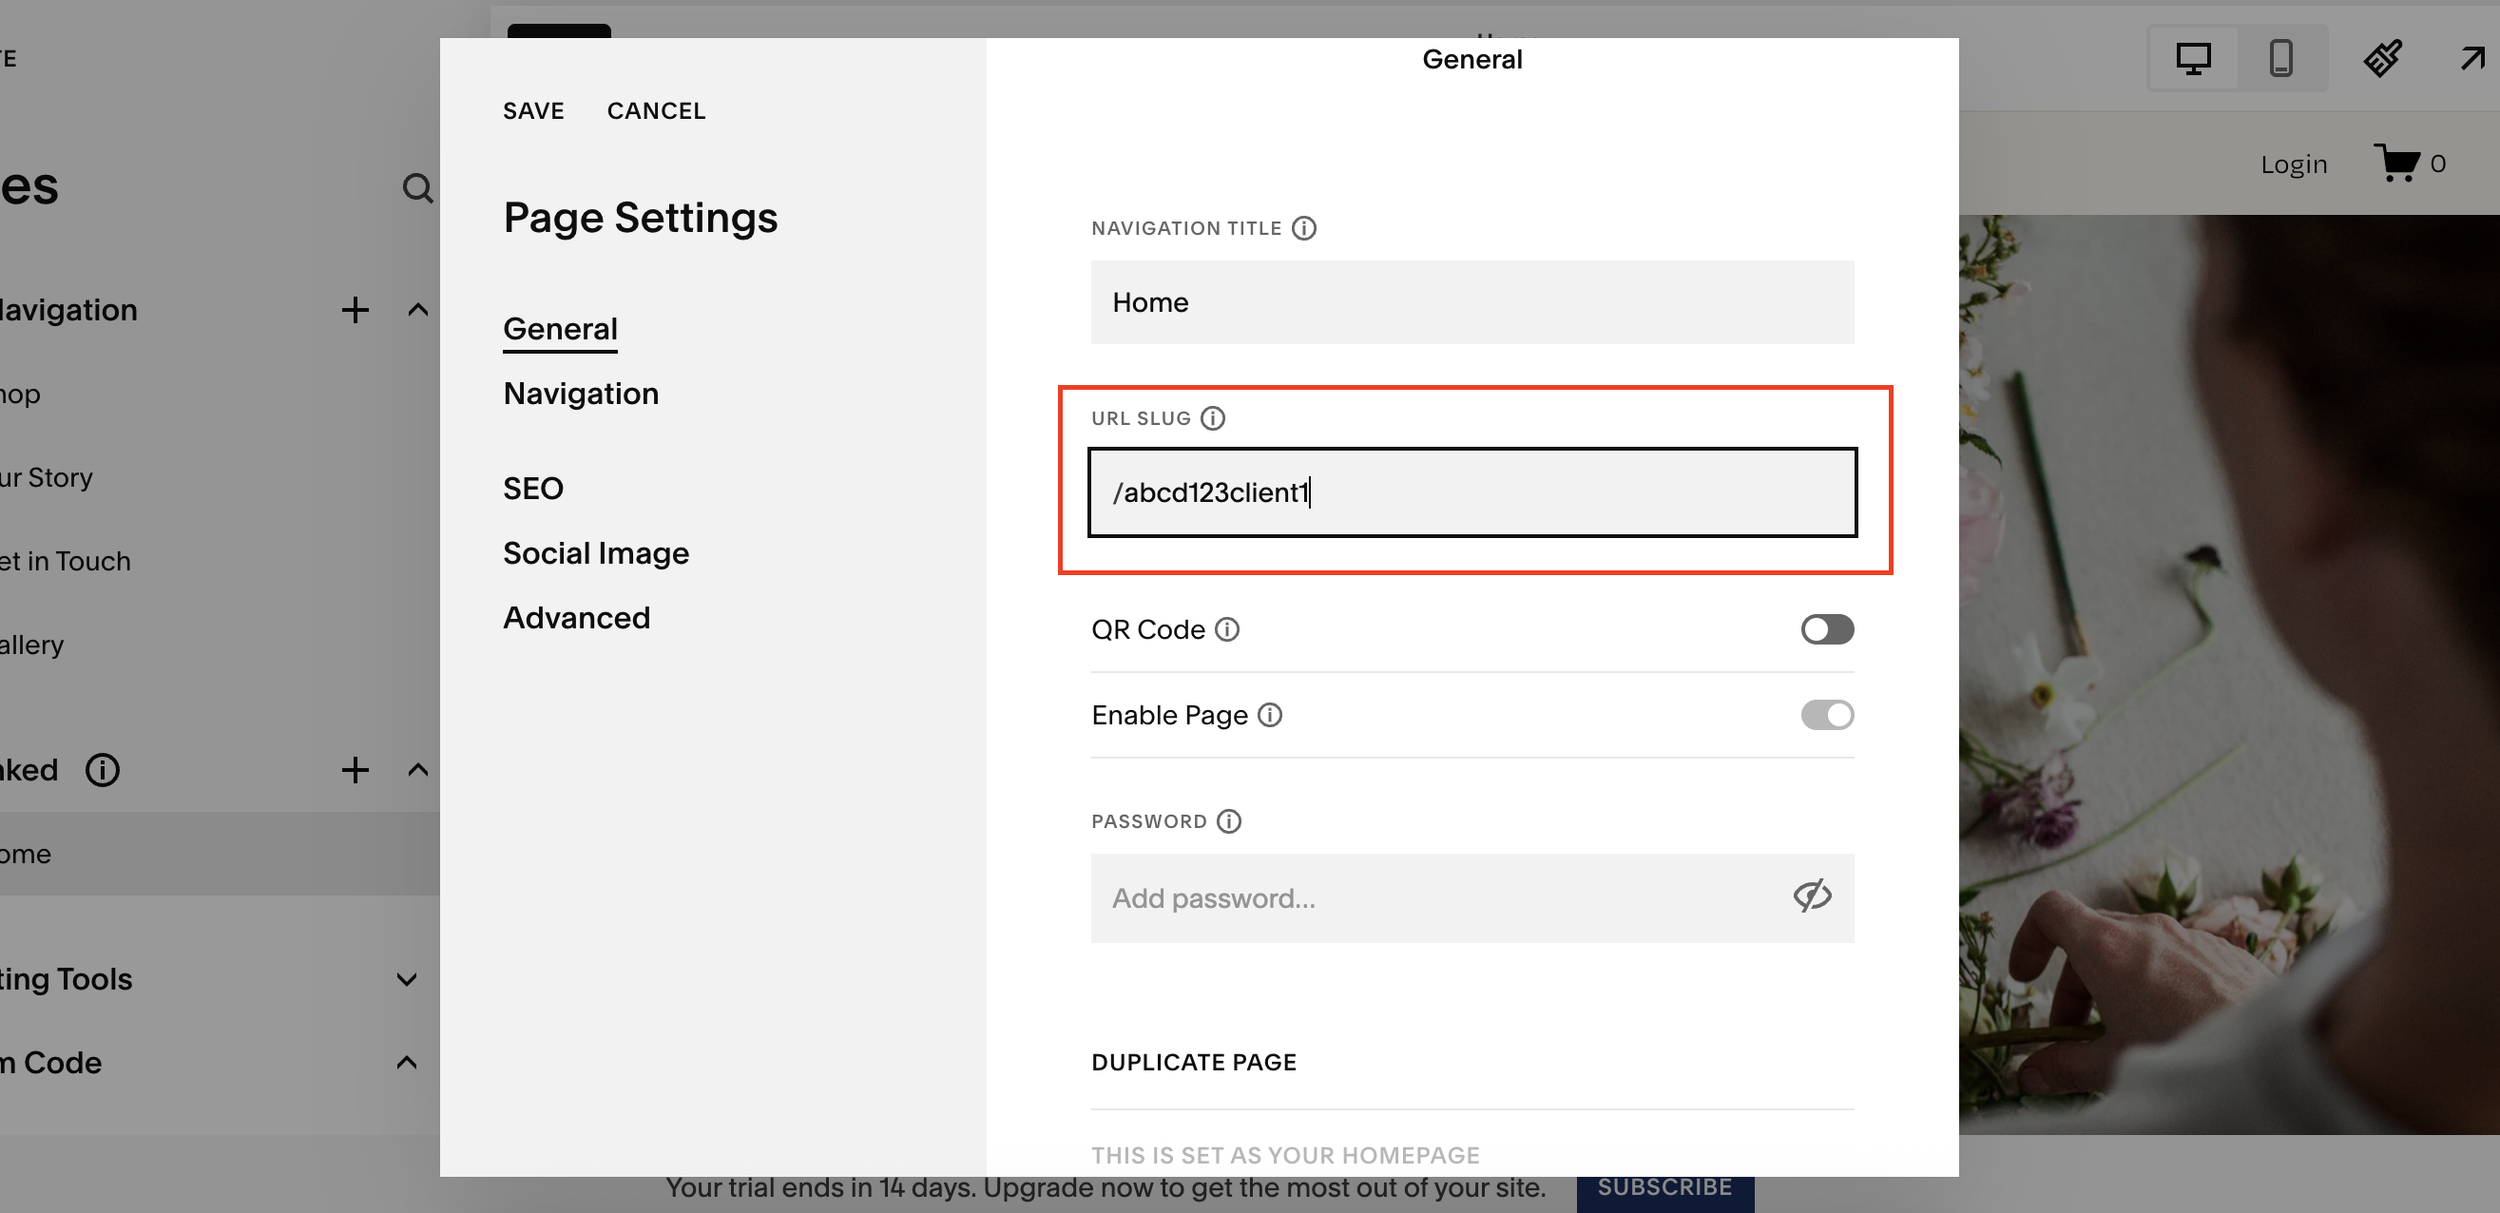
Step 3: Create a Unique URL Slug
Next, you’ll want to give the page a unique link that only your client will have.
Click the Settings Cog on the page.
Under URL Slug, replace the default name with a random sequence of letters and numbers (e.g. abc123-client1).
Click Save.
Now your client can access the page through a unique URL, but it still needs another layer of security.
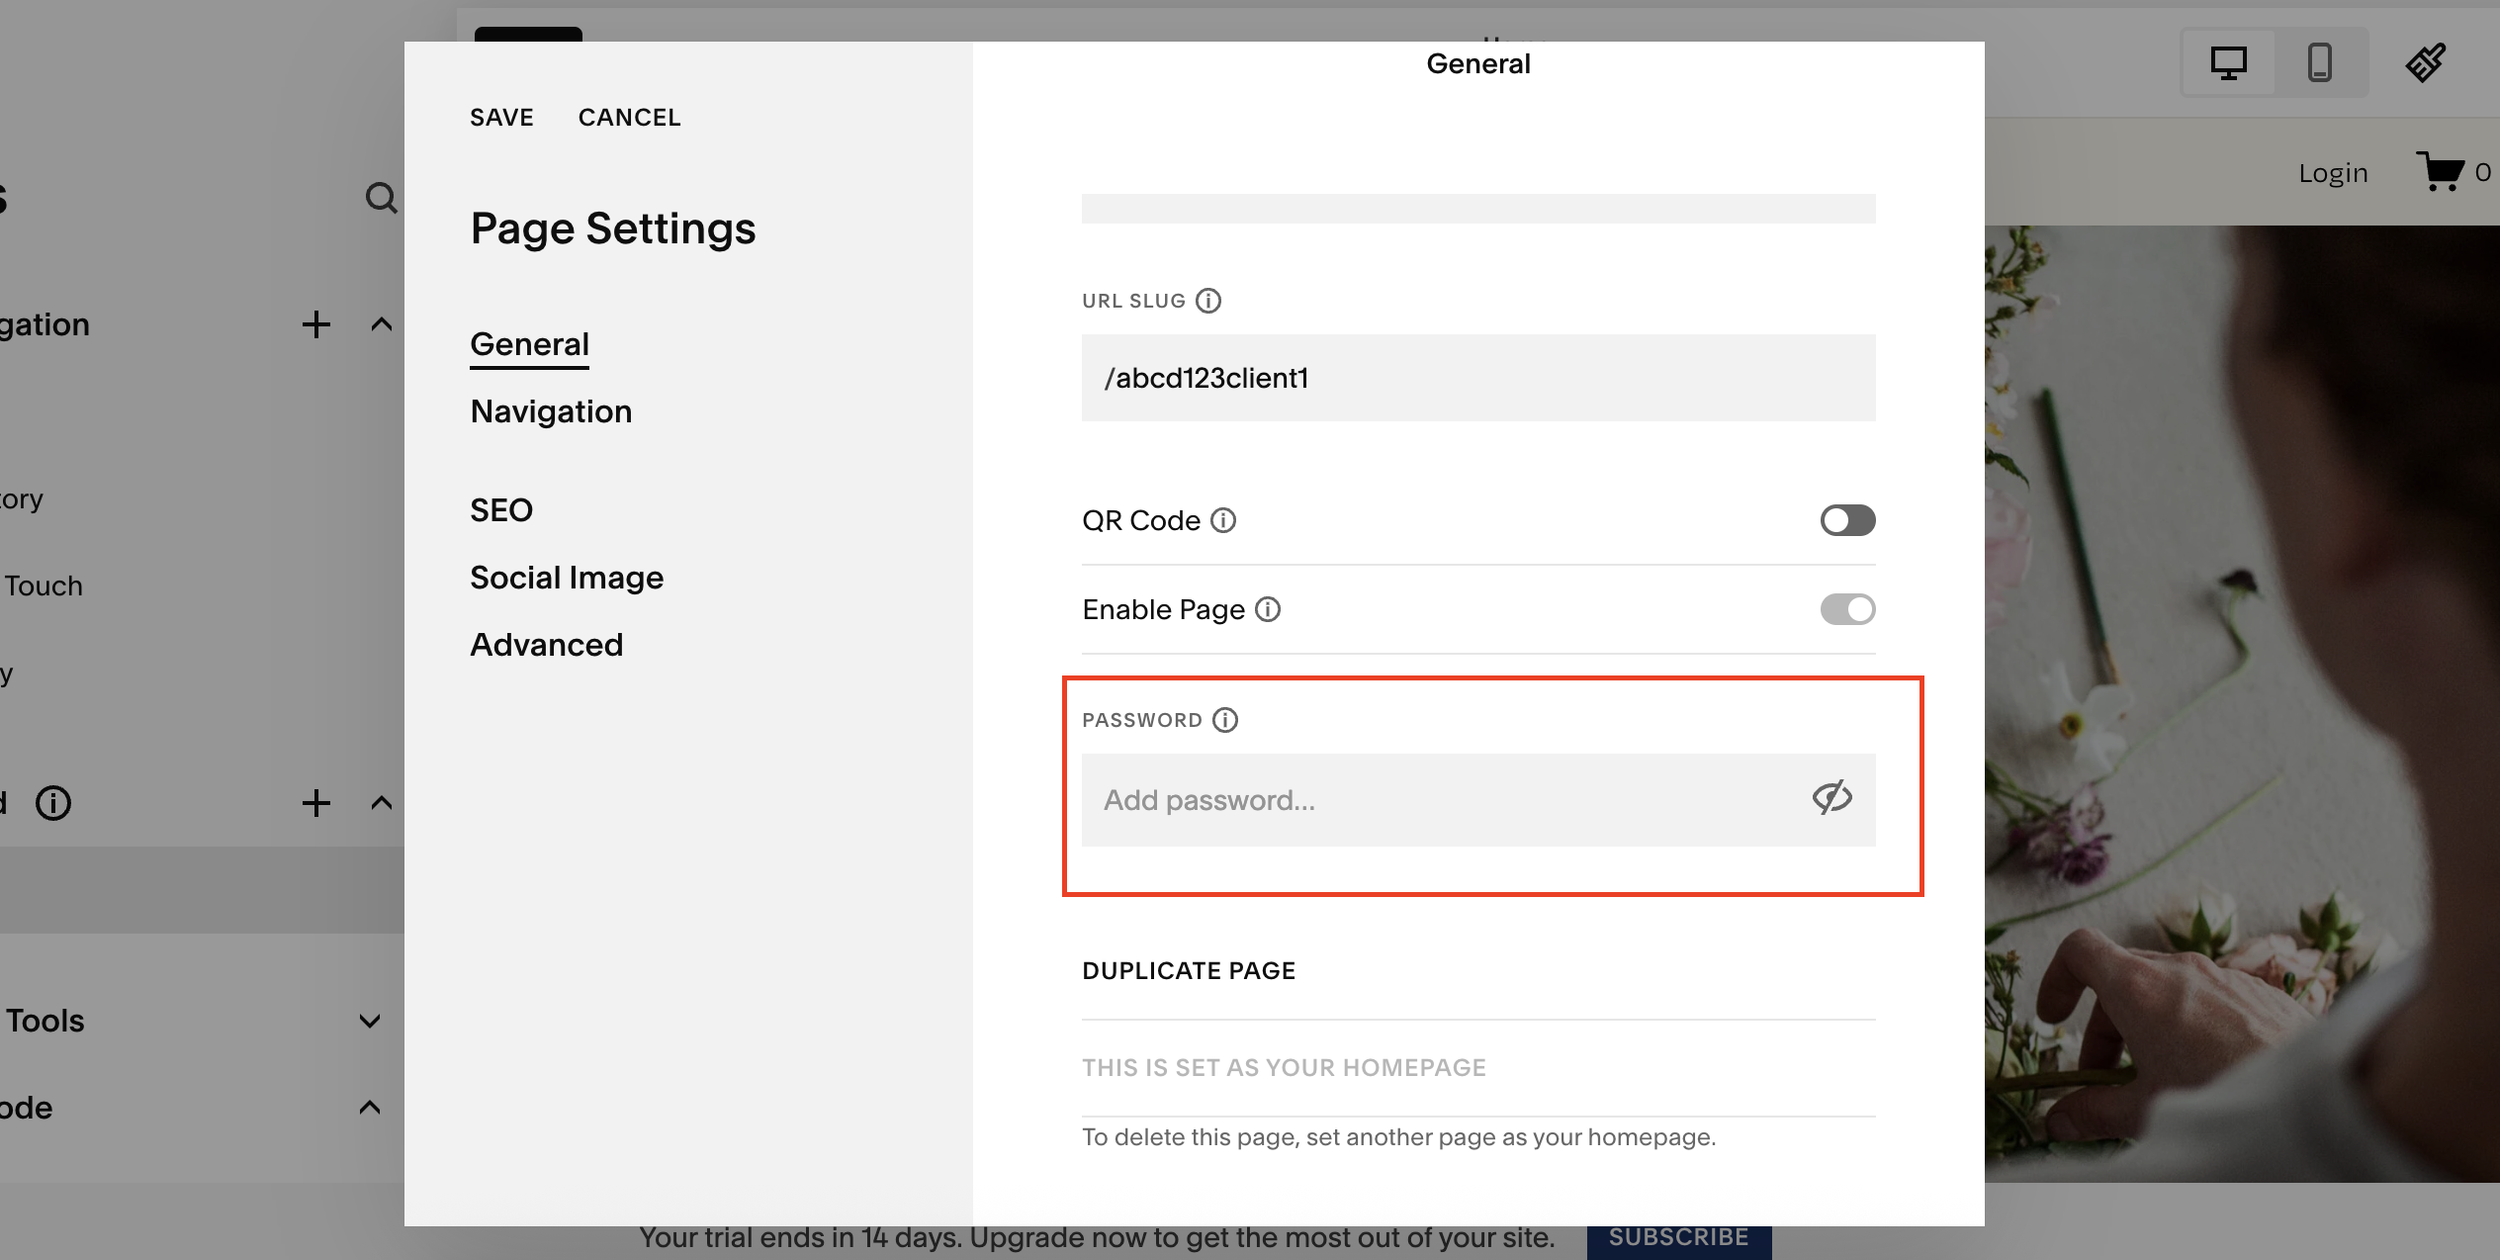
Step 4: Password Protect the Page
To ensure only your client can access the page:
Go back to the Page Settings.
Under General, enable Password Protection.
Enter a strong, random password (e.g. xY29nLm88!).
Hit Save.
Now, when your client visits the unique URL, they’ll be prompted to enter the password.
Step 5: Test Your Client-Only Page
Open your live site and paste in the unique URL.
You should now see a Password Protected Page message.
Enter the password and confirm the page loads correctly.
This ensures everything is set up before sharing the link with your client.
Benefits of Using Squarespace for Client Pages
Hidden from Search Engines: The page won’t show up in Google or your site’s navigation.
Secure Access: Even if someone guesses the URL, they won’t get in without the password.
Scalable: You can create as many client pages as you need.
Professional: Clients get a personalized, secure experience without complicated software.
Final Thoughts
Creating a client-only page in Squarespace is quick, effective, and secure. Whether you’re a finance firm, creative agency, or consultant, this feature allows you to deliver private content without needing third-party tools.