


Set Up Custom Error Pages (404) in Squarespace
If you’ve ever landed on a 404 error page in Squarespace, you’ll probably recognize it instantly. The default Squarespace 404 pages all look more or less the same, uninspired, unintuitive, and honestly, a little ugly.
But here’s the thing: a 404 page is more important than most people think. Instead of being a dead end, it can become a strategic part of your user journey.
In this guide, I’ll walk you through exactly how to build a custom 404 page in Squarespace that keeps visitors on your site, reduces bounce rates, and makes your brand look professional.
Why Your Squarespace 404 Page Matters
When a user lands on a broken or outdated link, they’re already at risk of bouncing off your site. If all they see is a bland error message, chances are they’ll leave.
But if you provide a clear explanation and an easy next step, like a link back to your homepage or a call to action, you give them a reason to stay.
A custom 404 page can:
Reduce your bounce rate
Improve user experience
Keep your visitors engaged
Strengthen your brand’s personality

Want a framework for designing the perfect homepage?

Need an expert to build your Squarespace website?
Book a free kick-off call with our team to discuss your project requirements in detail.
Step 1: Create a New 404 Page in Squarespace
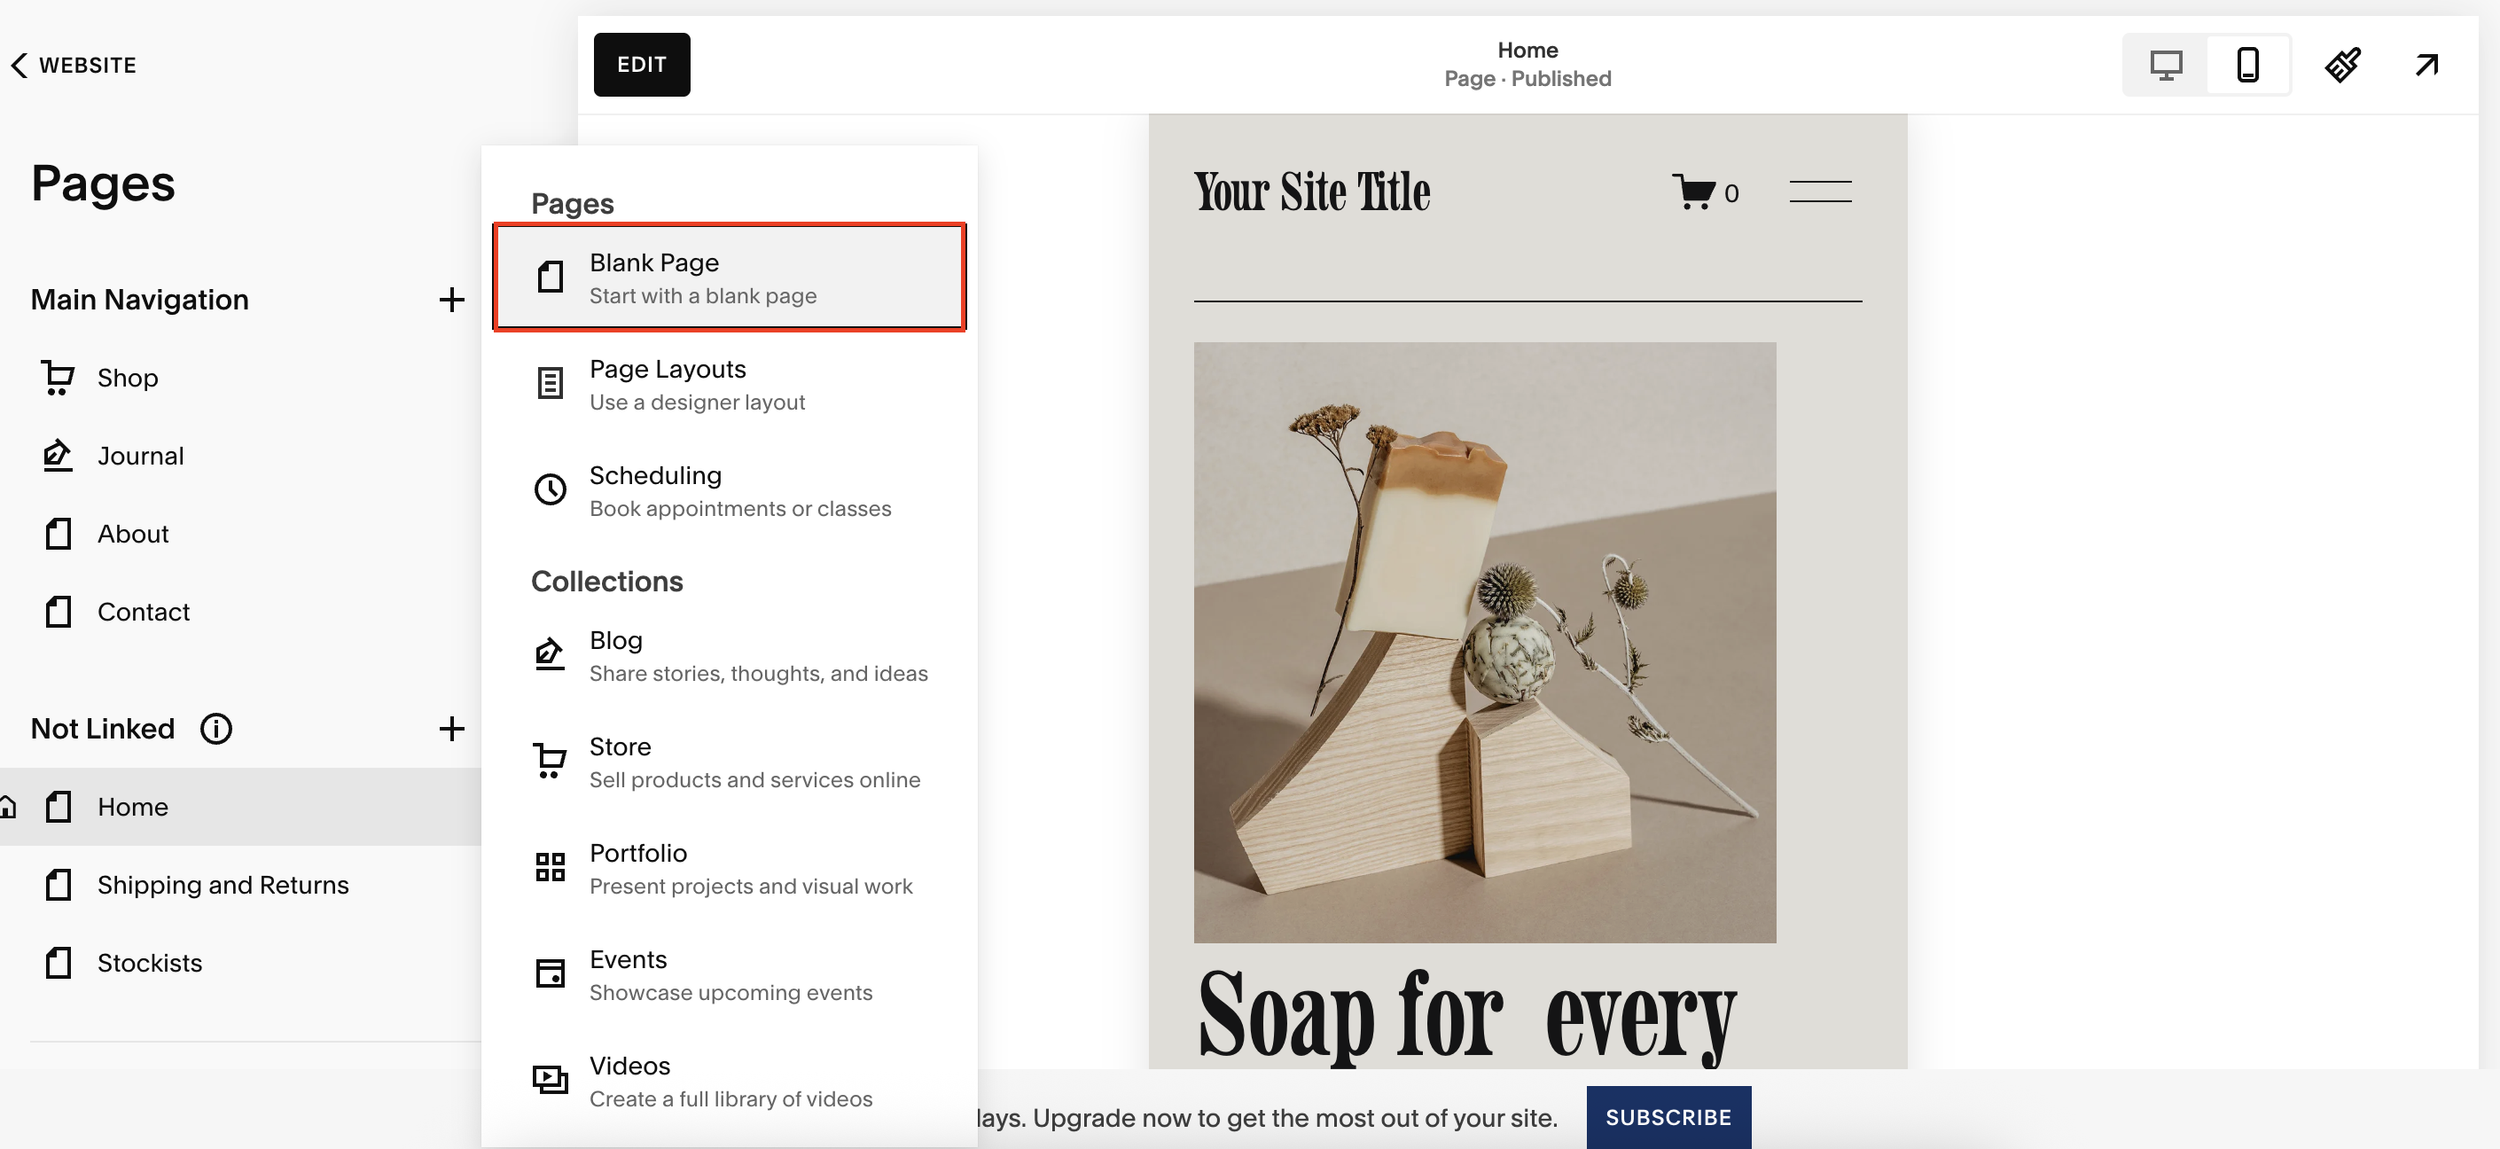
In your Squarespace dashboard, go to Pages.
Under Not Linked, click the + to add a new page.
Select Blank Page and name it 404 (make sure the page settings also reflect this).
Step 2: Design Your Custom 404 Page
Now it’s time to design. You can use any Squarespace layout options, but I recommend keeping it simple and user-friendly.
Click Edit on your new page.
Add a blank section and set the background color (white works well).
Insert a text block with a clear message like:
“Oops! That page doesn’t exist.”
“Looks like you’ve hit a dead end.”
Add a short explanation such as: “The page you’re looking for isn’t here, but don’t worry - you can return to our homepage to continue browsing.’
Insert a button block that links back to your homepage. Label it something actionable like Return to Homepage.
Pro tip: You can also add social links or featured content here to encourage further engagement.
Step 3: Optimize for Mobile
Always check your design on mobile. Adjust spacing and alignment so everything looks clean and accessible on smaller screens.
Step 4: Set Your Page as the Default 404
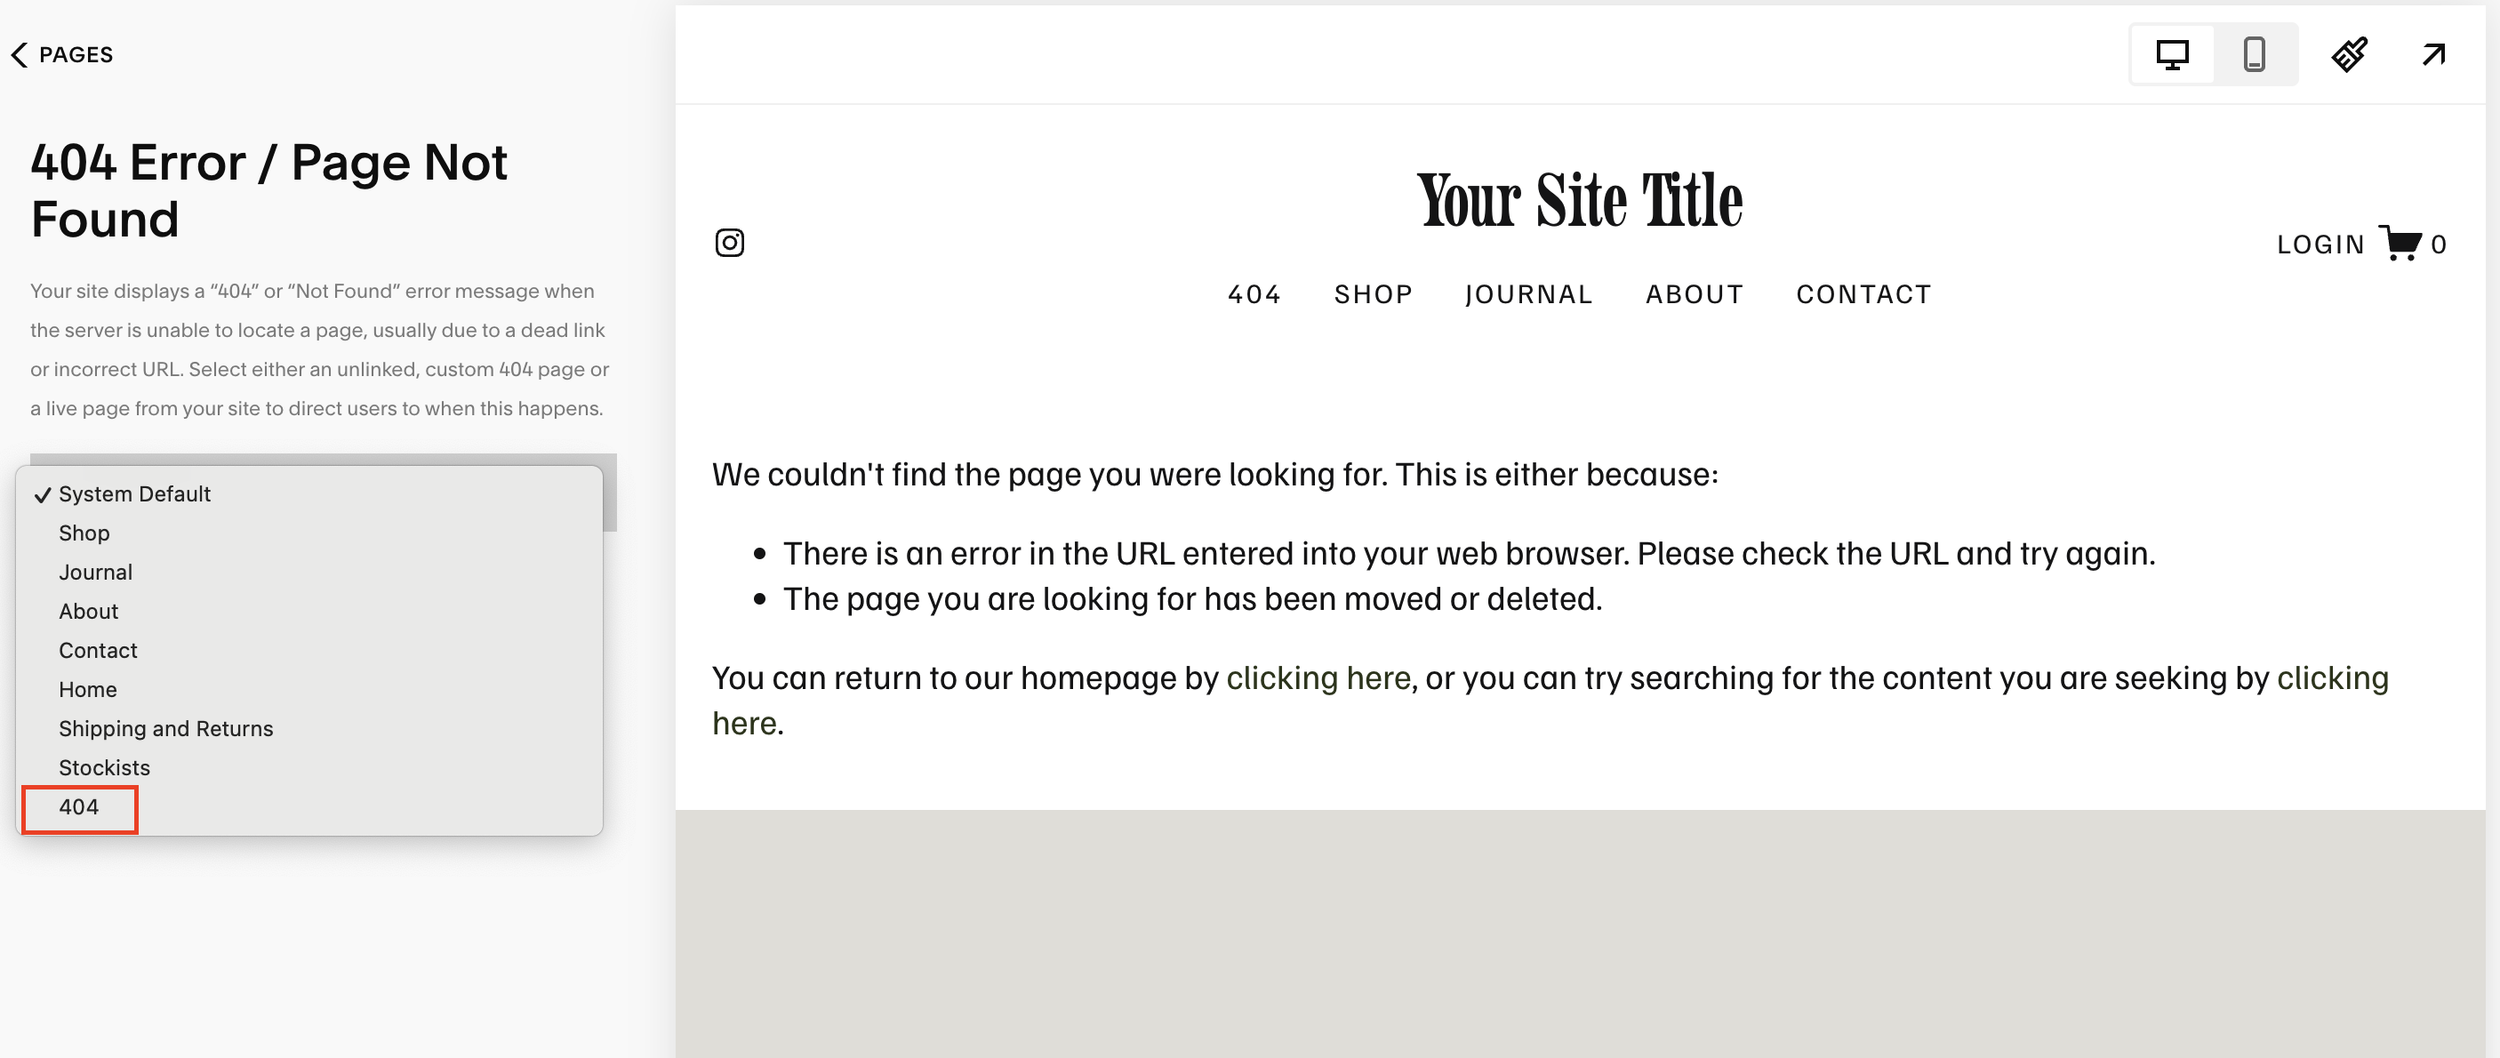
Finally, you need to assign your new page as the site’s default 404.
Go back to Pages.
Click on System Pages.
Under 404 Page, switch from the system default to your newly created 404 page.
Now, whenever someone lands on a broken link, they’ll see your branded, user-friendly error page instead of Squarespace’s generic version.
Wrapping Up
A custom 404 page might seem like a small detail, but it plays a big role in keeping users on your site and improving their overall experience.
By guiding visitors back to your homepage (or anywhere else useful), you’ll reduce bounce rates and give your Squarespace website a more professional, polished feel.